

What Oleria discovers
Once connected, Oleria continuously discovers and maps the following from your LaunchDarkly account:- Accounts - every human member, plus every personal and service access token as its own non-human identity (NHI) account.
- Teams - all teams and their membership, including custom roles assigned directly to a team.
- Roles - the five built-in base roles (Reader, Writer, Admin, Owner, No access) and every custom role, including which projects, environments, and flags each role’s policy grants access to.
- Resources - every project, environment, and feature flag.
- Audit activity - audit log events, attributed to the member, access token, or OAuth application that performed them.
Prerequisites
- The user creating the access token must hold, at minimum, the Admin base role (or a custom role with equivalent permissions - see Required permissions below)
Use a service account (and not an employee account) to generate the token, so the integration keeps working if the employee who created it leaves or changes roles.
Required permissions
LaunchDarkly’s custom role actions only cover a subset of the data this integration reads. There is no policy action that gates read access to members, custom roles, access tokens, webhooks, or the audit log - LaunchDarkly only exposes those through a role’s base permission tier (Reader/Writer/Admin/Owner), not through an explicitview* action. This means:
- Simplest option: use the Admin base role. It covers every object this integration reads (members, teams, roles, projects, environments, flags, tokens, webhooks, audit log) and, if you also want Oleria to perform governance actions, the writes those require.
-
Minimal custom role: set
basePermissionsto Reader (required - ano_accessbase role cannot see members/roles/tokens/webhooks/audit log no matter what policy you attach), then add an explicit policy for the two object kinds LaunchDarkly does let you scope precisely:viewProjectcascades to every environment and flag inside that project, so no separate environment- or flag-level action is needed. -
To also enable governance actions (deprovisioning a member, team membership changes, role assignment/removal), add:
Whichever role you use, it must be able to read its own token record (
GET /api/v2/tokens) - Oleria calls this to verify the connection. A role scoped too narrowly can fail this check even if every other permission above is granted correctly.How to create the custom role
- In LaunchDarkly, go to Account settings -> Roles, and select Create role.
- Name it (for example, “Oleria integration”) and set Base permissions to Reader.
- Switch the policy editor to Advanced editor and paste in the JSON policy from above (merge both snippets into a single array if you want governance actions too).
- Select Save role.
- When creating the access token in the next section, select Custom as the role and choose the role you just created.
Connect LaunchDarkly to Oleria
1
Create an access token
Log in to LaunchDarkly, go to Account settings, select the Authorization tab, and select Create token.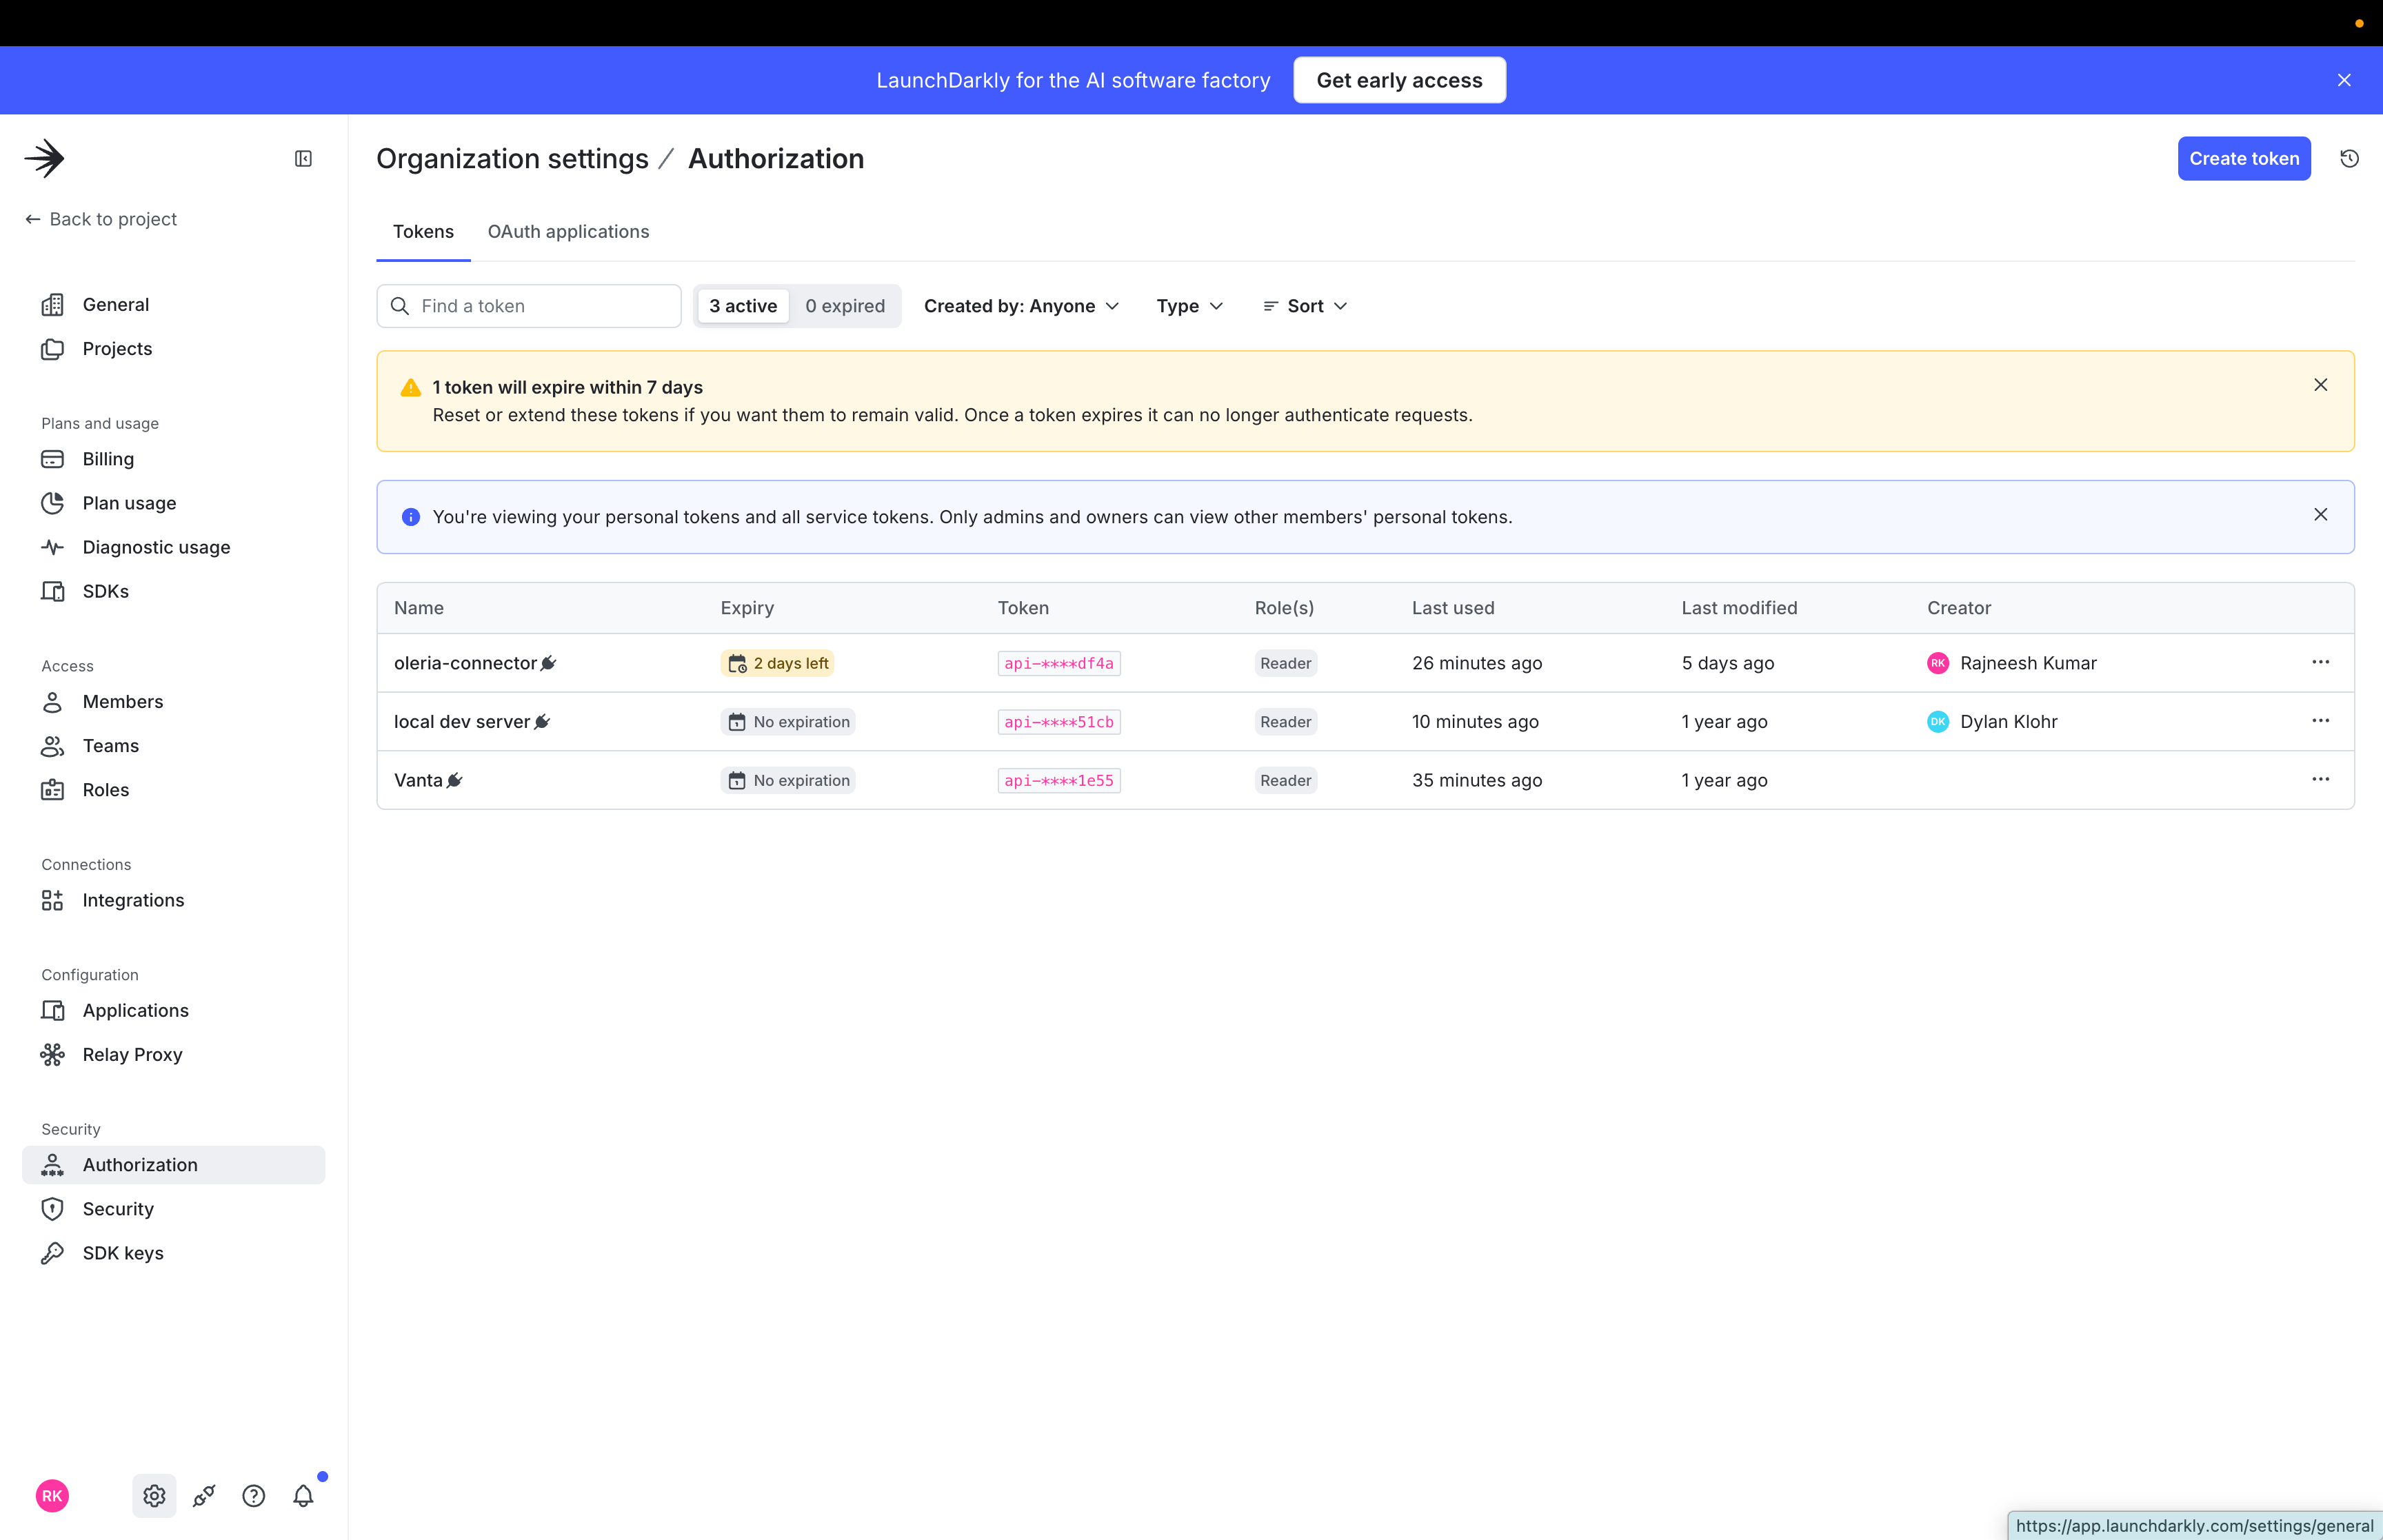
2
Name the token and choose a role
Give the token a name (for example, “Oleria”), and choose a role - Admin for the simplest setup, or the custom role you built per Required permissions above if you want to scope it tightly.Select Save Token.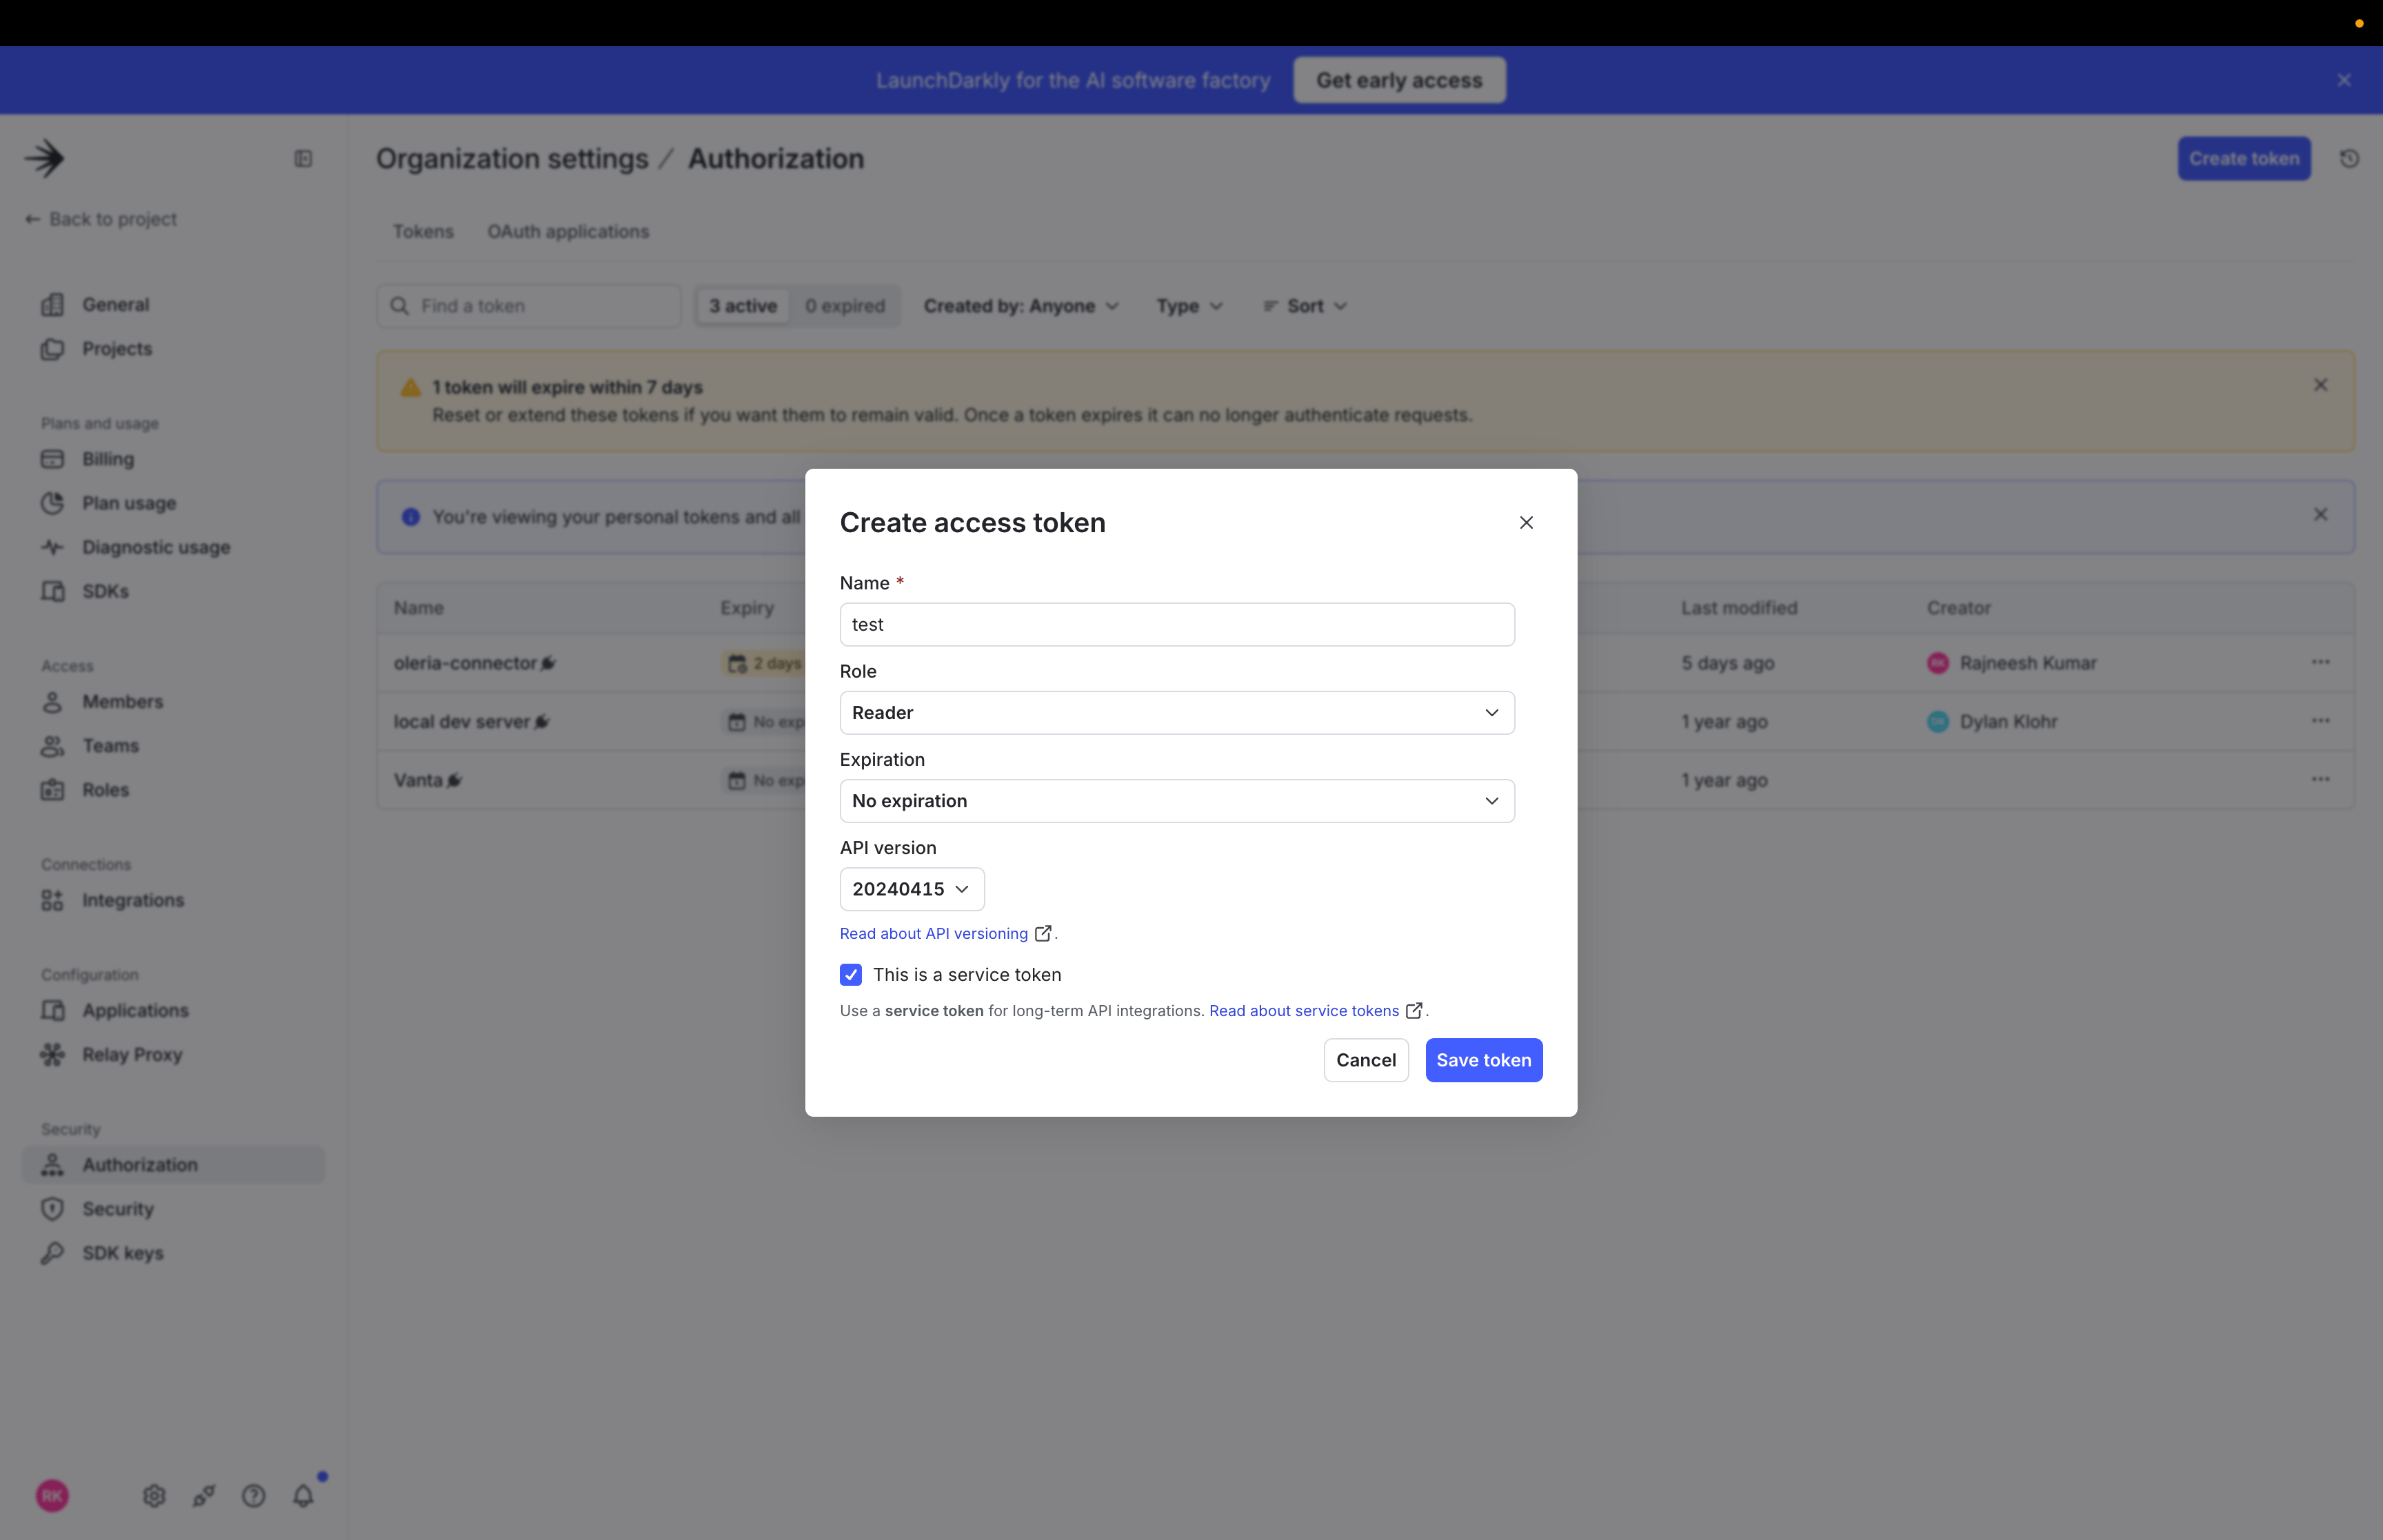
3
Copy the token value
Copy the token value immediately - LaunchDarkly only displays it once.
4
Find LaunchDarkly in Oleria
Go to your Oleria workspace, select Integrations, select the Available tab, and search for LaunchDarkly.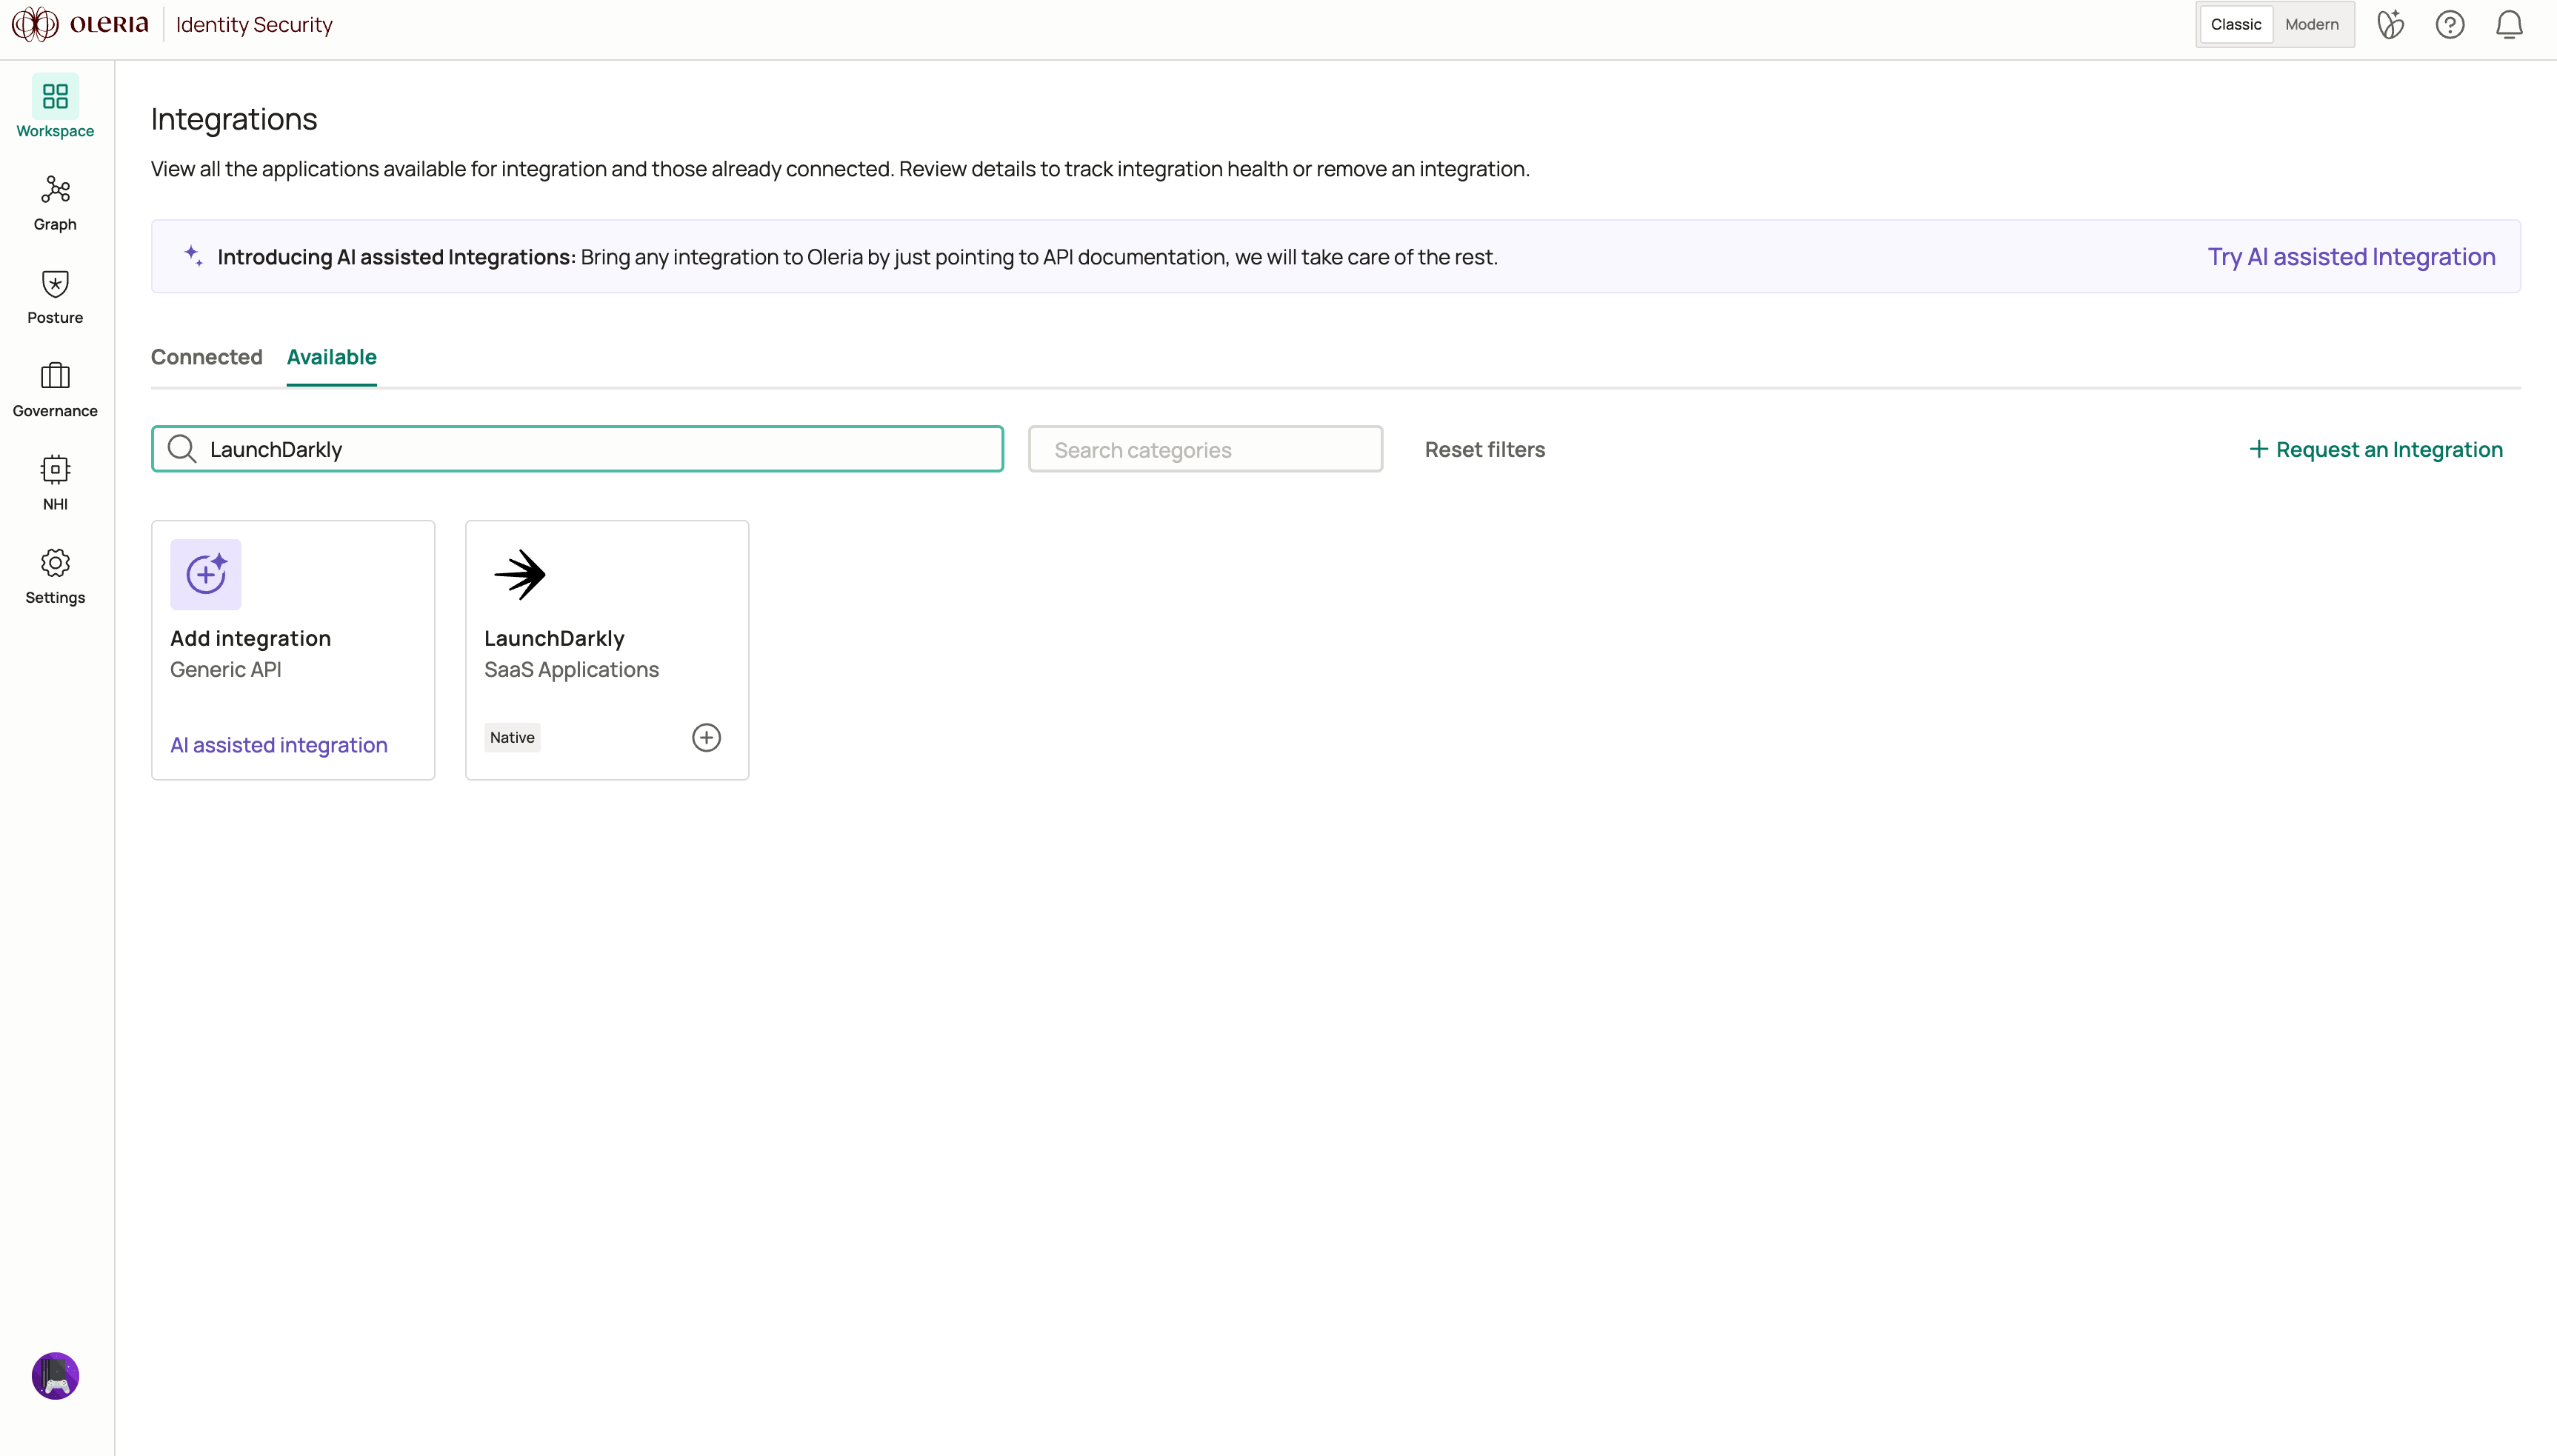
5
Connect in Oleria
Select the LaunchDarkly card, paste the token into API Access Token, then select Authenticate. Oleria checks the credentials against LaunchDarkly before saving.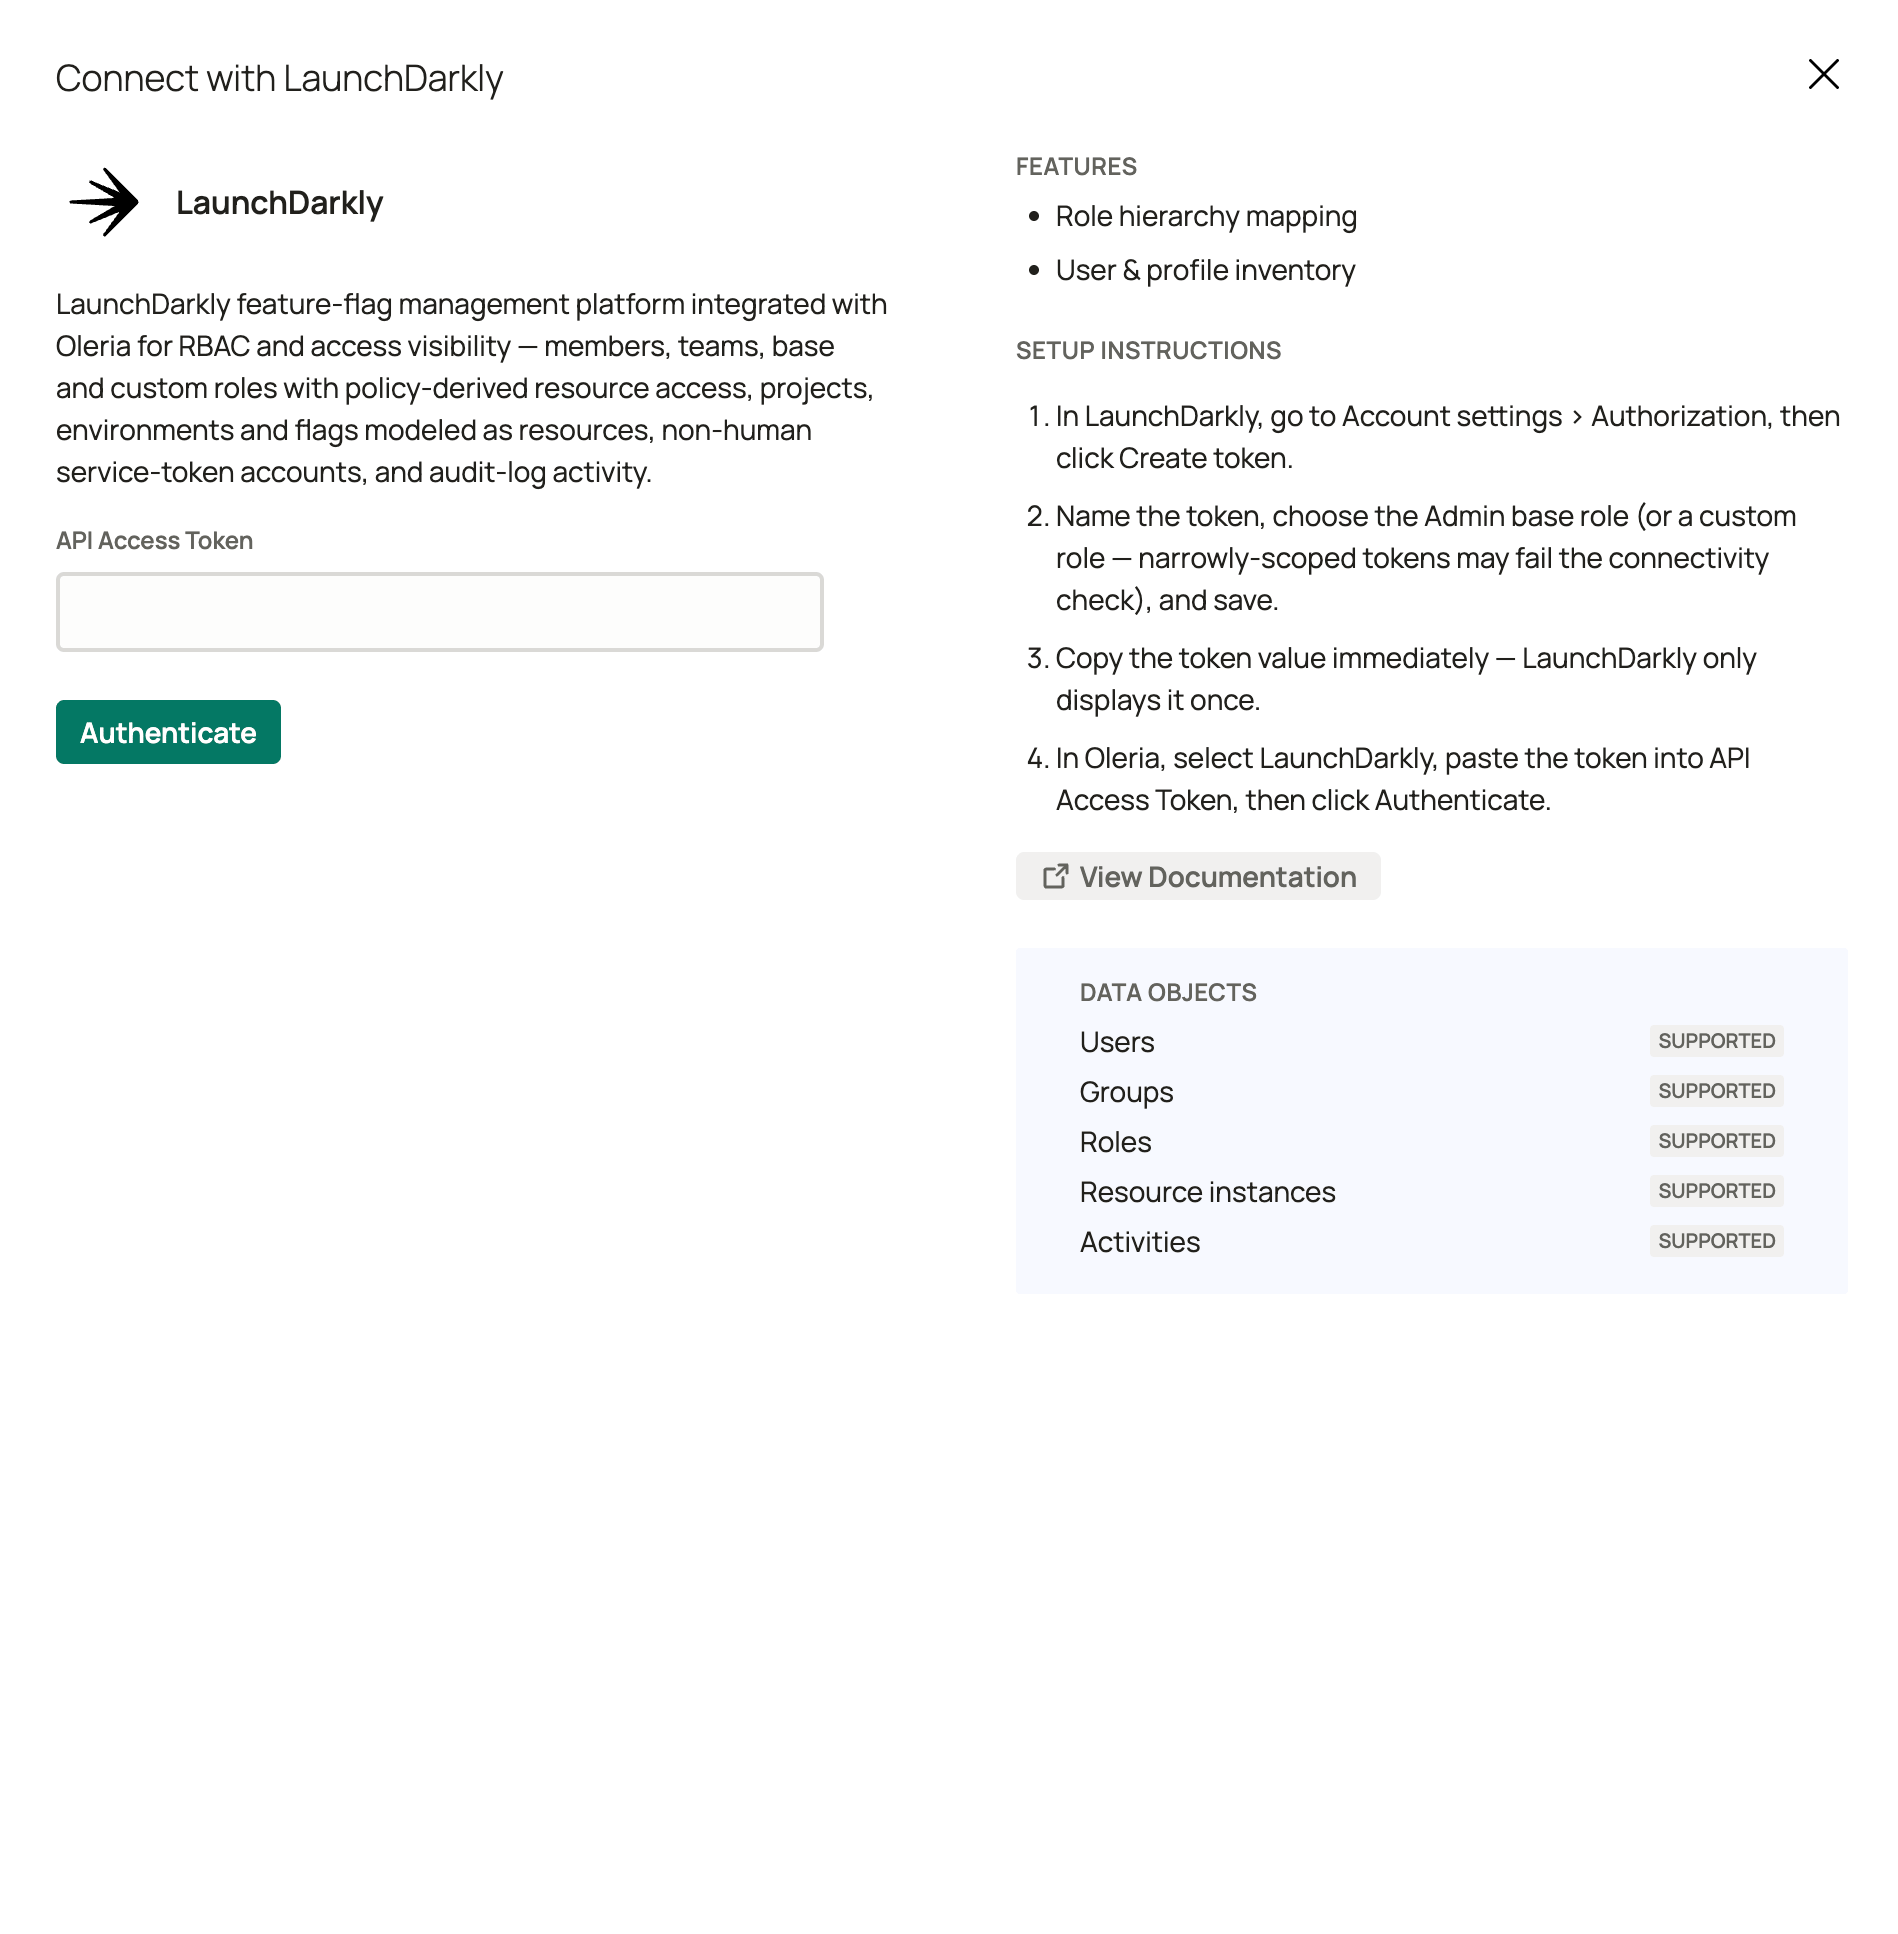
Verify the integration
Confirm the LaunchDarkly instance appears in your Oleria workspace connected integrations (Integrations -> Connected tab). After the first sync completes, you can review the discovered accounts, teams, roles, resources, and activity in your Oleria workspace.If you rotate or regenerate the access token, update the credential in Oleria by editing the integration. A revoked or expired token will cause discovery to stop.
Governance actions
Beyond discovery, Oleria can act on LaunchDarkly access to remediate risk. Governance actions require a token with write access to members, teams, and roles (see Required permissions above).Known limitations
denypolicy statements are not modeled. A custom role’sallowgrants are synced; adenystatement that narrows another role’sallowfor the same principal is not evaluated. A role relying ondenyto restrict access may be over-reported by Oleria as granting more access than it does in practice.- Base-role (Reader/Writer/Admin/Owner) access is approximated, not live-queried. LaunchDarkly exposes no API to query what a built-in base role actually grants - Oleria approximates it from LaunchDarkly’s published role documentation. Custom-role access, by contrast, is read directly from each role’s live policy.
- No disable or suspend state. LaunchDarkly has no concept of a disabled or suspended member. Deleting a member is the only deprovisioning path and is permanent.
- SSO enforcement status is not available per member via the LaunchDarkly API. Oleria reports this field as unavailable, not as a false negative.
- Commercial instance only. This integration connects to
app.launchdarkly.com. LaunchDarkly’s Federal (FedRAMP) and EU instances are not yet supported.