What Oleria discovers
- Users and their profiles, including their authentication methods.
- Groups and group membership.
- Applications registered in your tenant.
- Directory roles and role assignments.
- Policies - conditional access policies, and entitlement management role assignments.
- Non-human identities - service principals and AI agents, with their credentials and permission grants.
- Identity risk events and audit log activity.
- SharePoint and OneDrive sites and the items in them, when you connect M365 SharePoint.
Prerequisites
- A Microsoft Entra ID account with the Global Administrator role, to grant the permissions below.
- Admin access on the Oleria platform to add a new integration.
Standard integrations are configured with read-only permissions. Remediation is optional. To let Oleria take remediation actions, grant the additional write permissions listed below.Use a service account (and not an employee account) with the suggested privileges for the integration to ensure continuity.
Integration approaches
Choose one of three ways to connect:- Connect with Microsoft OAuth - automated configuration. Oleria creates the app and requests consent for you.
- Connect with a client secret - manual configuration with an app registration and client secret.
- Connect with a client certificate - manual configuration with an app registration and certificate, for security policies that require certificate-based authentication.
Connect with Microsoft OAuth
1
Open the integration
Sign in to your Oleria workspace and select Integrations.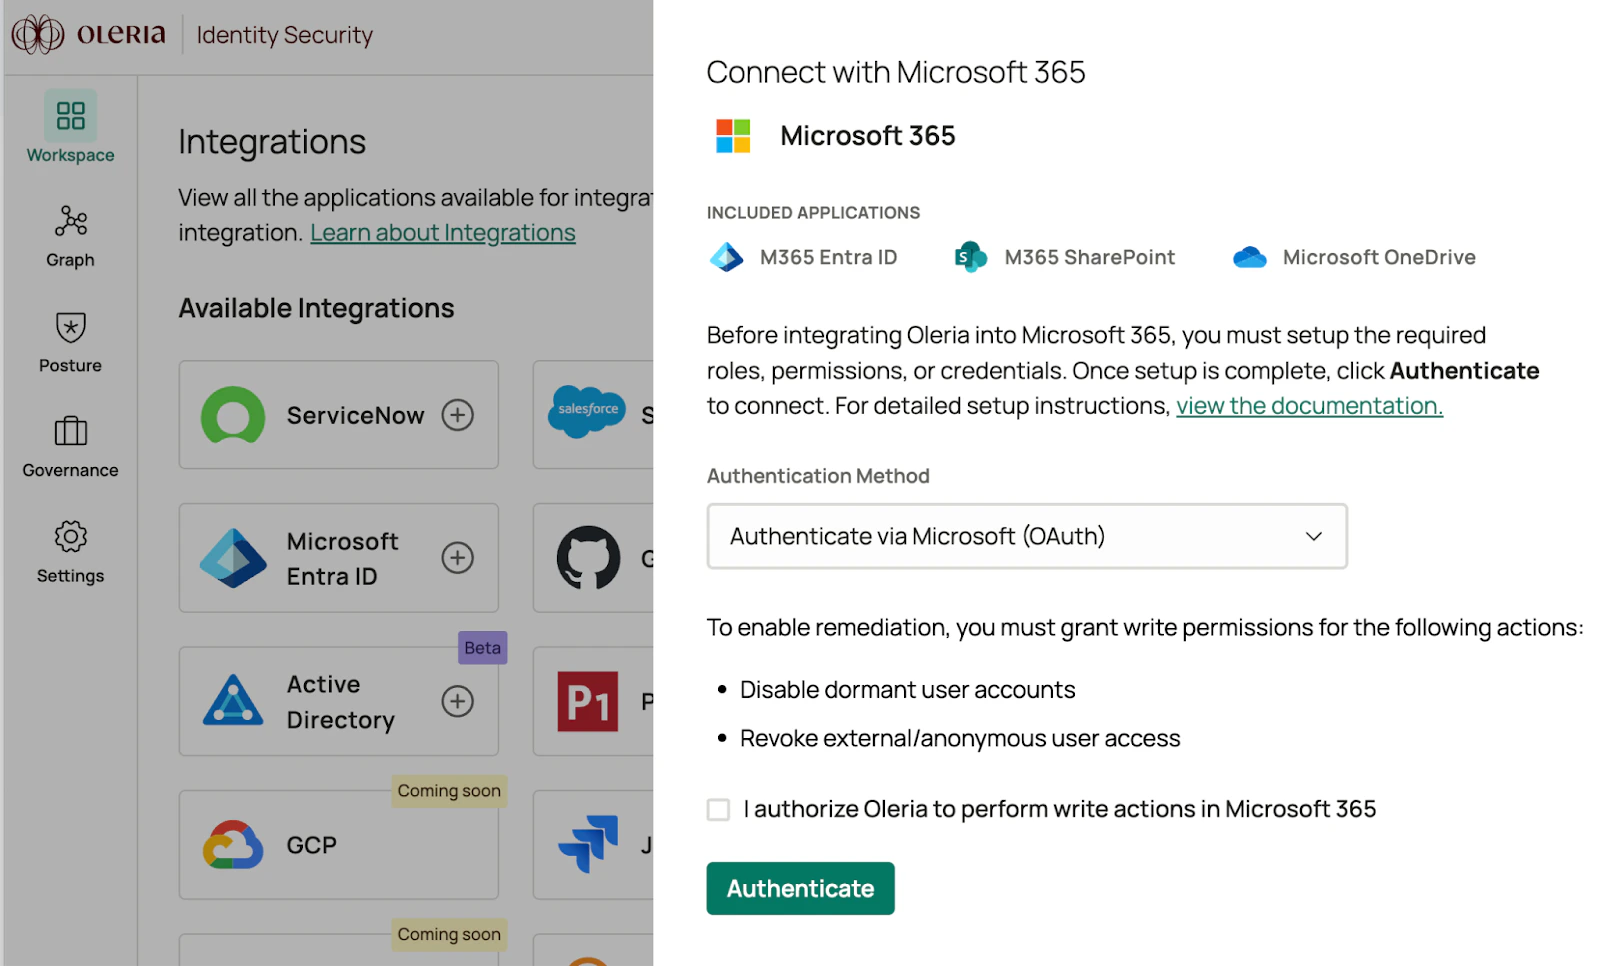
- Select Microsoft Entra ID to integrate Entra ID, or
-
Select Microsoft SharePoint and OneDrive to integrate Entra ID, SharePoint, and OneDrive.
2
Choose permission scope
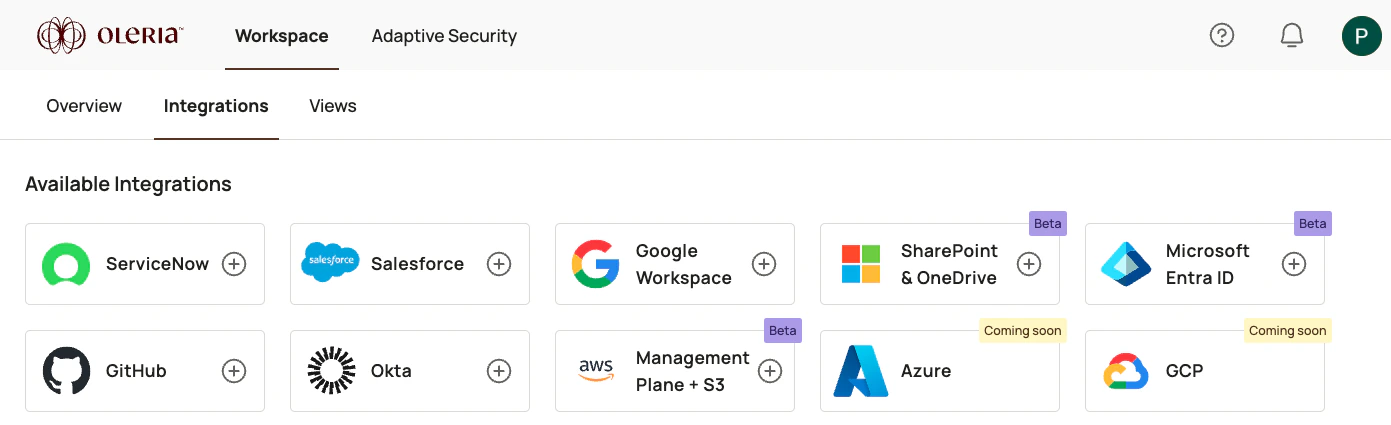
The screen shows an option to enable write permissions to allow Oleria to perform select remediations. The Oleria remediation feature is optional.To enable remediations, select the checkbox. Otherwise, select Authenticate to proceed with the standard read-only permissions scope.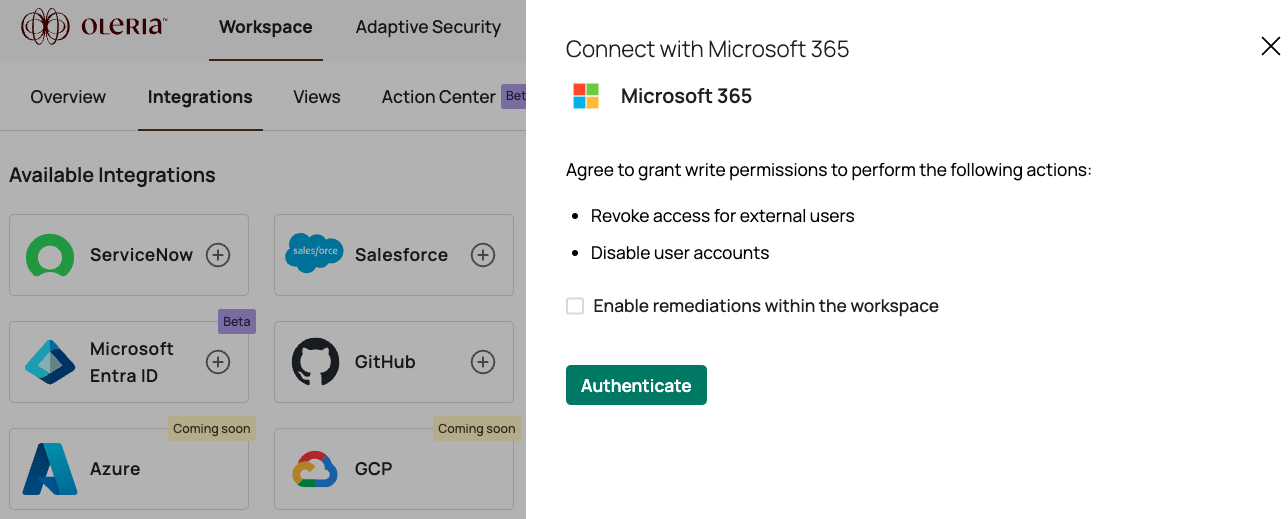
3
Select your Microsoft account
Select your Microsoft account and complete authentication.
4
Complete the initial consent form
A consent form appears to grant permissions for the Oleria application to view your basic profile and read access. Complete the consent form by selecting Accept.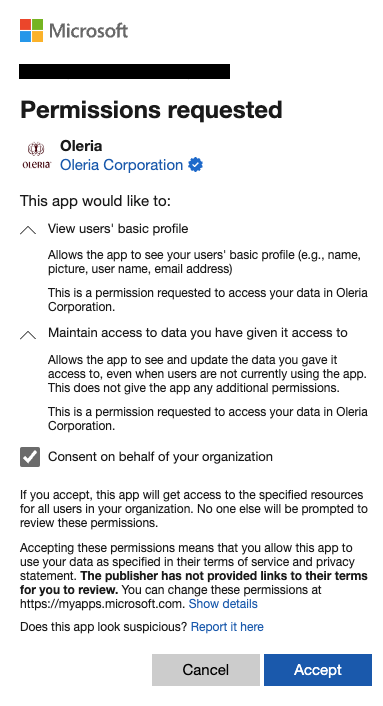
5
Complete the application consent form
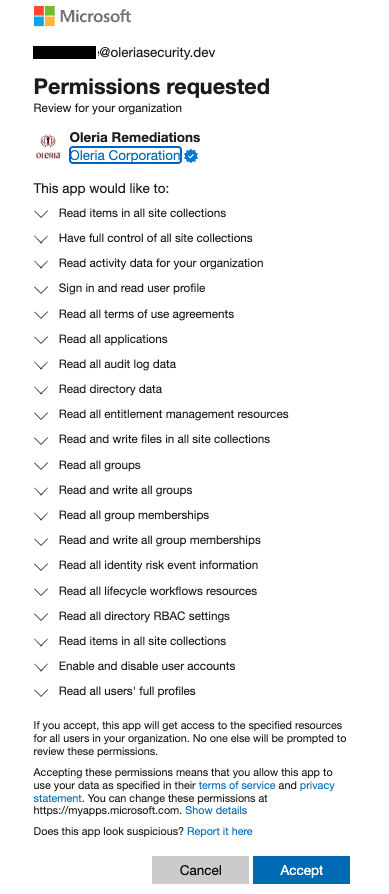
Microsoft’s application consent form appears with a list of requested permissions, which varies depending on your selected application and whether you chose to enable optional remediation capabilities. Complete the consent form by selecting Accept.The permissions vary by integration type:
-
Standard read-only permissions for Entra ID integration (without optional remediations)
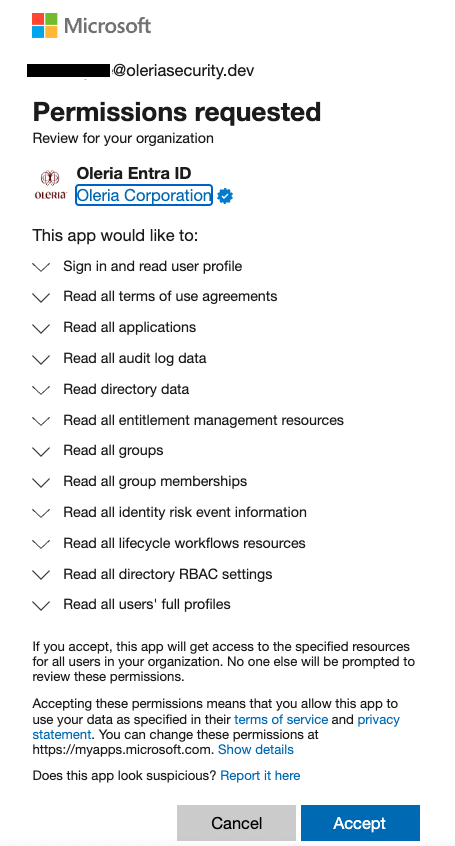
-
Standard read-only permissions for SharePoint and OneDrive integration (without optional remediation)
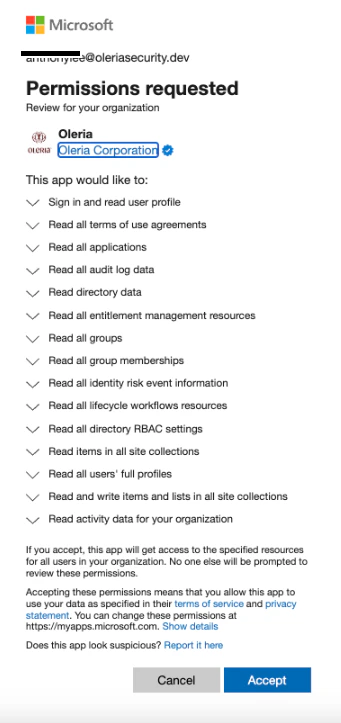
-
Permissions for Entra ID integration with optional remediation capabilities (includes some write permissions)
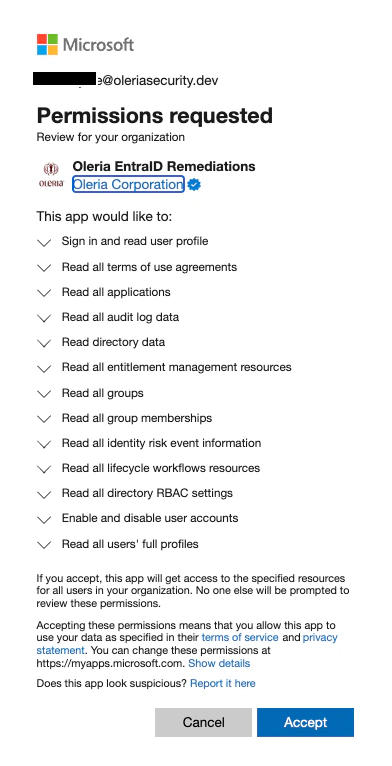
-
Permissions for SharePoint and OneDrive integration with optional remediation capabilities (includes some write permissions)
Connect with a client secret
1
Create an app registration in Entra ID
Sign in to Microsoft Entra ID, navigate to App registrations, and select New registration.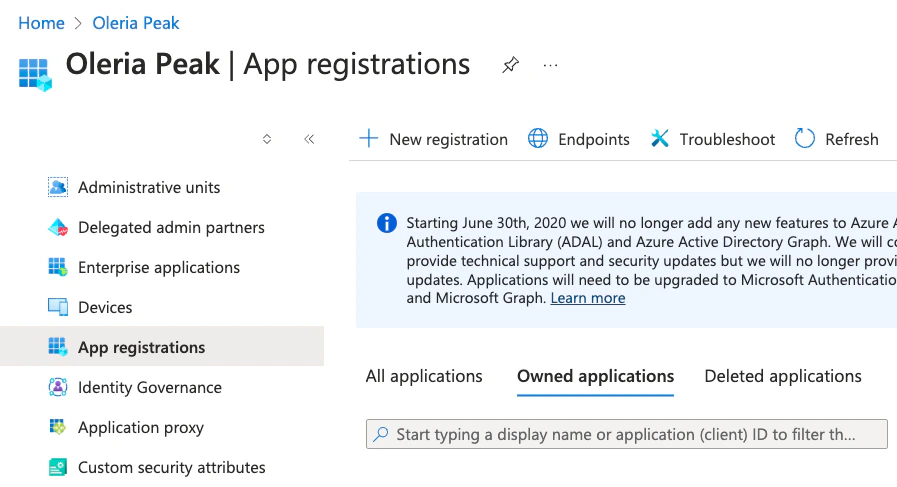
2
Configure the registration
Give a name to the application (for example, Oleria) and select Accounts in this organizational directory only (Single tenant). Select Register.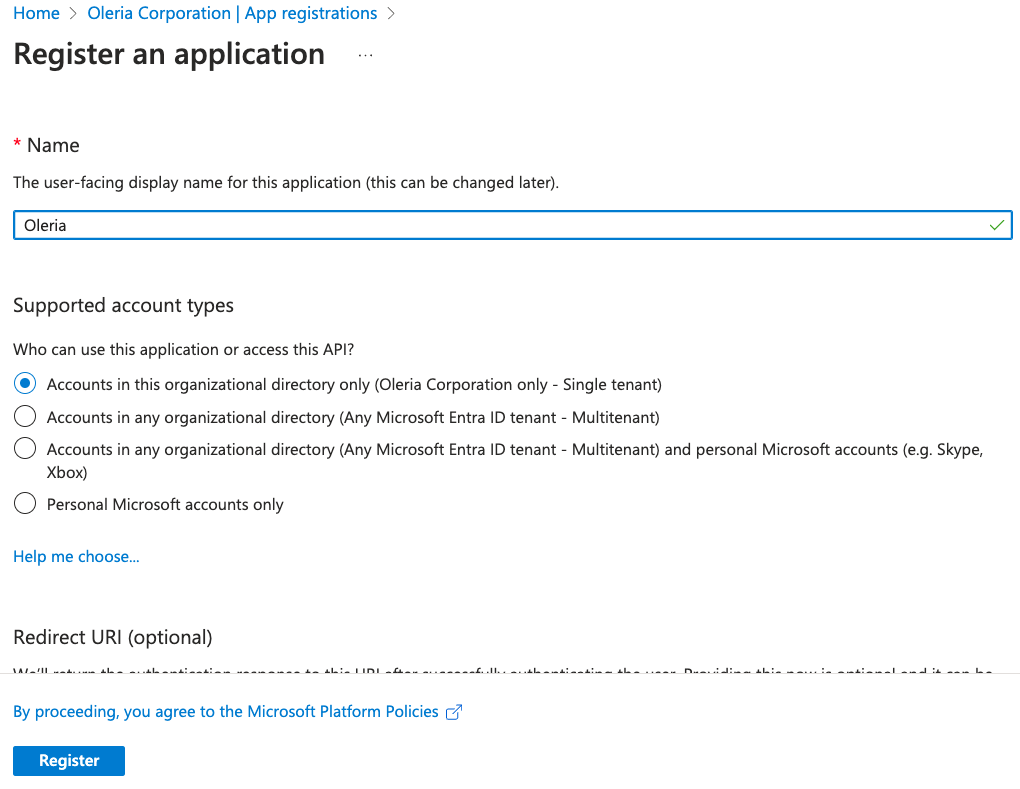
Oleria connects to one tenant per integration. To connect more tenants, create an app registration in each one, or register the app as Accounts in any organizational directory (Multitenant), grant admin consent in each tenant, and add a separate Oleria integration per tenant.
3
Open API permissions
Open the application and select Manage -> API permissions. Select Add permission.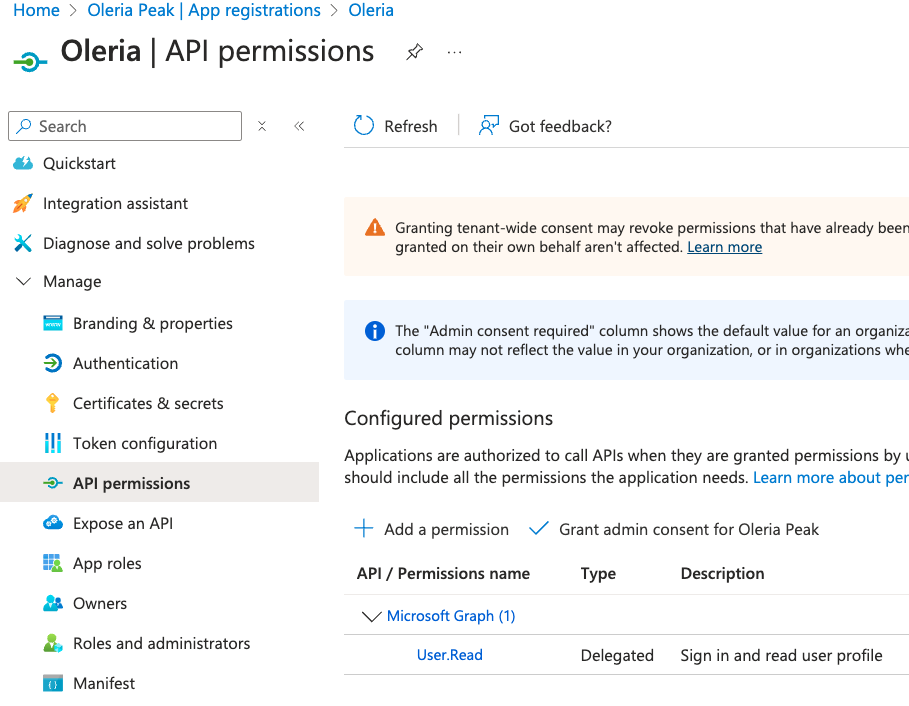
4
Add Microsoft Graph permissions
Select Microsoft Graph and select Application permissions. Add the permissions appropriate for your integration: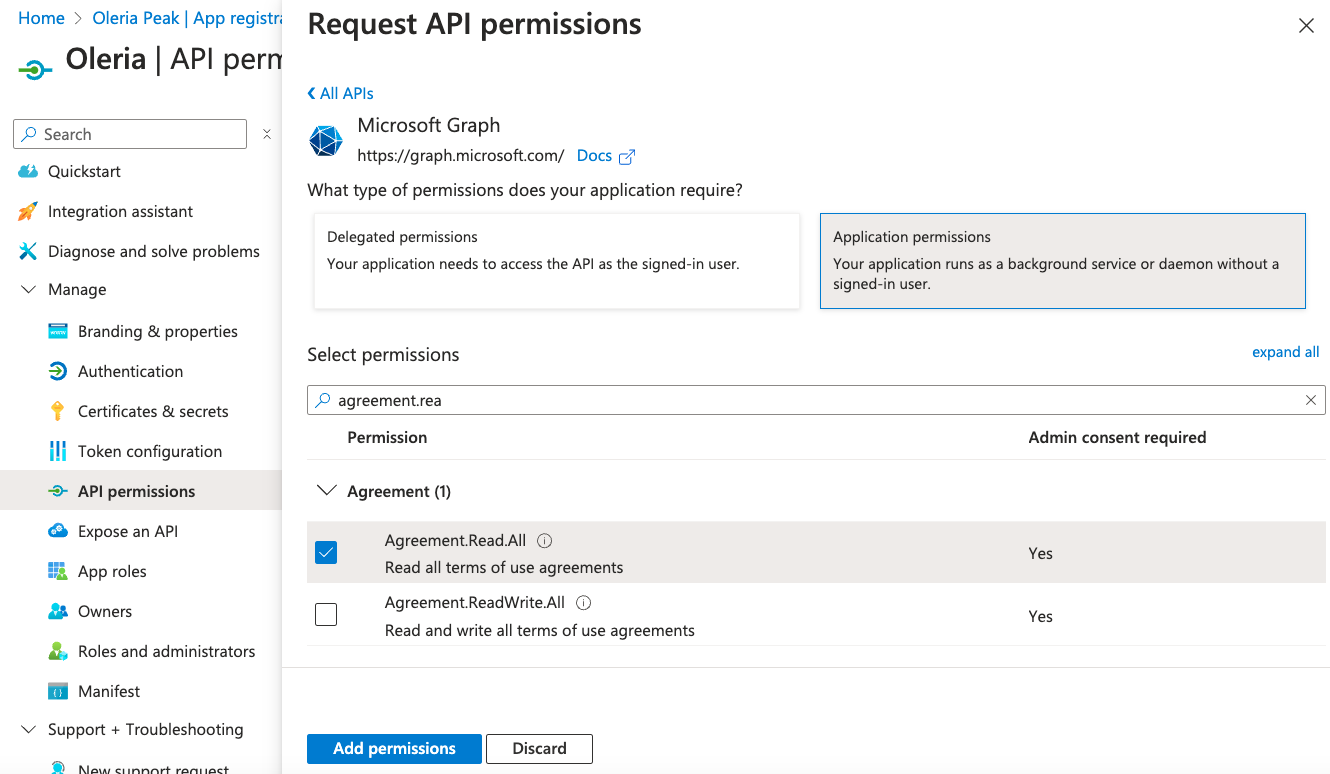
- Standard read-only permissions for Entra ID integration (without optional remediations)
- Standard read-only permissions for SharePoint and OneDrive integration (without optional remediation)
- Permissions for Entra ID integration with optional remediation capabilities (includes some write permissions)
Each remediation action checks for its own permission before it runs. Grant the permissions for the actions you plan to use:
- Permissions for SharePoint and OneDrive integration with optional remediation capabilities (includes some write permissions)
The SharePoint remediation action removes an external account’s access to a site or file. It uses a different permission depending on how that access was granted:
5
Grant admin consent
After adding all application permissions, select Grant admin consent to complete the consent.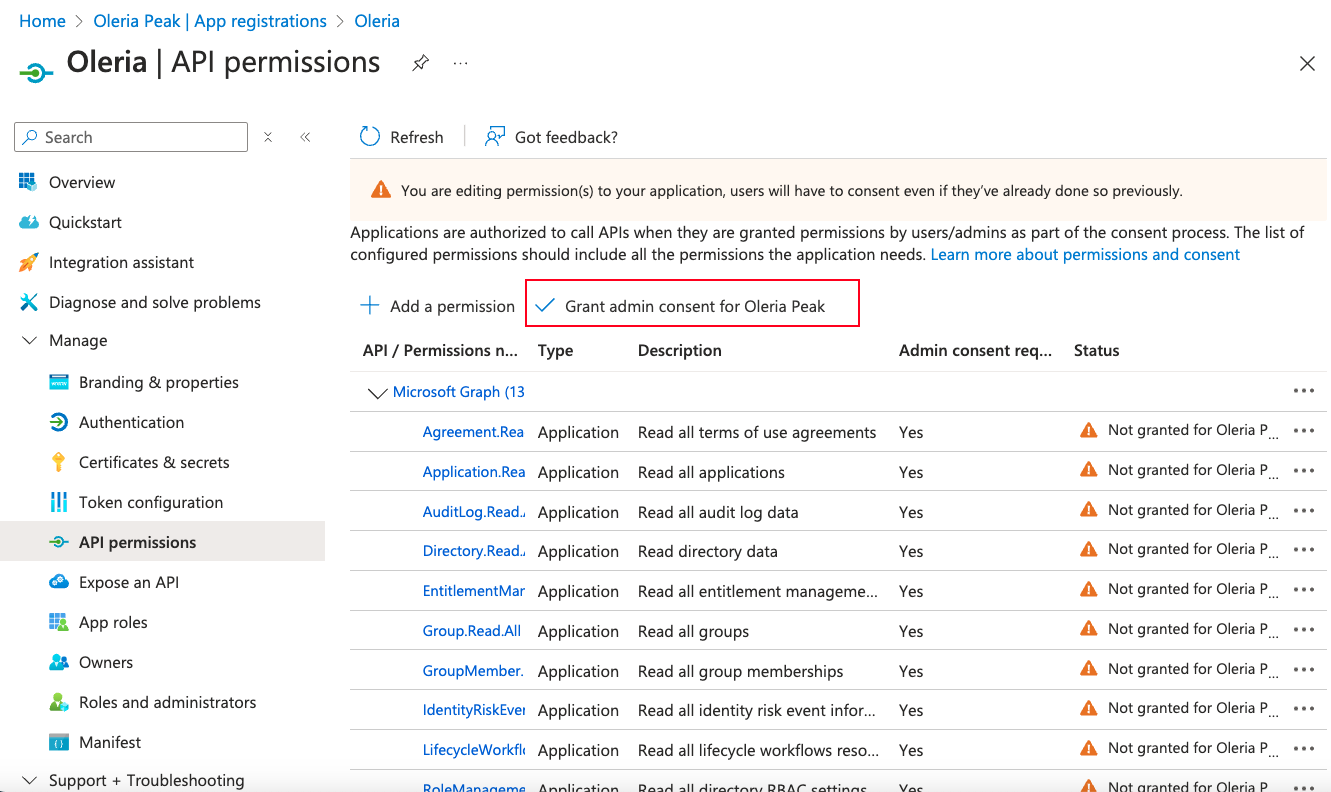
6
Confirm admin consent
After admin consent succeeds, each permission shows a green granted status.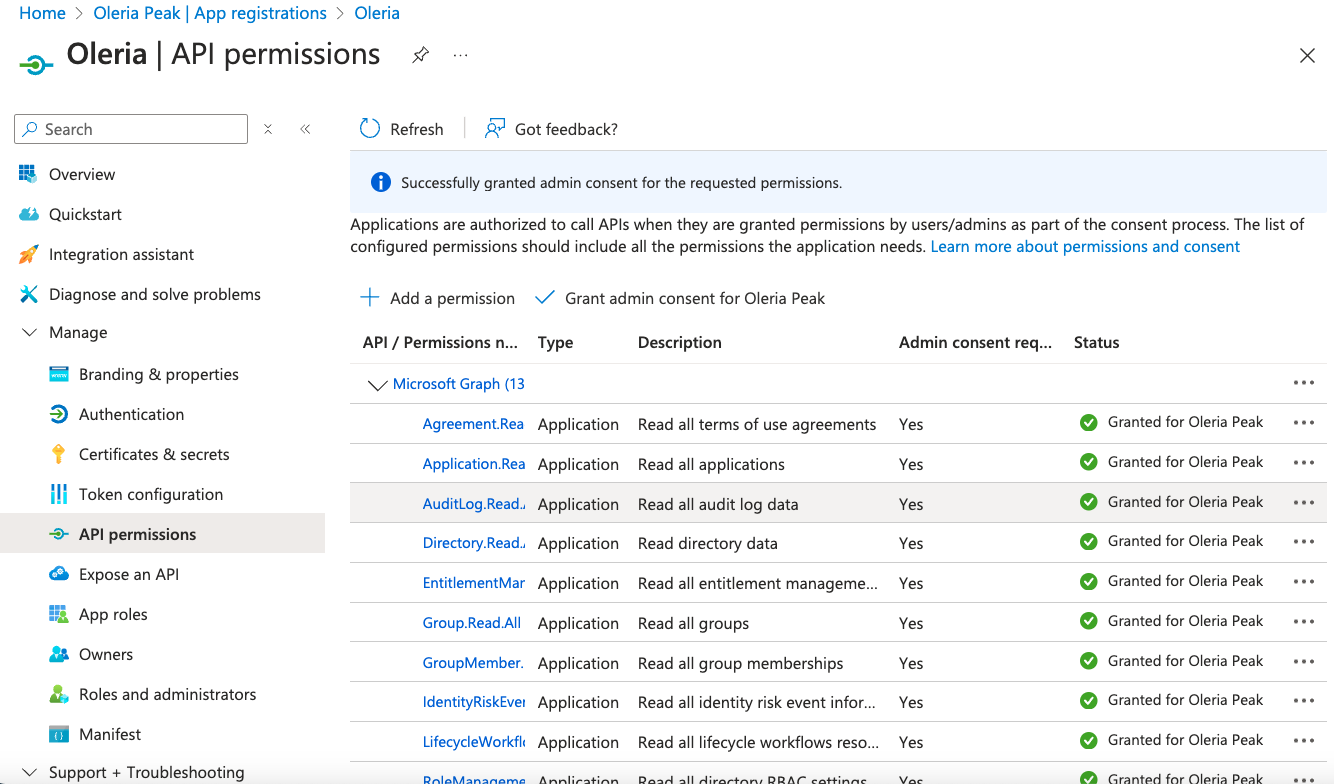
7
Create a client secret
Navigate to Certificates & Secrets and create a client secret.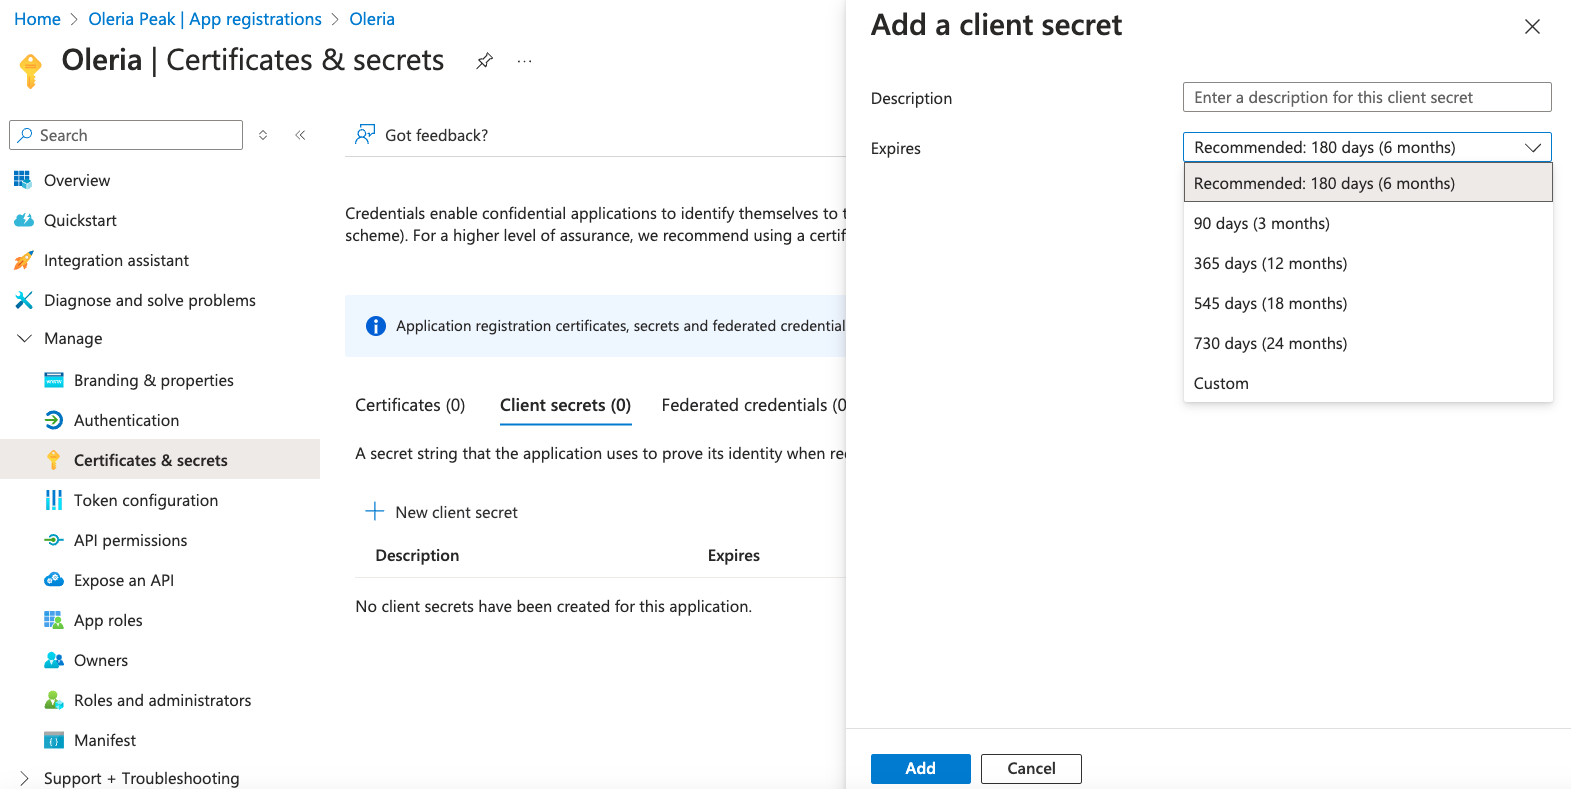
8
Copy the client secret value
The generated client secret will be shown. Copy the Client Secret Value.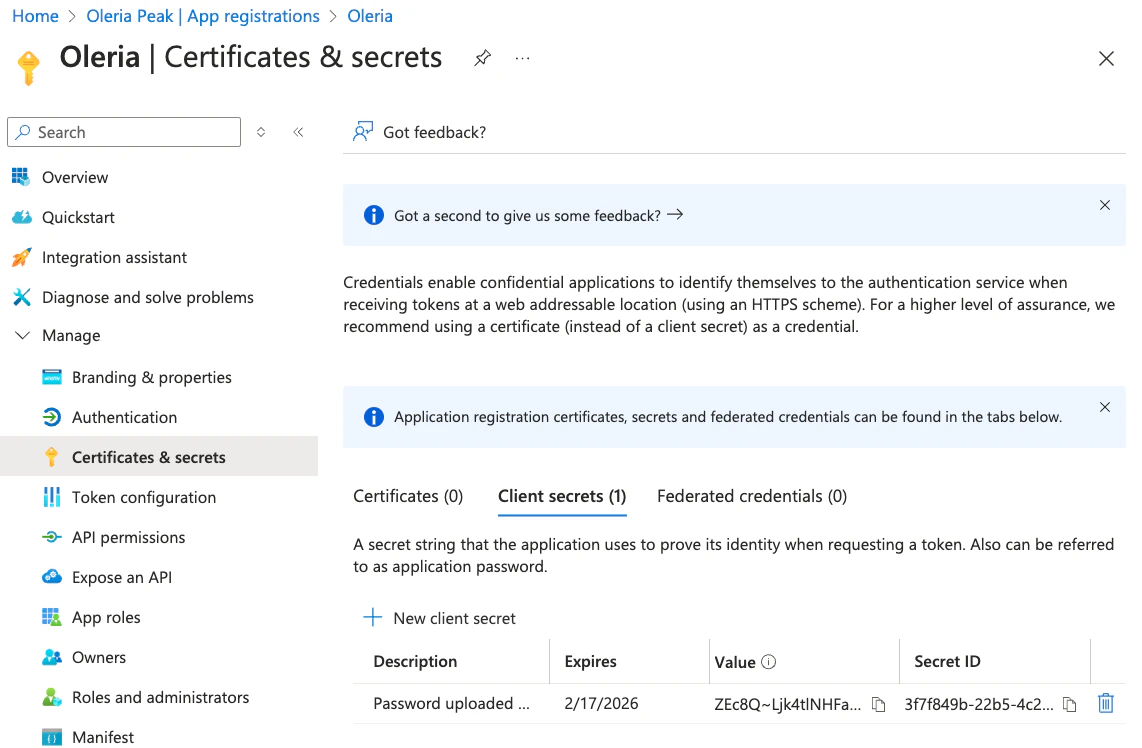
9
Copy the client ID and tenant ID
From the app registration overview, copy the Application (client) ID and Directory (tenant) ID.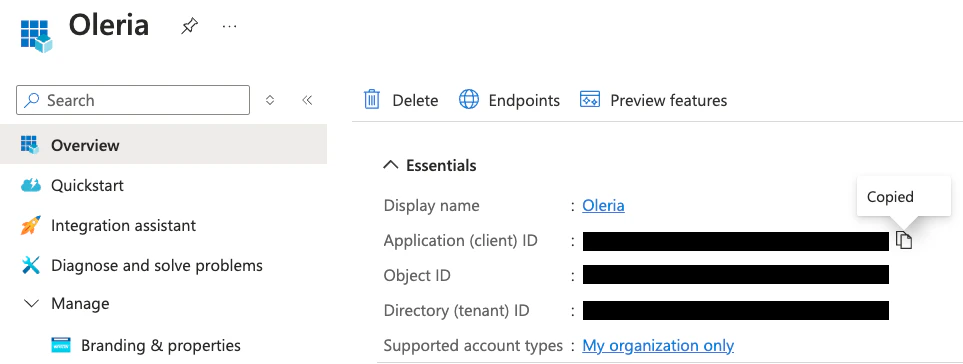
10
Open the integration in Oleria
Sign in to your Oleria workspace and select Integrations -> Microsoft SharePoint and OneDrive.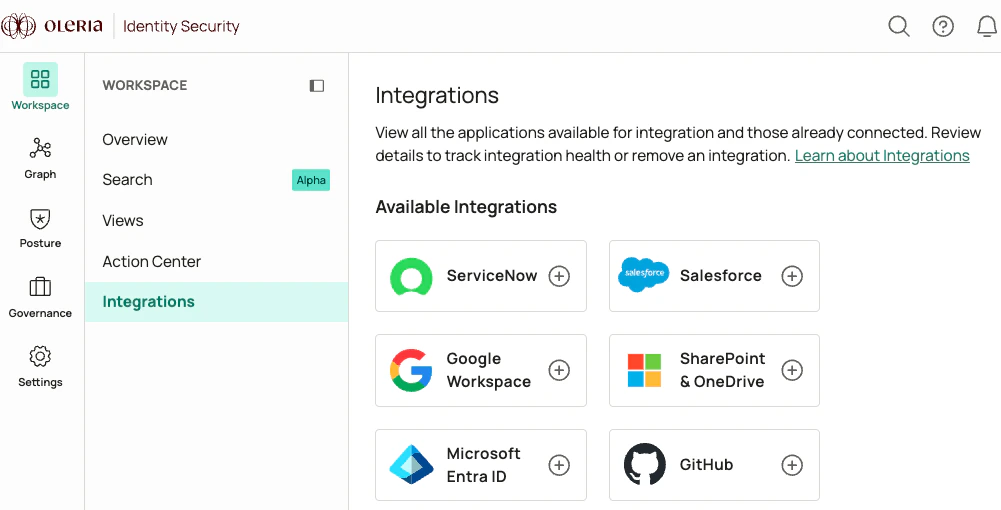
11
Authenticate with a client secret
Select the Authentication Method dropdown and select Client Secret Authentication.Enter the Client Secret, Tenant Id, and Client Id you copied earlier. To enable remediation actions, also select I authorize Oleria to perform write actions in Microsoft Entra ID. Then select Authenticate.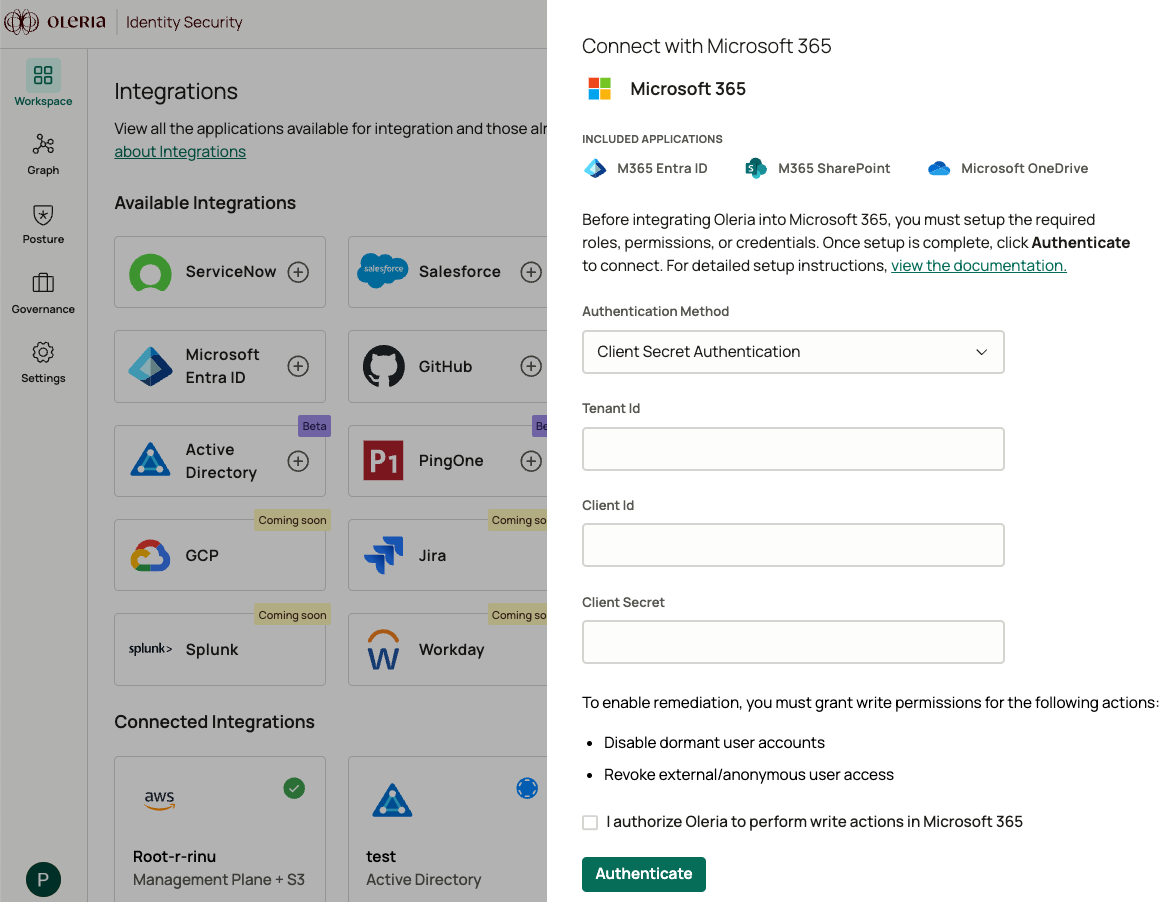
Connect with a client certificate
Client certificate authentication uses a certificate uploaded to your Oleria app registration in Entra ID and a base64-encoded private key stored by Oleria. Use this method when your security policy requires certificate-based service principal authentication instead of a client secret.This flow reuses the Oleria app registration and API permissions you create in Connect with a client secret. Complete the steps from Create an app registration in Entra ID through Confirm admin consent, then return here. Skip the Create a client secret step.
1
Prepare your certificate files
Place the following files in a single working directory:
certificate.pem- the public certificate in PEM formatprivate_key.txt- the matching unencrypted private key in PEM formatcertificate_chain.txt- the intermediate certificate chain in PEM format
New-SelfSignedCertificate on Windows) and export it in the formats above.The private key must be unencrypted. If
private_key.txt is passphrase-protected, decrypt it to a new file with openssl rsa -in private_key.txt -out private_key_unencrypted.txt (or the equivalent for your key type). Keep the encrypted original, and use private_key_unencrypted.txt wherever the commands below reference private_key.txt.2
Generate the base64-encoded private key
Oleria expects a single base64 string that decodes to the certificate, chain, and unencrypted private key concatenated as PEM blocks. Run the commands for your operating system from the directory that holds the files prepared in the previous step.The contents of
- macOS or Linux
- Windows (PowerShell)
base64_generate_cert.pem is the value you will paste into Oleria in the final step.3
Upload the certificate to Entra ID
Sign in to your Entra ID tenant and navigate to Microsoft Entra ID -> Manage -> App registrations. Open your Oleria app registration.Select Manage -> Certificates & secrets -> Certificates and upload 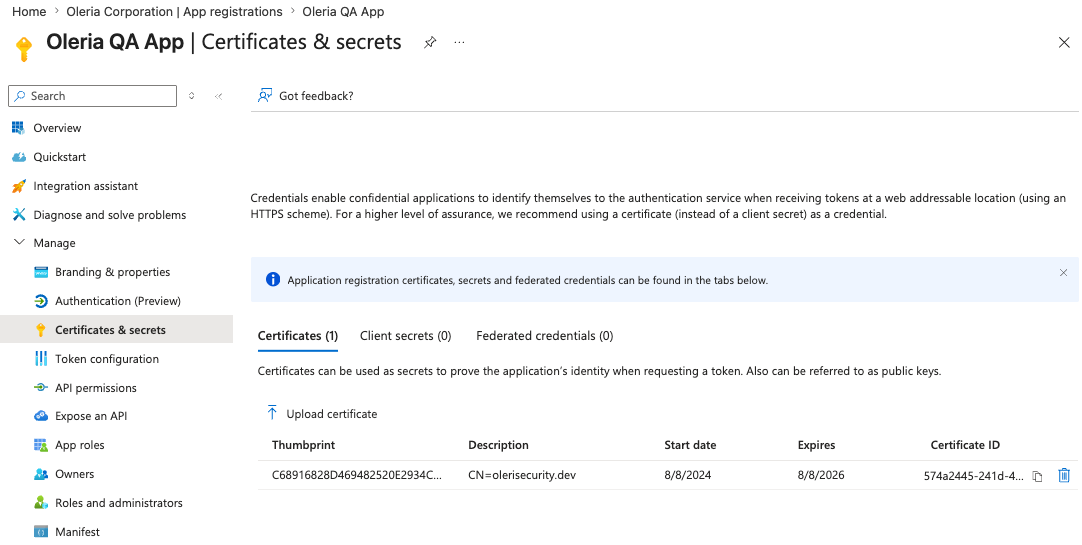
If the app is not visible under Owned applications, switch to All applications and search for it by name.
certificate.pem.4
Open the integration in Oleria
Sign in to your Oleria workspace and select Integrations.
- For a new integration, select Microsoft Entra ID or Microsoft SharePoint and OneDrive to open the side panel.
- To migrate an existing integration from client secret to client certificate, select Connected, then select the edit icon on your Entra ID integration to open the side panel.
5
Authenticate with the client certificate
From the Authentication Method dropdown, select Client Certificate Authentication.Provide the following: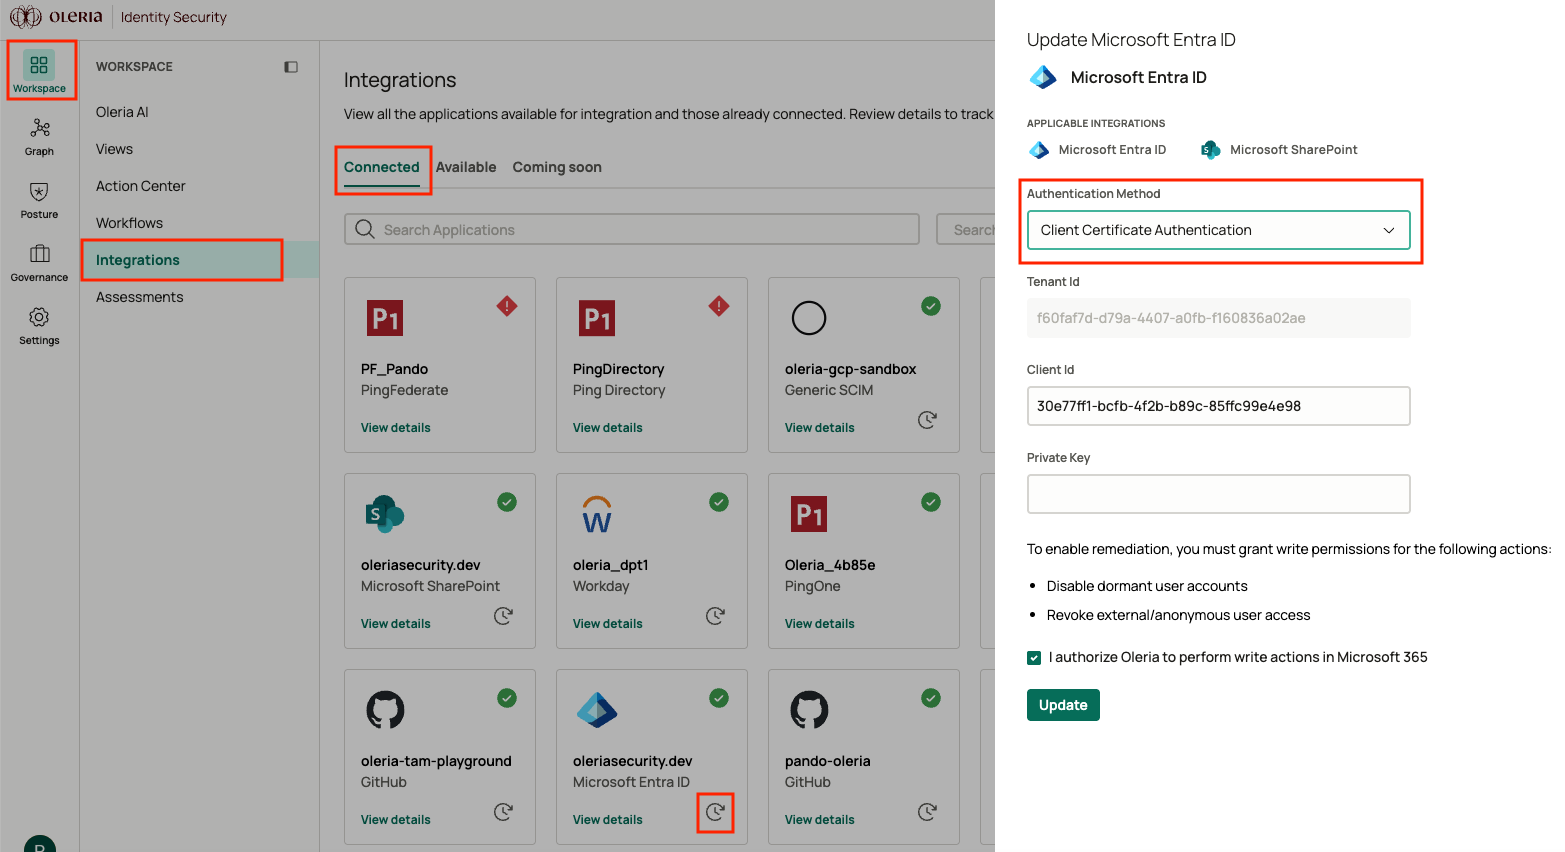
Select Update to save the integration.
6
Clean up generated files
generated_cert.pem and base64_generate_cert.pem both contain the unencrypted private key inline, as does private_key_unencrypted.txt if you decrypted a passphrase-protected key. Delete them from the working directory now that the integration is connected. Your original certificate.pem, certificate_chain.txt, and private_key.txt files are unchanged and can stay in your existing key store.- macOS or Linux
- Windows (PowerShell)
history -c on Bash or Zsh, Clear-History on PowerShell.How Oleria handles the private key
The Private Key field in the integration form is masked while you enter it. Oleria receives the value over TLS and stores it encrypted at rest. Only the Oleria service that authenticates to Entra ID can read it, and Oleria doesn’t write the private key to logs.Verify the integration
Whichever approach you used, confirm the Entra ID and M365 SharePoint instances appear on the Connected tab of your Oleria Integrations page with a status of Healthy. After the first sync completes, you can review the discovered users, groups, applications, directory roles, and SharePoint sites in your Oleria workspace.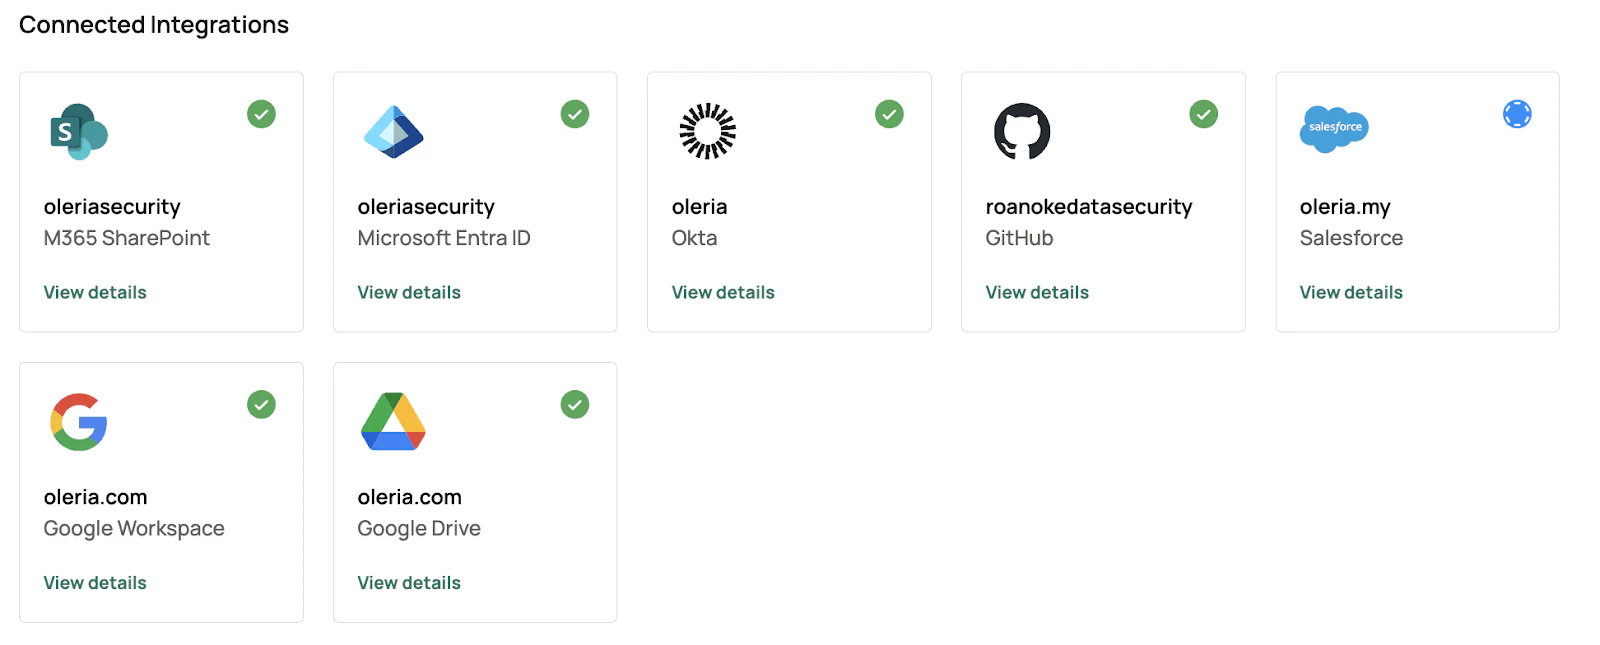
Remediation actions
If you granted the optional remediation permissions, Oleria can take these actions in Microsoft Entra ID. Each action needs the permission listed in the Add Microsoft Graph permissions step.- Enable or disable a user
- Add or remove a user from a group
- Add or remove a user from a directory role
- Assign or unassign a user to an application
- Assign or remove a group’s access to an application
- Disable a non-human identity (service principal)
- Create a user
- Delete a user
- Revoke a user’s sign-in sessions
Check the Oleria app in your Entra ID instance
1
Find the Oleria app in Enterprise applications
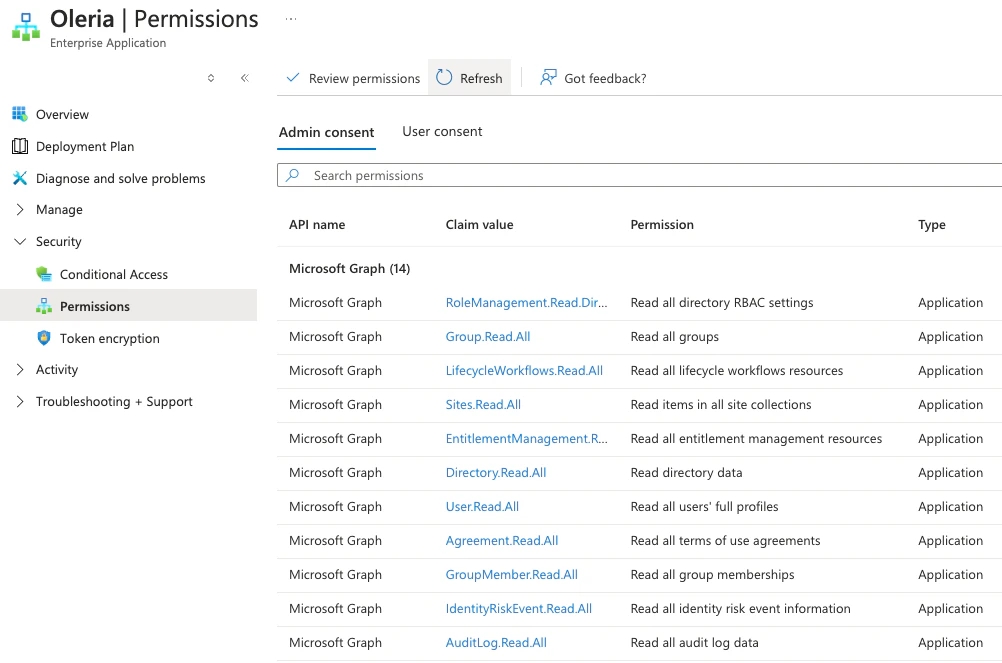
Sign in to your Entra ID instance, navigate to Enterprise applications -> select All applications.You will find the Oleria application in the Enterprise applications list.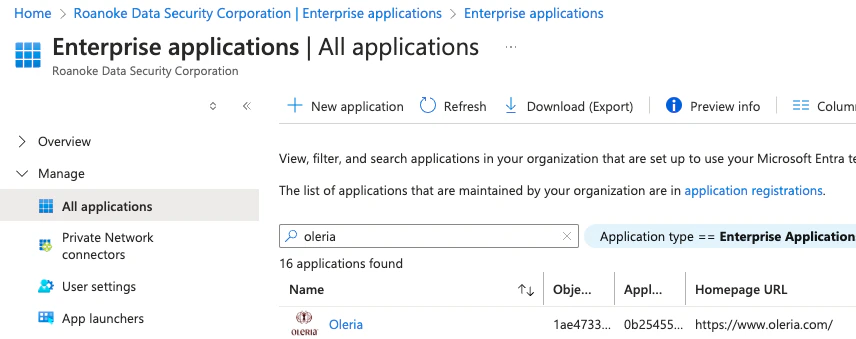
2
View granted permissions
Select Permissions to view the read permissions granted to the Oleria application.