

- Prerequisites - a one-time setup in Microsoft Entra ID and the Teams Admin Center to grant Oleria the permissions and bot deployment it needs.
- Integration - connecting Microsoft Teams in the Oleria console using the credentials produced in the prerequisites.
Roles required
Prerequisites
Complete the following two prerequisites before connecting Microsoft Teams in the Oleria console.Entra ID App Registration
Choose the path that matches your situation: create a new dedicated App Registration (recommended), or reuse an existing one.- Option A: Create New (Recommended)
- Option B: Use Existing
Who: Azure/Entra ID Admin
1
Register the application
Sign in to the Microsoft Entra admin center and navigate to Entra ID → App registrations → New registration. Configure the application with these settings, then select Register:
2
Generate a client secret
In the new App Registration, navigate to Certificates & secrets, then select Client secrets → New client secret. Configure the secret with these settings:
Select Add, then copy the secret
Value immediately - it will not be displayed again after you leave this page.3
Add API permissions
Navigate to API permissions → Add a permission, then select Microsoft Graph → Application permissions. Search for and add each of the following permissions:
After adding all 6 permissions, select Grant admin consent for [Your Organization] and confirm by clicking Yes. Verify all 6 permissions show a green checkmark under the Status column.
4
Record your credentials
Collect the following values - you will need them in the Integration section of this guide:
Proceed to Deploy the Oleria Bot App below.
Deploy the Oleria Bot App
Who: Microsoft Teams Admin The Oleria bot app is a pre-built Teams application provided by Oleria. It is separate from the Entra App Registration configured above. The bot handles the delivery of notification messages to your Teams channels and direct messages.1
Obtain the Oleria Teams app package
- Your Oleria account team will provide the bot app package as a
.zipfile. - If you have not received this, contact your Oleria representative.
2
Upload the app to Teams Admin Center
- Sign in to the Teams Admin Center.
- Navigate to Teams apps → Manage apps.
- Select Upload new app → Upload.
- Select the Oleria
.zippackage and confirm the upload. - The app appears in the Manage apps list once uploaded. Per Microsoft’s guidance, the uploaded app may take a few hours to become available to org users.
3
Allow the app
- In Manage apps, search for the Oleria app.
- Click on the app name to open its details.
- Ensure the Status is set to Allowed.
4
Configure app availability - required for direct messages
Choose one of the following deployment strategies based on your organization’s needs.
- Option A: Organization-wide
- Option B: Targeted rollout
All users should receive Oleria notifications.
- In Teams Admin Center, go to Teams apps → Setup policies.
- Edit the Global (Org-wide default) policy.
- Under Installed apps, select Add apps.
- Search for Oleria, select Add, then Save.
The bot can send direct messages to any user whose setup policy includes the Oleria app under Installed apps (not just Allowed). When configured this way, users do not need to install the app themselves. Per Microsoft’s guidance, setup-policy changes can take a few hours to propagate, so wait before testing.
Using app centric management? If your tenant has migrated to app centric management (Microsoft’s newer app-governance model), preinstall the Oleria app from Teams admin center → Teams apps → Manage apps: select the Oleria app, select Edit installs, choose the users or groups, and select Apply. In this mode, app setup policies become read-only for new installs. See Microsoft’s Preinstall Teams apps guide.
5
Verify deployment
- Open Microsoft Teams as a user covered by the setup policy.
- Go to Apps in the left sidebar.
- Search for “Oleria” - the app should appear and show as available.
- (Optional sanity check) Open the app’s icon in the left rail. If you can see it as a pinned app or in the Chat list, the personal-scope install has succeeded.
Integration
Who: Oleria Workspace Admin With the prerequisites complete, you can now connect Microsoft Teams in the Oleria console using the credentials recorded in the Entra ID App Registration step.Connecting Microsoft Teams with Oleria
1
Open the Messaging System settings
Select Messaging System under the Settings window.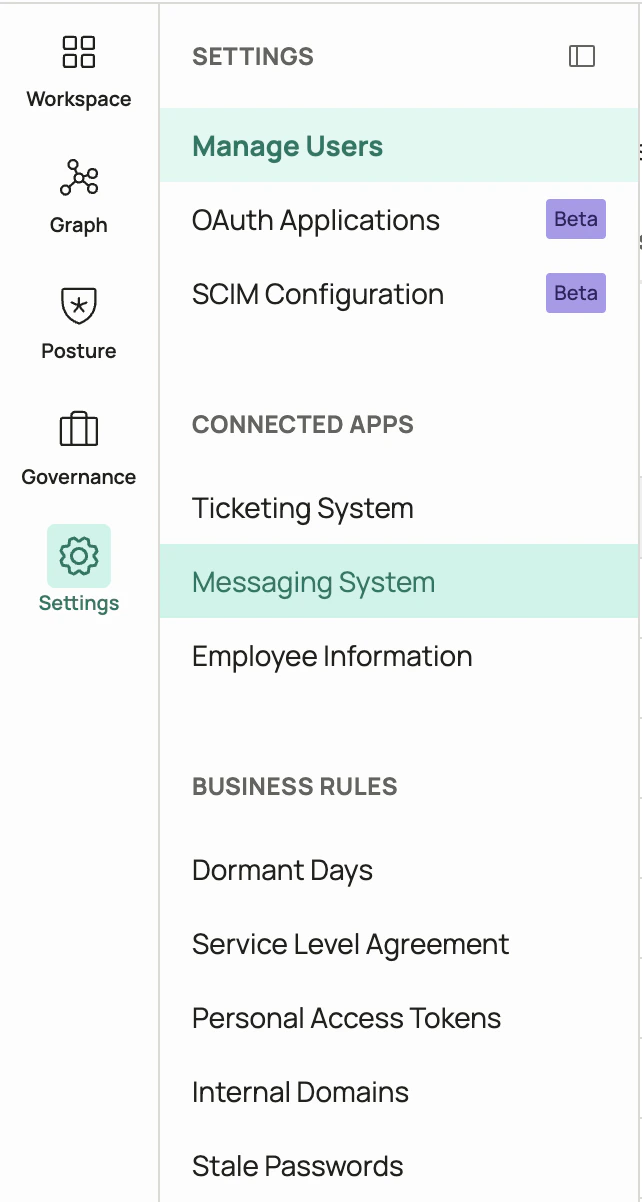
2
Connect Microsoft Teams
Select Connect under the Microsoft Teams application in the messaging system.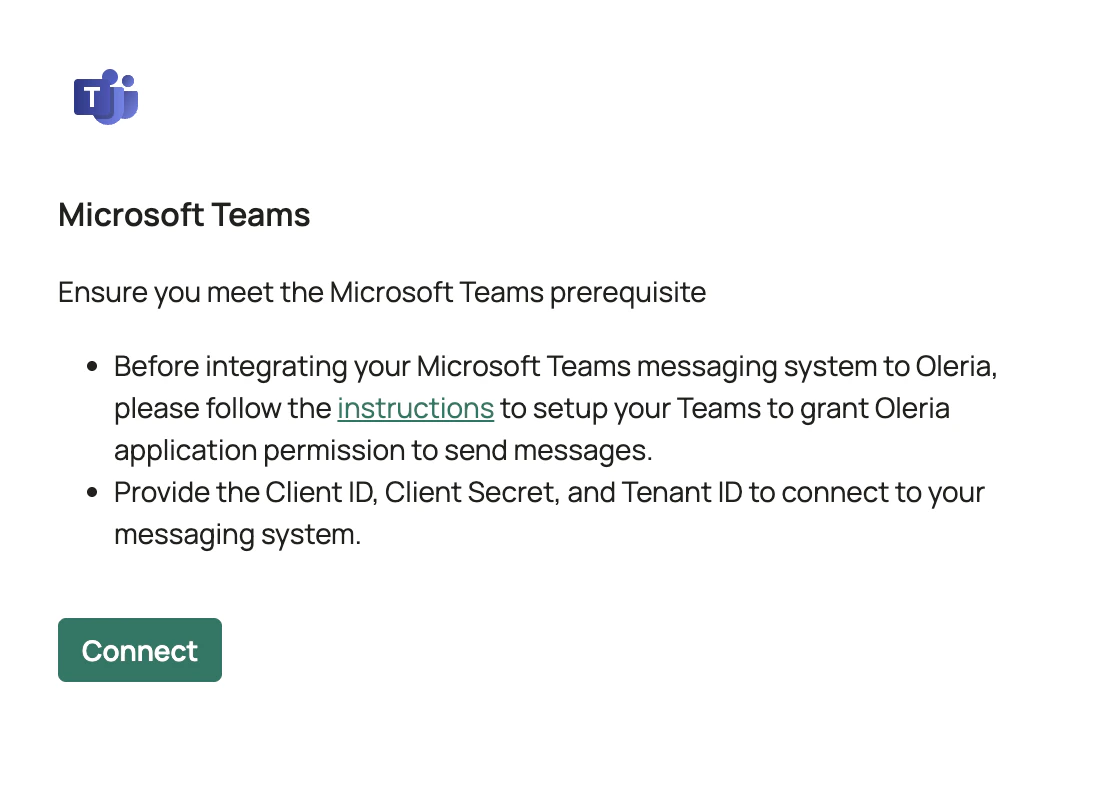
3
Enter authentication credentials
In the Microsoft Teams Messaging Authentication overlay, enter the following details and select Connect.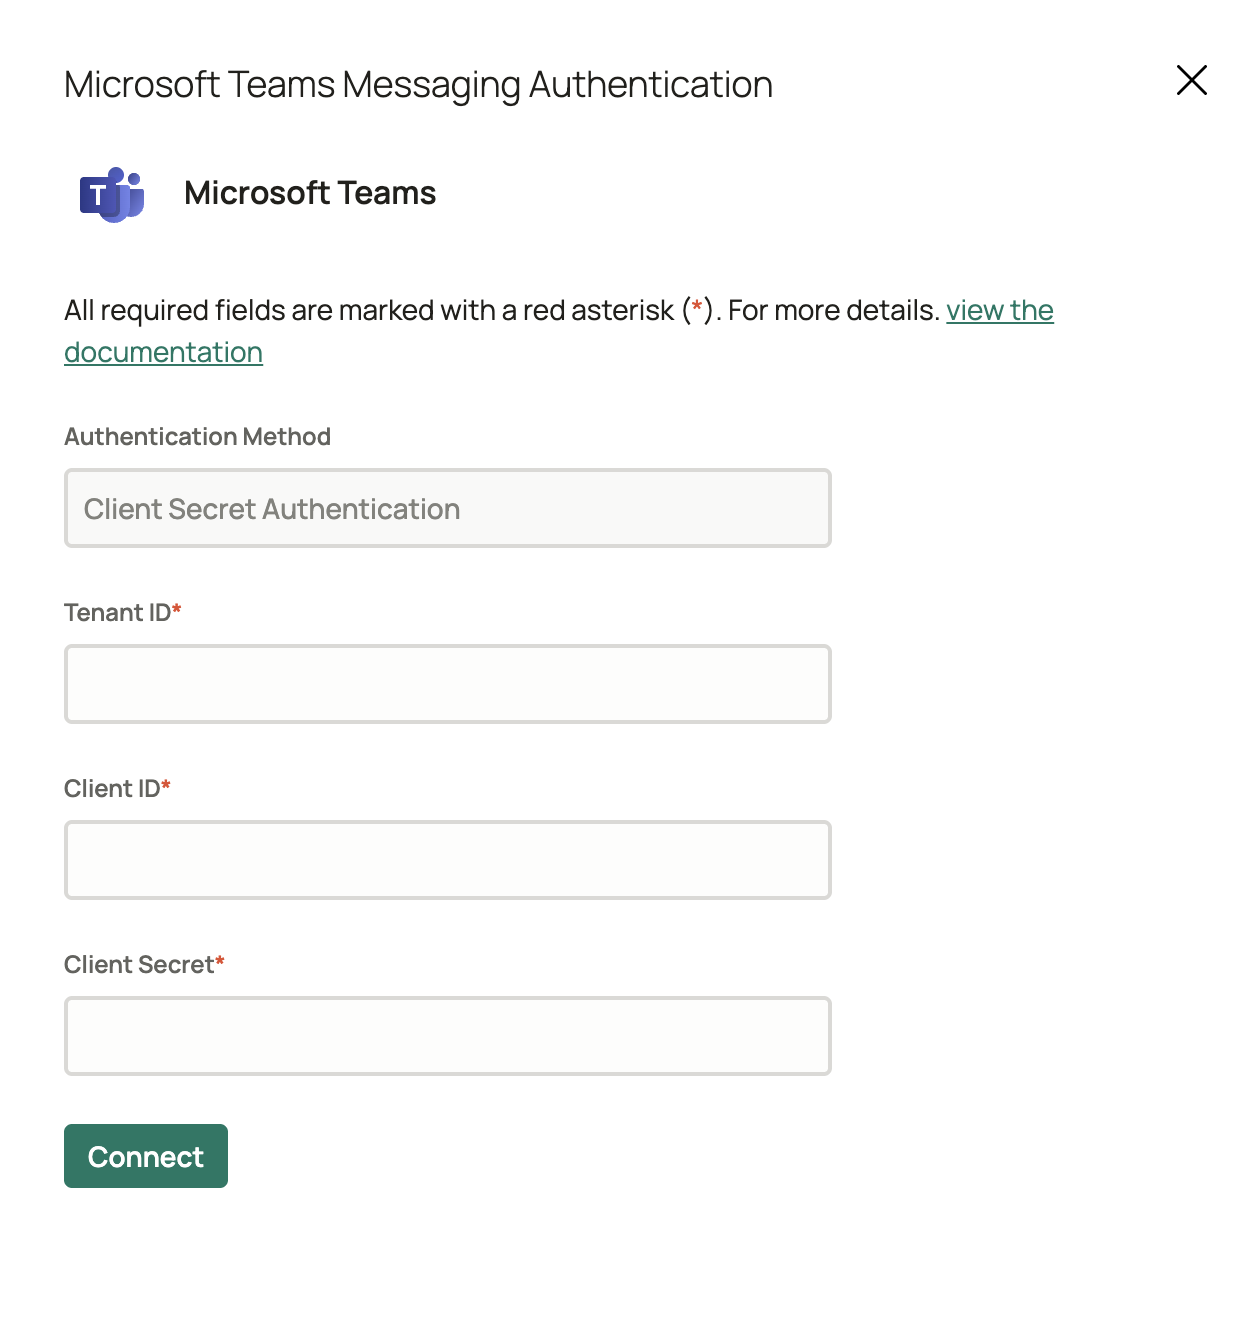
- Authentication Method - Client Secret Authentication is selected by default.
- Tenant ID - Directory (tenant) ID from your Entra App Registration.
- Client ID - Application (client) ID from your Entra App Registration.
- Client Secret - Client secret value generated under Certificates & secrets in your Entra App Registration.
For Oleria to deliver direct messages to a user, the Oleria bot app must be installed in that user’s personal scope via a Teams setup policy. Channel messages require the bot to be available to the team where the channel lives.
4
Verify the integration status
Select View Details from the messaging system to verify the integration status. A connected Microsoft Teams integration will show that messaging has been configured and Oleria will be able to send messages.
Security Summary
Entra App Registration (Your Organization)
Total permissions: 6 - all read-only. No write access to any Teams or directory data. No access to mail, calendar, files, sites, or message content.