

What Oleria discovers
- Users, roles, and role memberships - Snowflake users, the roles granted to them, and the role-to-role hierarchy.
- MFA and SSO configuration - per-user MFA enrollment and SAML SSO settings.
- Resources - databases and other objects, and the access each role has to them.
- Activity - sign-in history, access history, and query history.
- Policies and integration metadata - collected into tables the setup script creates in your Snowflake account, and kept up to date by a task that runs hourly. Oleria uses this data to generate risks and SAML SSO insights.
Prerequisites
- A Snowflake user with the
ACCOUNTADMINrole, to run the setup script that creates Oleria’s connector user, role, and warehouse and grants their permissions. - Admin access on the Oleria platform to add a new integration.
Standard integrations are configured with read-only permissions.
Copy the account identifier
1
Sign in as ACCOUNTADMIN
Sign in to your Snowflake instance and confirm your role is set to ACCOUNTADMIN.
2
Copy the account identifier
Go to ACCOUNTADMIN -> Account -> your account number, and copy the account identifier.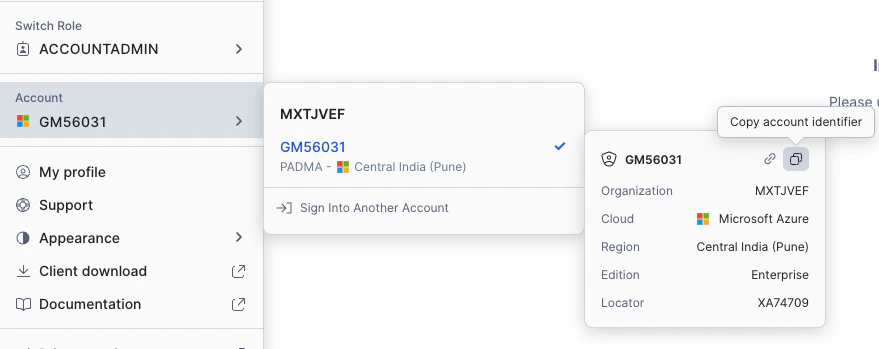
Generate the setup script in Oleria
1
Open the integration and provide connector details
Sign in to your Oleria workspace, go to Integrations, and select Snowflake. A side panel opens. Provide the following information and select Continue:
-
Account Identifier - copied above, in the format
<org-name>.<account-name>or<org-name>-<account-name> -
User Name - default is
oleria_connector_user. Change if preferred. -
Role Name - default is
oleria_connector_role. Change if preferred. -
Warehouse Name - default is
oleria_connector_warehouse. Change to use an existing one if desired.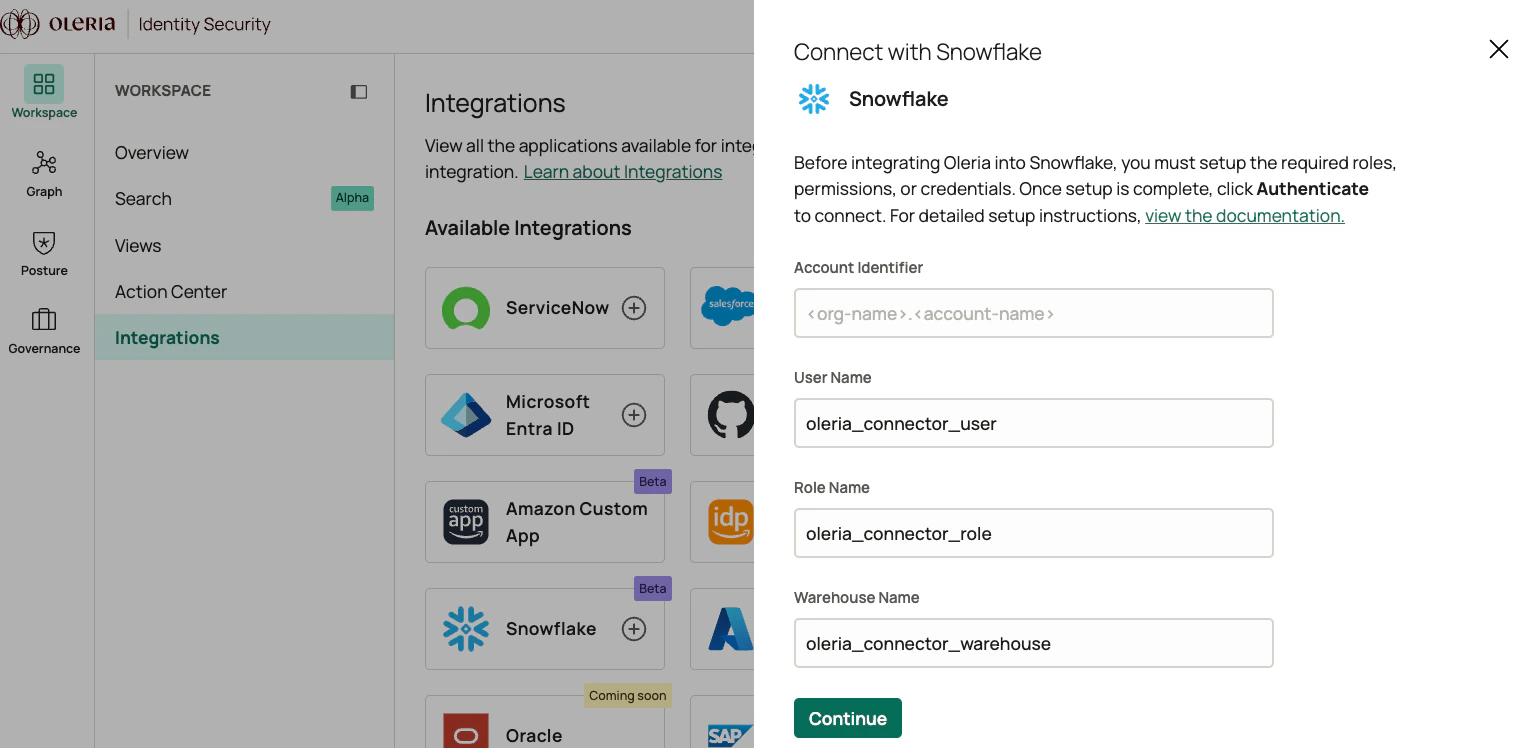
2
Copy the generated script
Oleria generates a setup script. Copy it.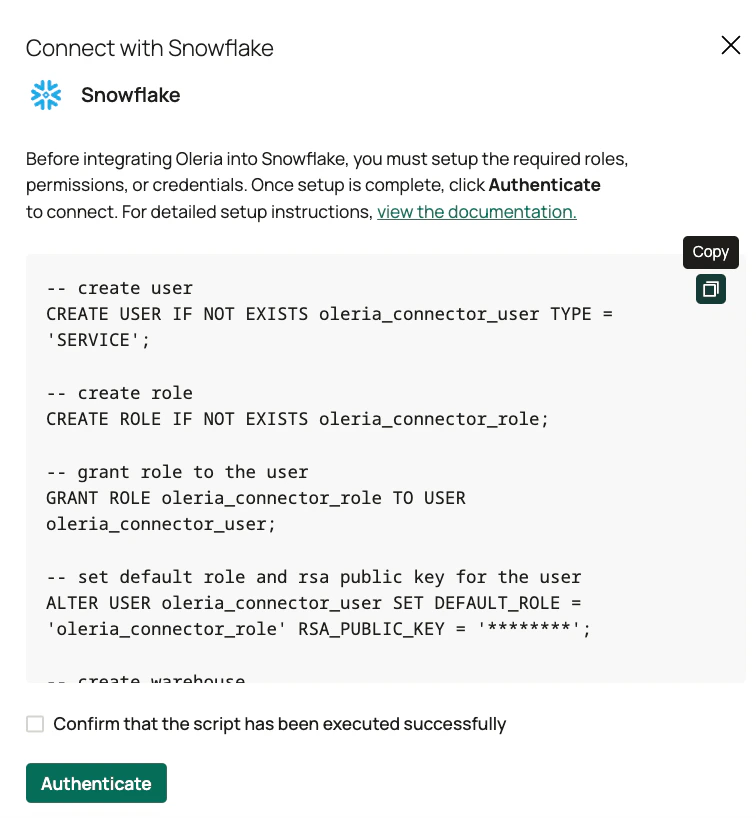
Keep this window open. You’ll come back to it after you run the script.
Run the script in Snowflake
1
Run the script in a SQL Worksheet
Open the Snowflake console and navigate to SQL Worksheet. Create a new SQL worksheet, paste the script you copied, and select Run All.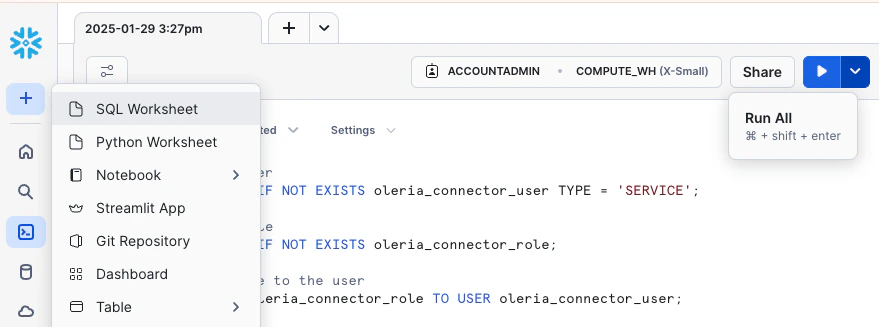
2
Confirm completion
The script creates the database, tables, and tasks. These tables store policies and integration metadata that Oleria uses to generate risks and SAML SSO insights. The task is scheduled to run hourly to keep the tables up to date.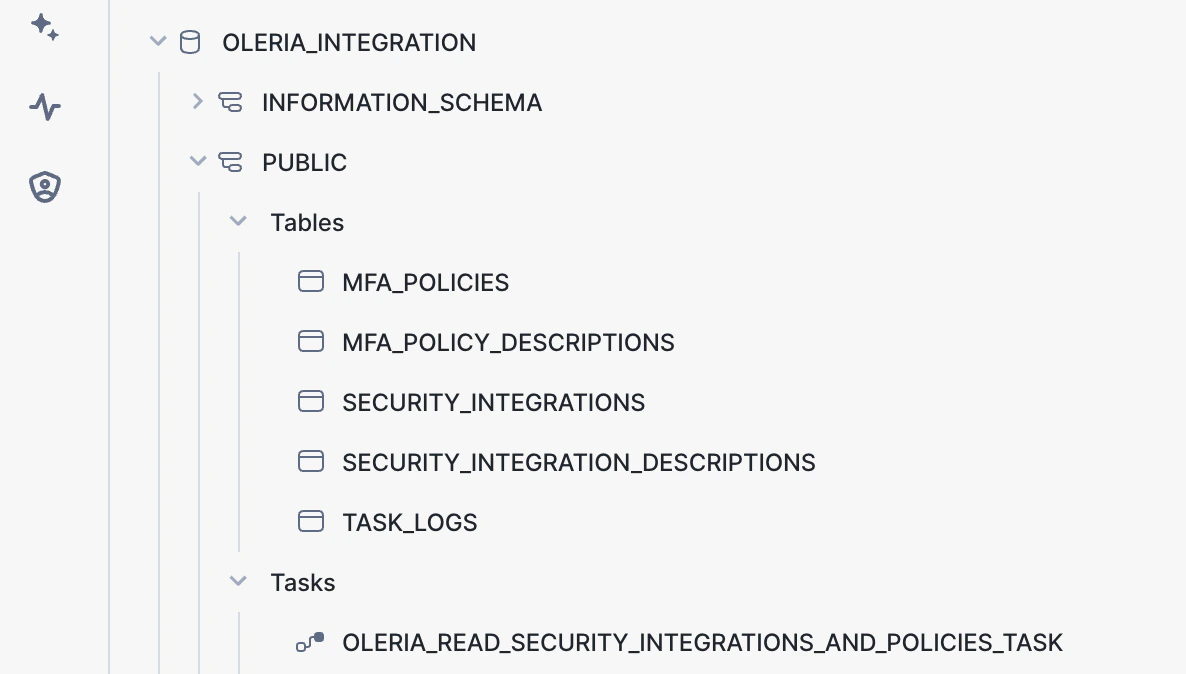
The hourly task is a serverless Snowflake task, so it consumes serverless compute credits in your Snowflake account. It doesn’t use the connector warehouse.
Connect Snowflake to Oleria
1
Confirm script execution and authenticate
Return to the Oleria side panel, select I have run the above commands in Snowflake, and select Authenticate.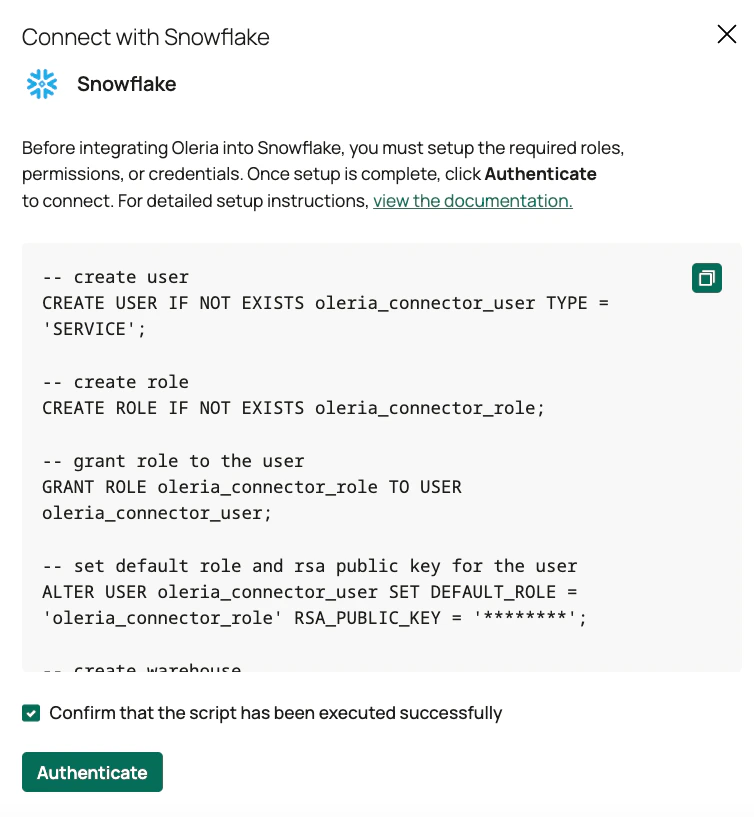
Verify the integration
Confirm the Snowflake instance appears on the Connected tab of your Oleria Integrations page with a status of Healthy. After the first sync completes, you can review the discovered users, roles, and role memberships, along with the risks and SAML SSO insights Oleria generates for Snowflake, in your Oleria workspace.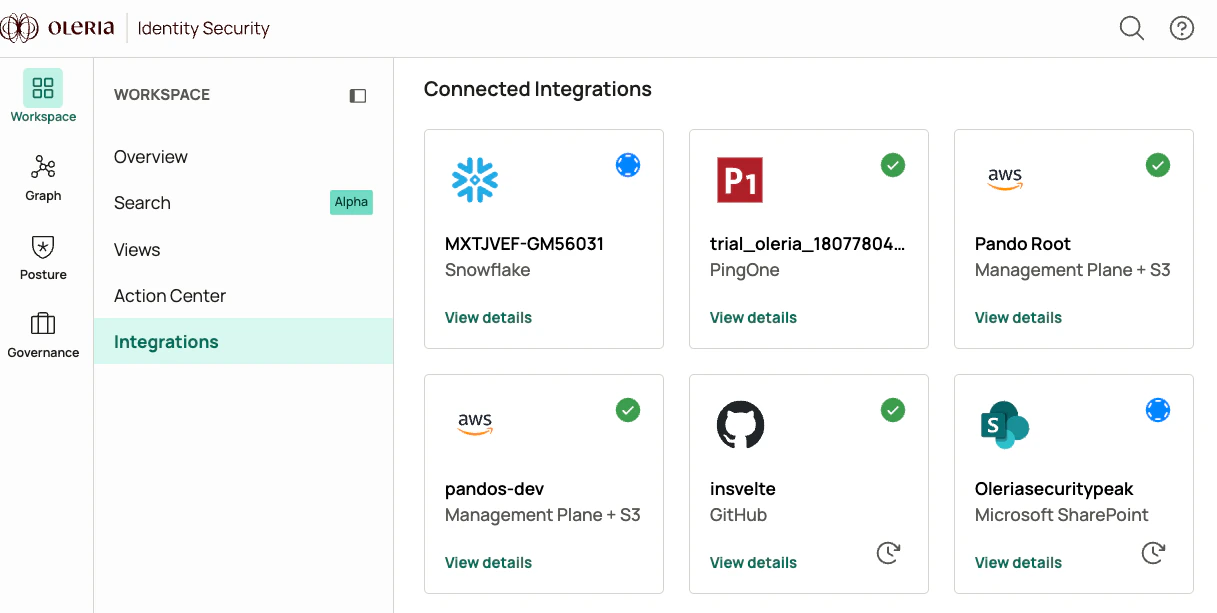
Remediation actions
Oleria can take the following action in Snowflake:- Disable a user account
Remove the integration
After you remove the Snowflake integration from Oleria, you can delete the objects the setup script created. Run the following asACCOUNTADMIN, replacing the user, role, and warehouse names with the values you entered in Oleria: