

What Oleria discovers
- Users - user accounts across the environments and populations in your PingOne organization.
- Groups - groups, nested groups, and group membership.
- Roles - administrator role assignments.
- Applications - applications and the users and groups that can access them.
- Non-human identities - application and webhook accounts.
- Activity - PingOne audit events.
- Risks - configuration findings.
Prerequisites
- The user granting these permissions must have Administrative privileges.
Standard integrations are configured with read-only permissions. Use a service account (and not an employee account) with the suggested privileges for the integration to ensure continuity.
Create an Oleria application in PingOne
1
Create a new application
Sign in to your PingOne instance, navigate to Applications, and select the + icon to create a new application.Enter the application name Oleria, select application type Worker, and select Save.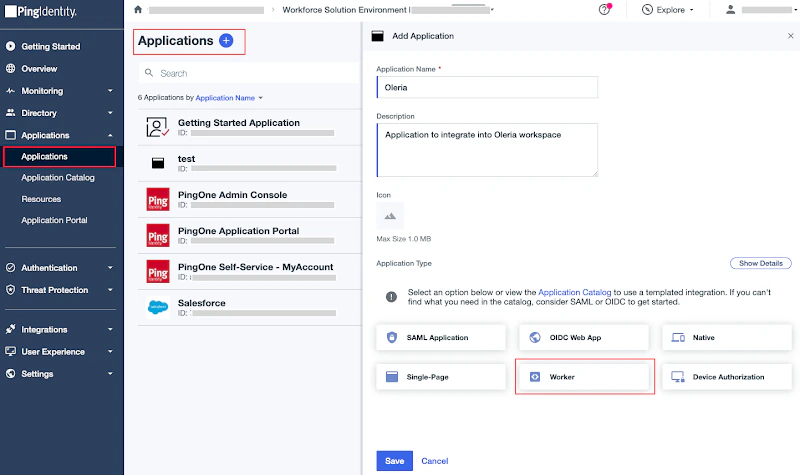
2
Grant roles
The newly created application opens showing the Roles tab. Select Grant Roles.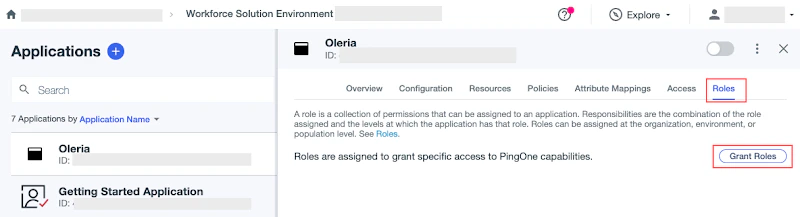
3
Select the required roles
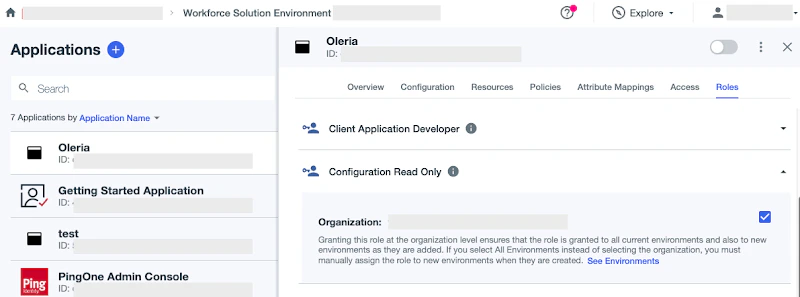
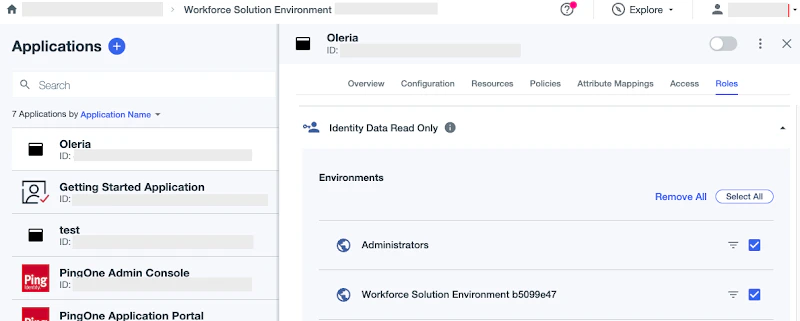
Select the following roles:
- Configuration Read Only (select organization)
-
Identity Read Only (select all environments)
4
Grant remediation roles (optional)
To enable remediation actions, grant the Identity Data Admin role and select all environments. To also assign or remove a group’s access to an application, grant the Environment Admin role. Select Save.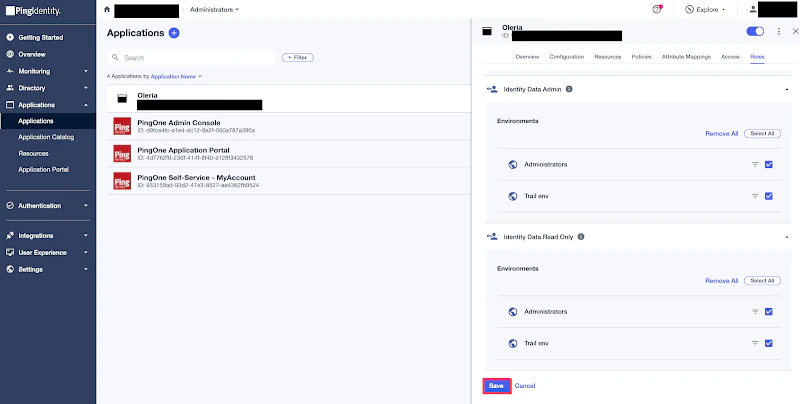
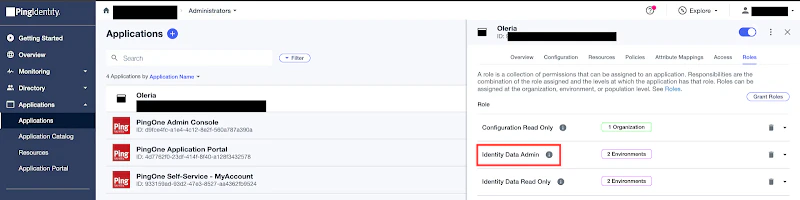
5
Enable the application
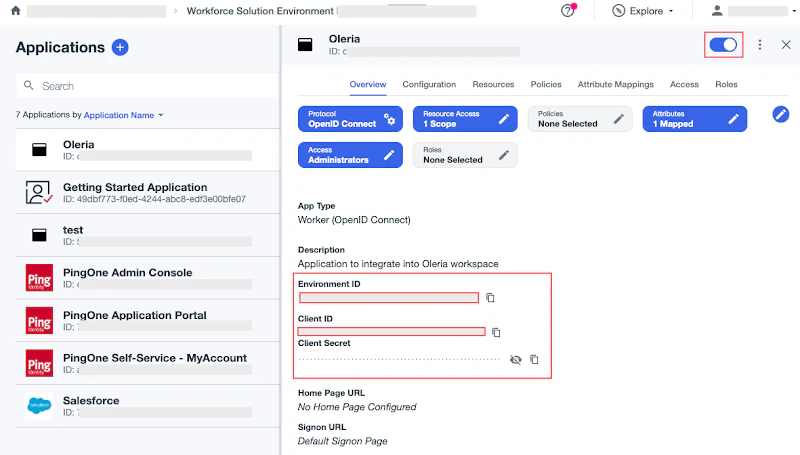
Enable the Oleria application.
6
Note down the application credentials
From the Oleria application Overview, note down the following:
- Environment ID
- Client ID
-
Client Secret
7
Note down the region
From the Oleria application Configuration, expand URLs and note down the region.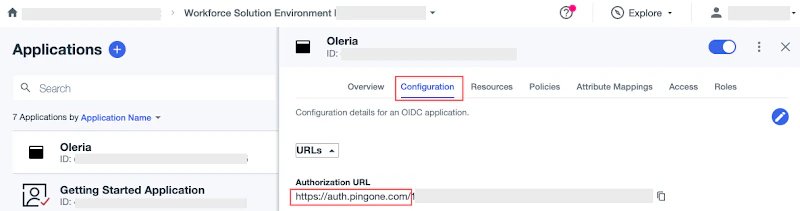
Connect PingOne to Oleria
1
Open the integration
Sign in to your Oleria workspace, navigate to Integrations, and select PingOne. A side page opens - select Continue.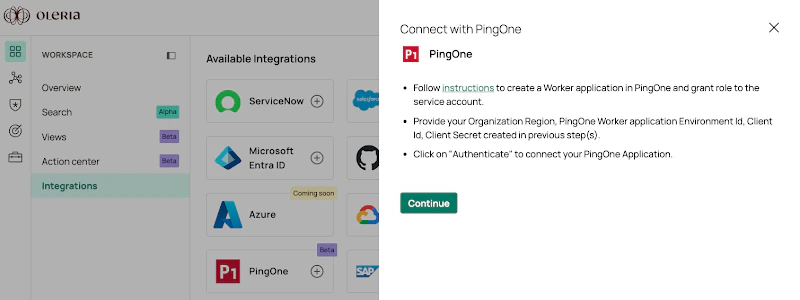
2
Provide your credentials
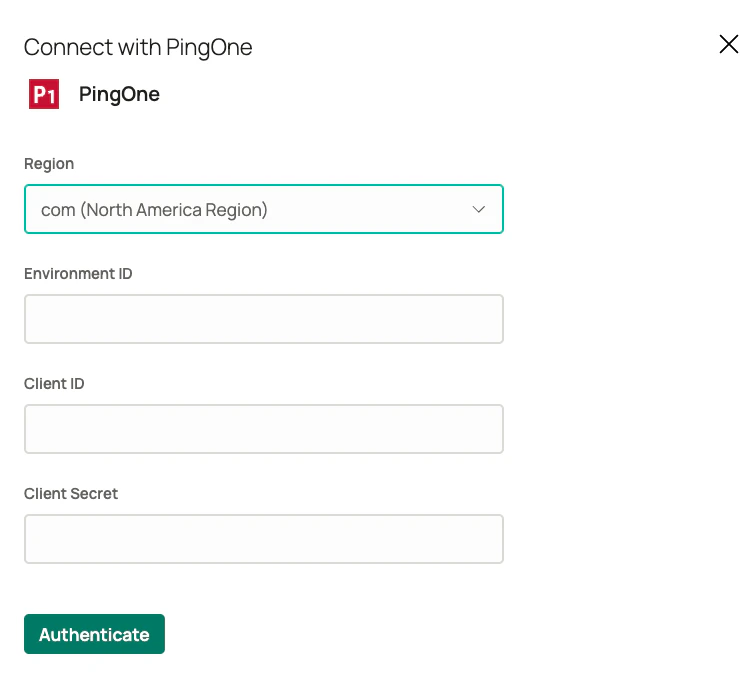
Provide the following information and select Authenticate:
- Region - from the previous section
- Environment ID - from the previous section
- Client ID - from the previous section
-
Client Secret - from the previous section
Verify the integration
Confirm the PingOne instance appears on the Connected tab of your Oleria Integrations page with a status of Healthy. After the first sync completes, you can review the discovered users, groups, roles, applications, non-human identities, activity, and risks in your Oleria workspace.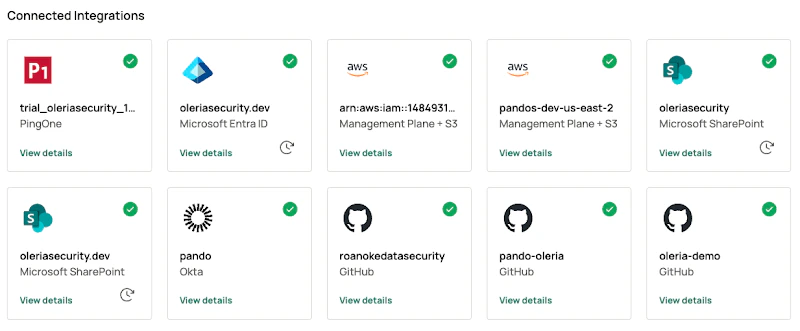
Remediation actions
Oleria can take these actions in PingOne when you grant the roles in the Grant remediation roles (optional) step. Assigning or removing a group’s access to an application needs Environment Admin. Every other action needs Identity Data Admin:- Disable or enable a user account
- Create or delete a user
- Add or remove a user from a group
- Assign or remove a group’s access to an application
- Revoke a user’s sessions