What Oleria discovers
- Users - user accounts in your Salesforce org, including multi-factor authentication details and, with Manage Users, each user’s last password change date.
- Groups - public groups and nested group membership.
- Profiles and permission sets - the profiles, permission sets, and permission set groups that grant access.
- Object access - which Salesforce objects and records each user can access.
- Non-human identities - connected apps, external client apps, integration and automated-process users, and auto-launched flows.
- Risks - security configuration findings.
- Activity - login, logout, login-as, verification, and setup audit trail events. With Event Monitoring (Shield) configured, Oleria also captures URI, Lightning, and report events.
Prerequisites
- Salesforce Admin role
Use a service account (and not an employee account) with the suggested privileges for the integration to ensure continuity.
Create the Oleria app in Salesforce
1
Open the integration
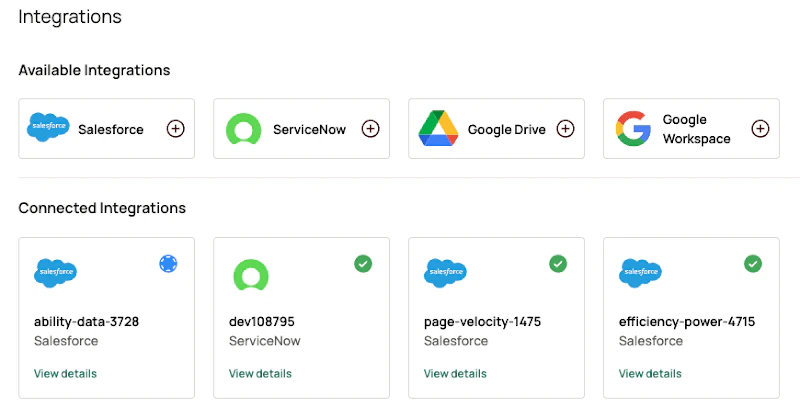
Sign in to your Oleria workspace, select Integrations -> select Salesforce.
2
Review prerequisites and continue
A side page opens with prerequisites and a link to the onboarding instructions. Select Continue.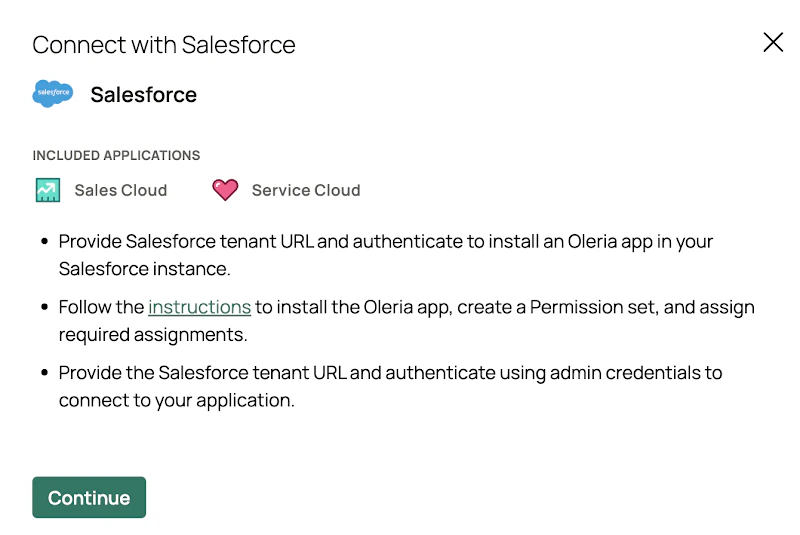
3
Provide your Salesforce tenant URL
Enter your Salesforce URL in the Tenant URL field and select Authenticate.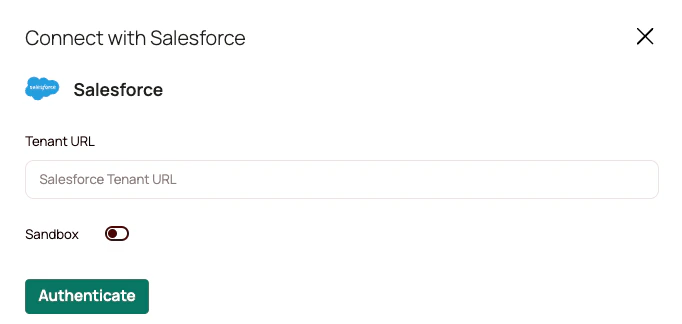
Turn the Sandbox switch on if you are integrating a Salesforce sandbox environment.
4
Authorize Oleria access
Authorize Oleria access to create a connected app called Oleria in your Salesforce application.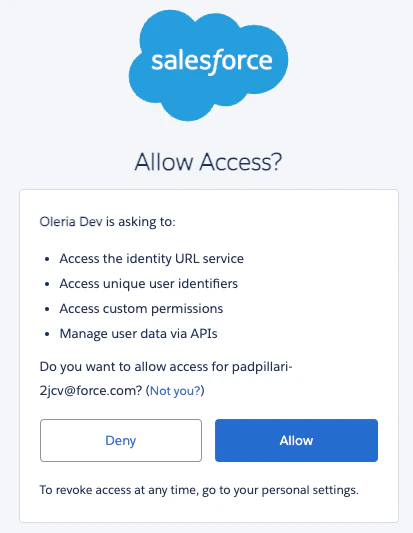

You will see an error notification: “User hasn’t approved this consumer”. Ignore this message and continue with the next sections to install the Oleria app and Oleria Access permission set in your Salesforce application.
Install the Oleria app in Salesforce
1
Find and install the Oleria app
Sign in to your Salesforce application, search for Connected Apps OAuth Usage, select the Oleria app, and select Install.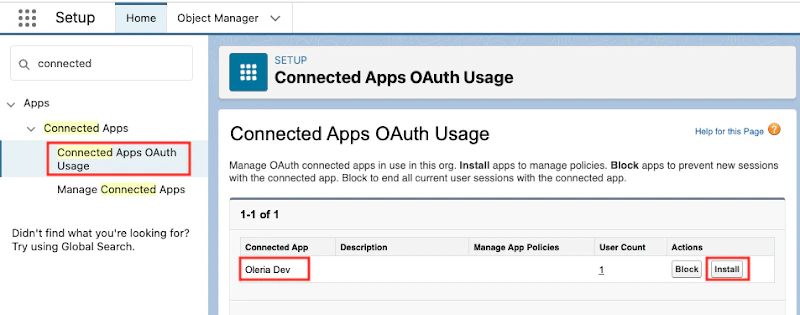
2
Edit policies
After completing the Oleria app installation, select Edit Policies.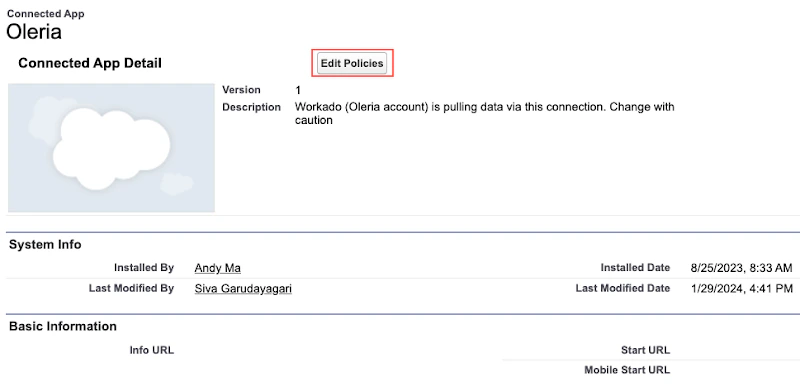
3
Configure OAuth policies
Navigate to the OAuth Policies section, set Permitted Users to Admin approved users are pre-authorized, and select Save.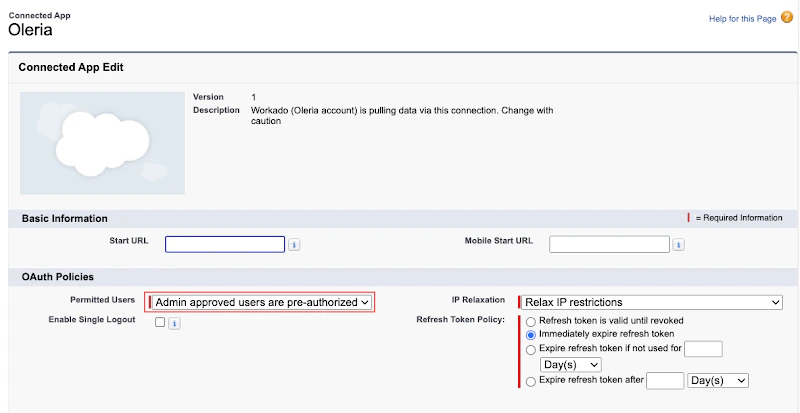
Create a permission set for Oleria access
1
Create the permission set
Navigate to Permission Sets and select New to create a new permission set named Oleria Access.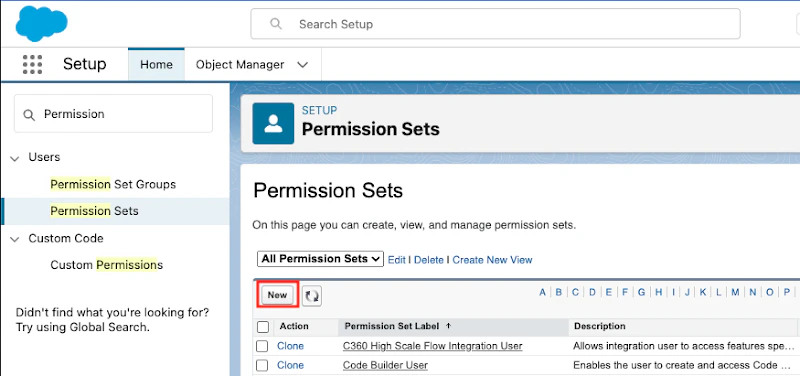
2
Configure the permission set
Set the Label to Oleria Access and configure the API Name as shown below, then save the permission set.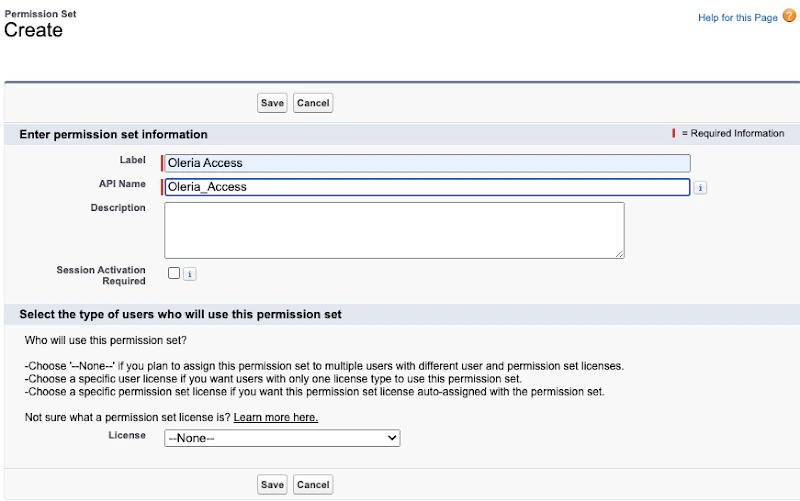
3
Assign a user
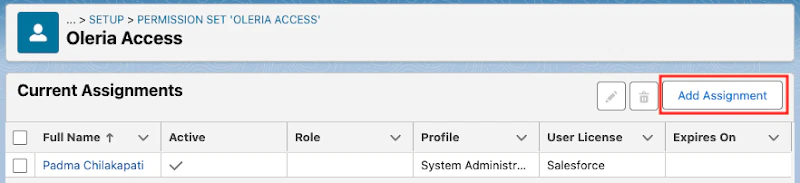
Open the Oleria Access permission set and select Manage Assignments to assign a user.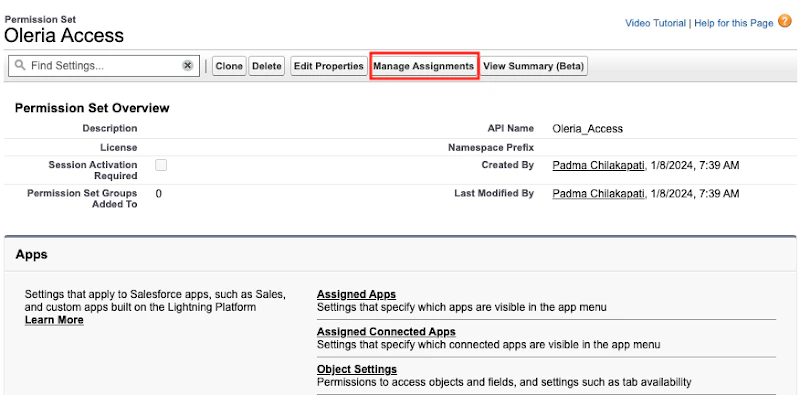
4
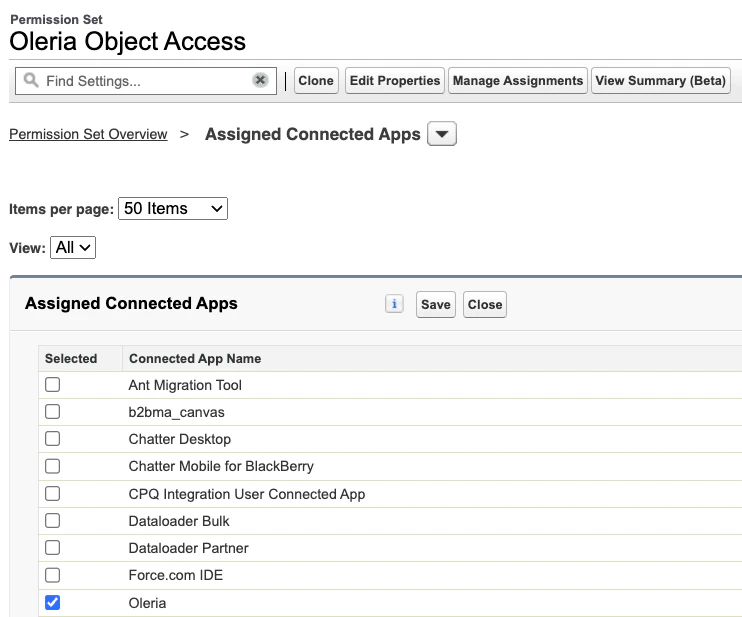
Assign the Oleria connected app
Open the Oleria Access permission set and select Assigned Connected Apps to add the Oleria app to the permission set.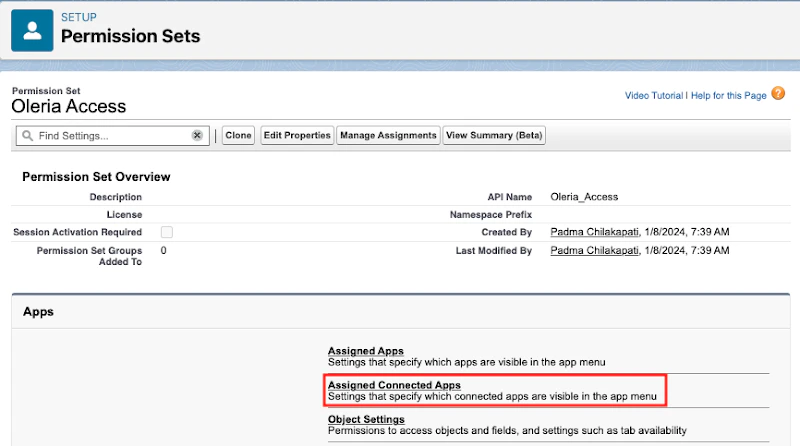
5
Configure system permissions
Select System Permissions.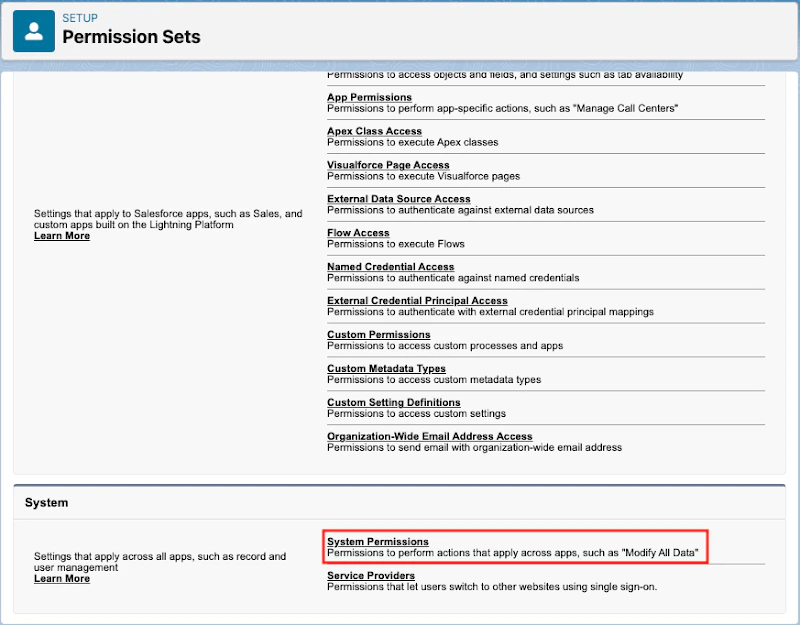

-
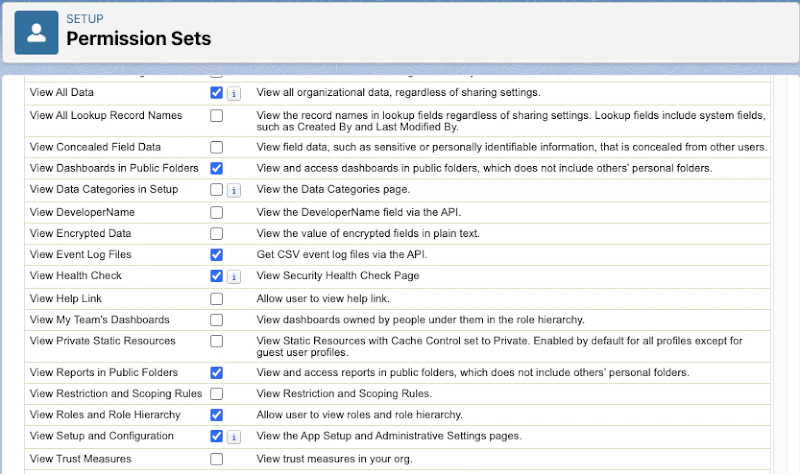
To disable or enable accounts, add or remove users from groups, revoke sessions, and to collect password-change-based dormancy signals, enable Manage Users
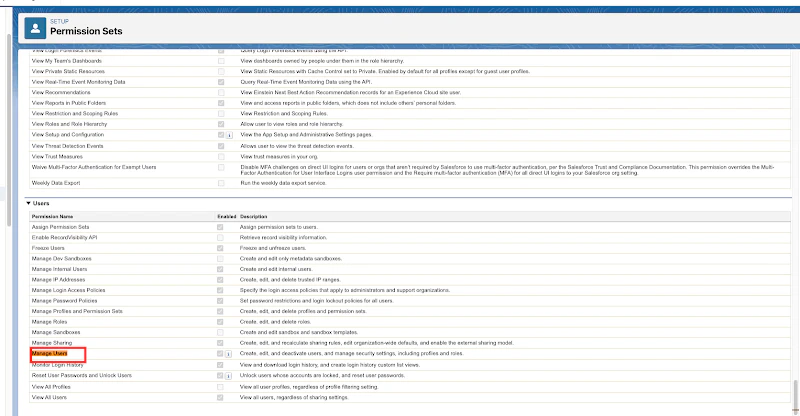
Manage Users is required for Oleria to read each user’s last password change date. Without it, Salesforce omits that field entirely, so password-change-based dormancy signals will be unavailable. The sync still completes successfully, with no error shown.
-
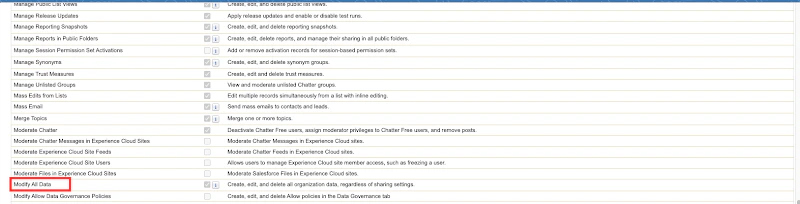
To revoke access to records, shared assets, and resources, enable Modify All Data
- To assign or remove permission sets and permission set groups, enable Assign Permission Sets
- To disable non-human identities, enable the permissions for the types you plan to disable: Customize Application and Modify Metadata Through Metadata API Functions for connected apps, Modify Metadata Through Metadata API Functions and View Setup and Configuration for external client apps, and Manage Flow for flows. Disabling an integration user uses Manage Users.
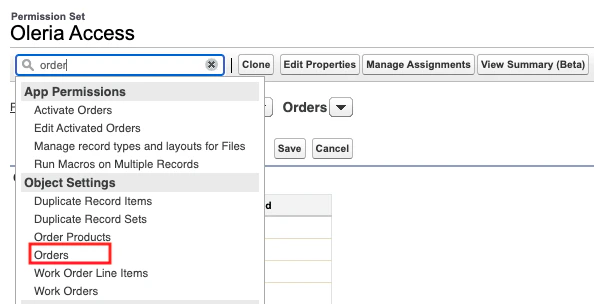
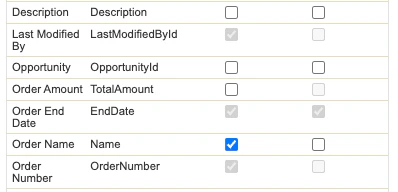
Skip the Orders step if the Orders object does not exist.
Configure Event Monitoring
Oleria recommends enabling and configuring Event Monitoring (Shield) in your Salesforce instance. This captures all user activity and provides insights into it. Without Event Monitoring (Shield), user activity insights are limited to login and logout activities.1
Enable Event Manager storage and streaming
Select Set up -> search Event Manager -> enable Storage and Streaming for all events.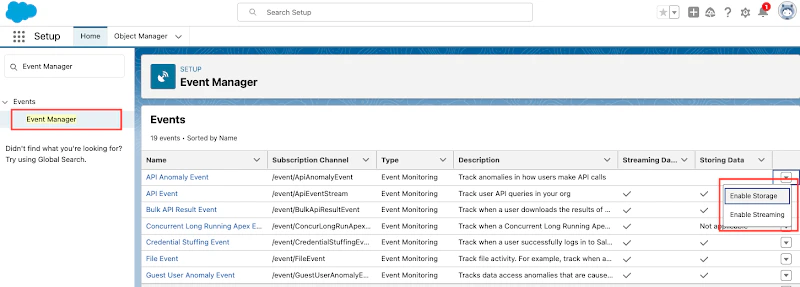
Connect Salesforce to Oleria
1
Open the integration
Go to your Oleria workspace, select Integrations -> select Salesforce.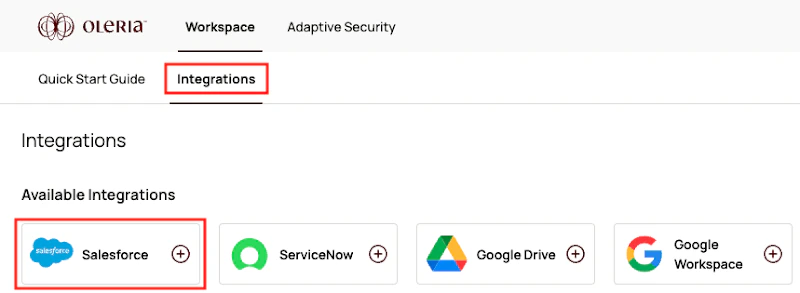
2
Authenticate
Enter your Salesforce URL in the Tenant URL field and select Authenticate.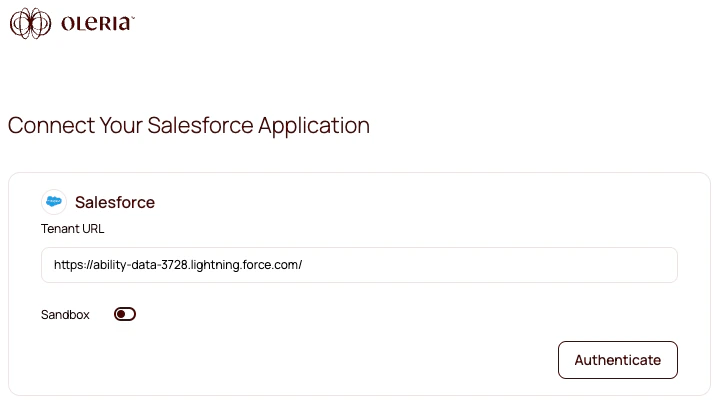
Verify the integration
Confirm the Salesforce instance appears on the Connected tab of your Oleria Integrations page with a status of Healthy. After the first sync completes, you can review the discovered users, groups, profiles, permission sets, object access, non-human identities, risks, and activity in your Oleria workspace.