1
Open Custom Access
Go to Governance -> Access Requests -> Custom Access, and select New custom access.
2
Name and describe it
Give the item a name and description. Employees see these in the request catalog.
3
Connect a webhook
Select the webhook that provisions this access, and add any parameters that should be sent on every request.
4
Configure the request form
Define the fields employees fill in when they request this access. Fields can be required or optional.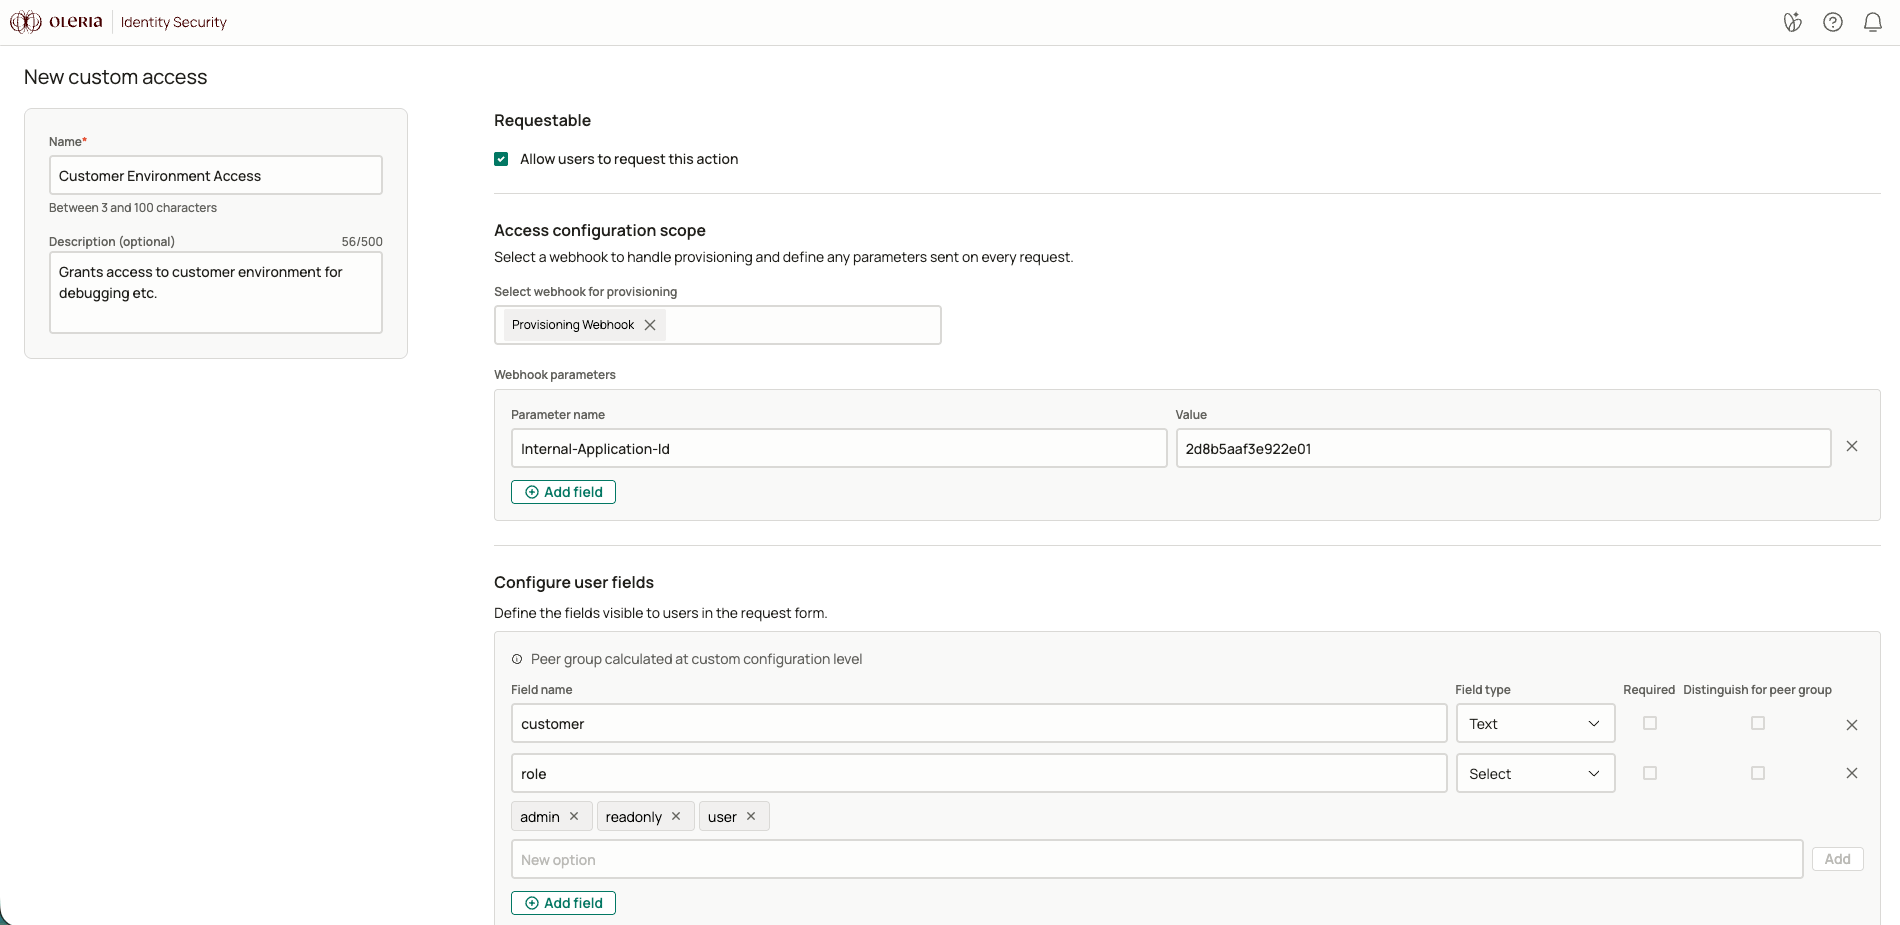
5
Set duration, expiration, and justification
Choose whether access is permanent or time-limited, how long a pending request can stay open before it expires, and whether a business justification is required.
6
Assign an approval chain
Select the approval chain that should govern requests for this item, and choose whether to notify approvers by email or Slack.
Custom Access is provisioned and revoked through the webhook you configure. If the webhook doesn’t return a successful response, the request or revocation fails without affecting other pending requests.
Requesting Custom Access
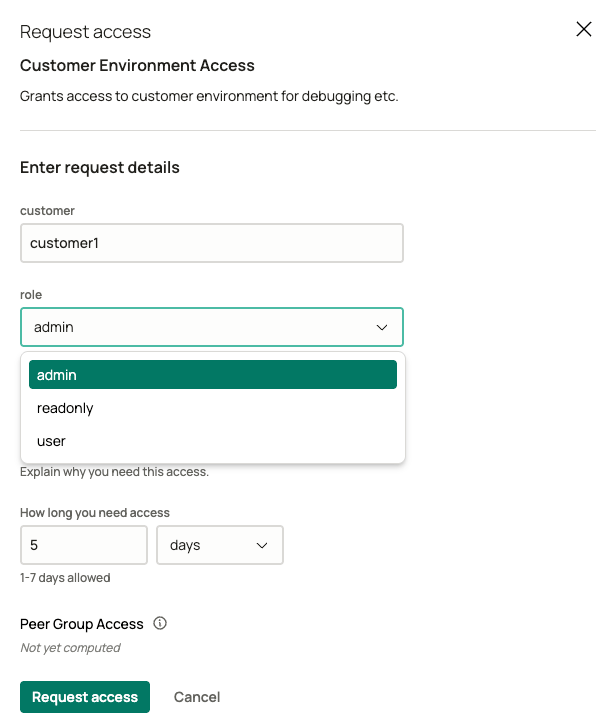
Employees request Custom Access the same way they request application access, from the Custom Access tab in the Governance App catalog. The request form shows whatever fields you’ve configured instead of an application and role, and submissions are tracked separately under My Custom Access Requests.