

- Joiner: HR-Triggered - Oleria polls your connected HR system periodically and processes employees whose start date is approaching. Best suited for planned hires where you want accounts and access ready before the employee’s first day.
- Joiner: Manual Entry - An admin enters employees individually or uploads a CSV file to start onboarding immediately or at a scheduled time. Each employee must already exist in Oleria as an employee record from your employee source of truth. Best suited for onboarding employees on demand, outside the normal HR detection window.
Prerequisites
- Admin, Governance Operator, or Identity Lifecycle Operator role on the Oleria platform
- An HRIS or IdP selected as your employee source of truth under Settings -> Employee Information - see Integrations.
- Connected identity providers and applications for account provisioning
- Access Bundles defined to determine which access is granted to joiners
Creating a joiner lifecycle
Navigate to Employee Lifecycle -> Lifecycles and select Create lifecycle to open the template picker. Choose Joiner: HR-Triggered or Joiner: Manual Entry to begin the setup wizard.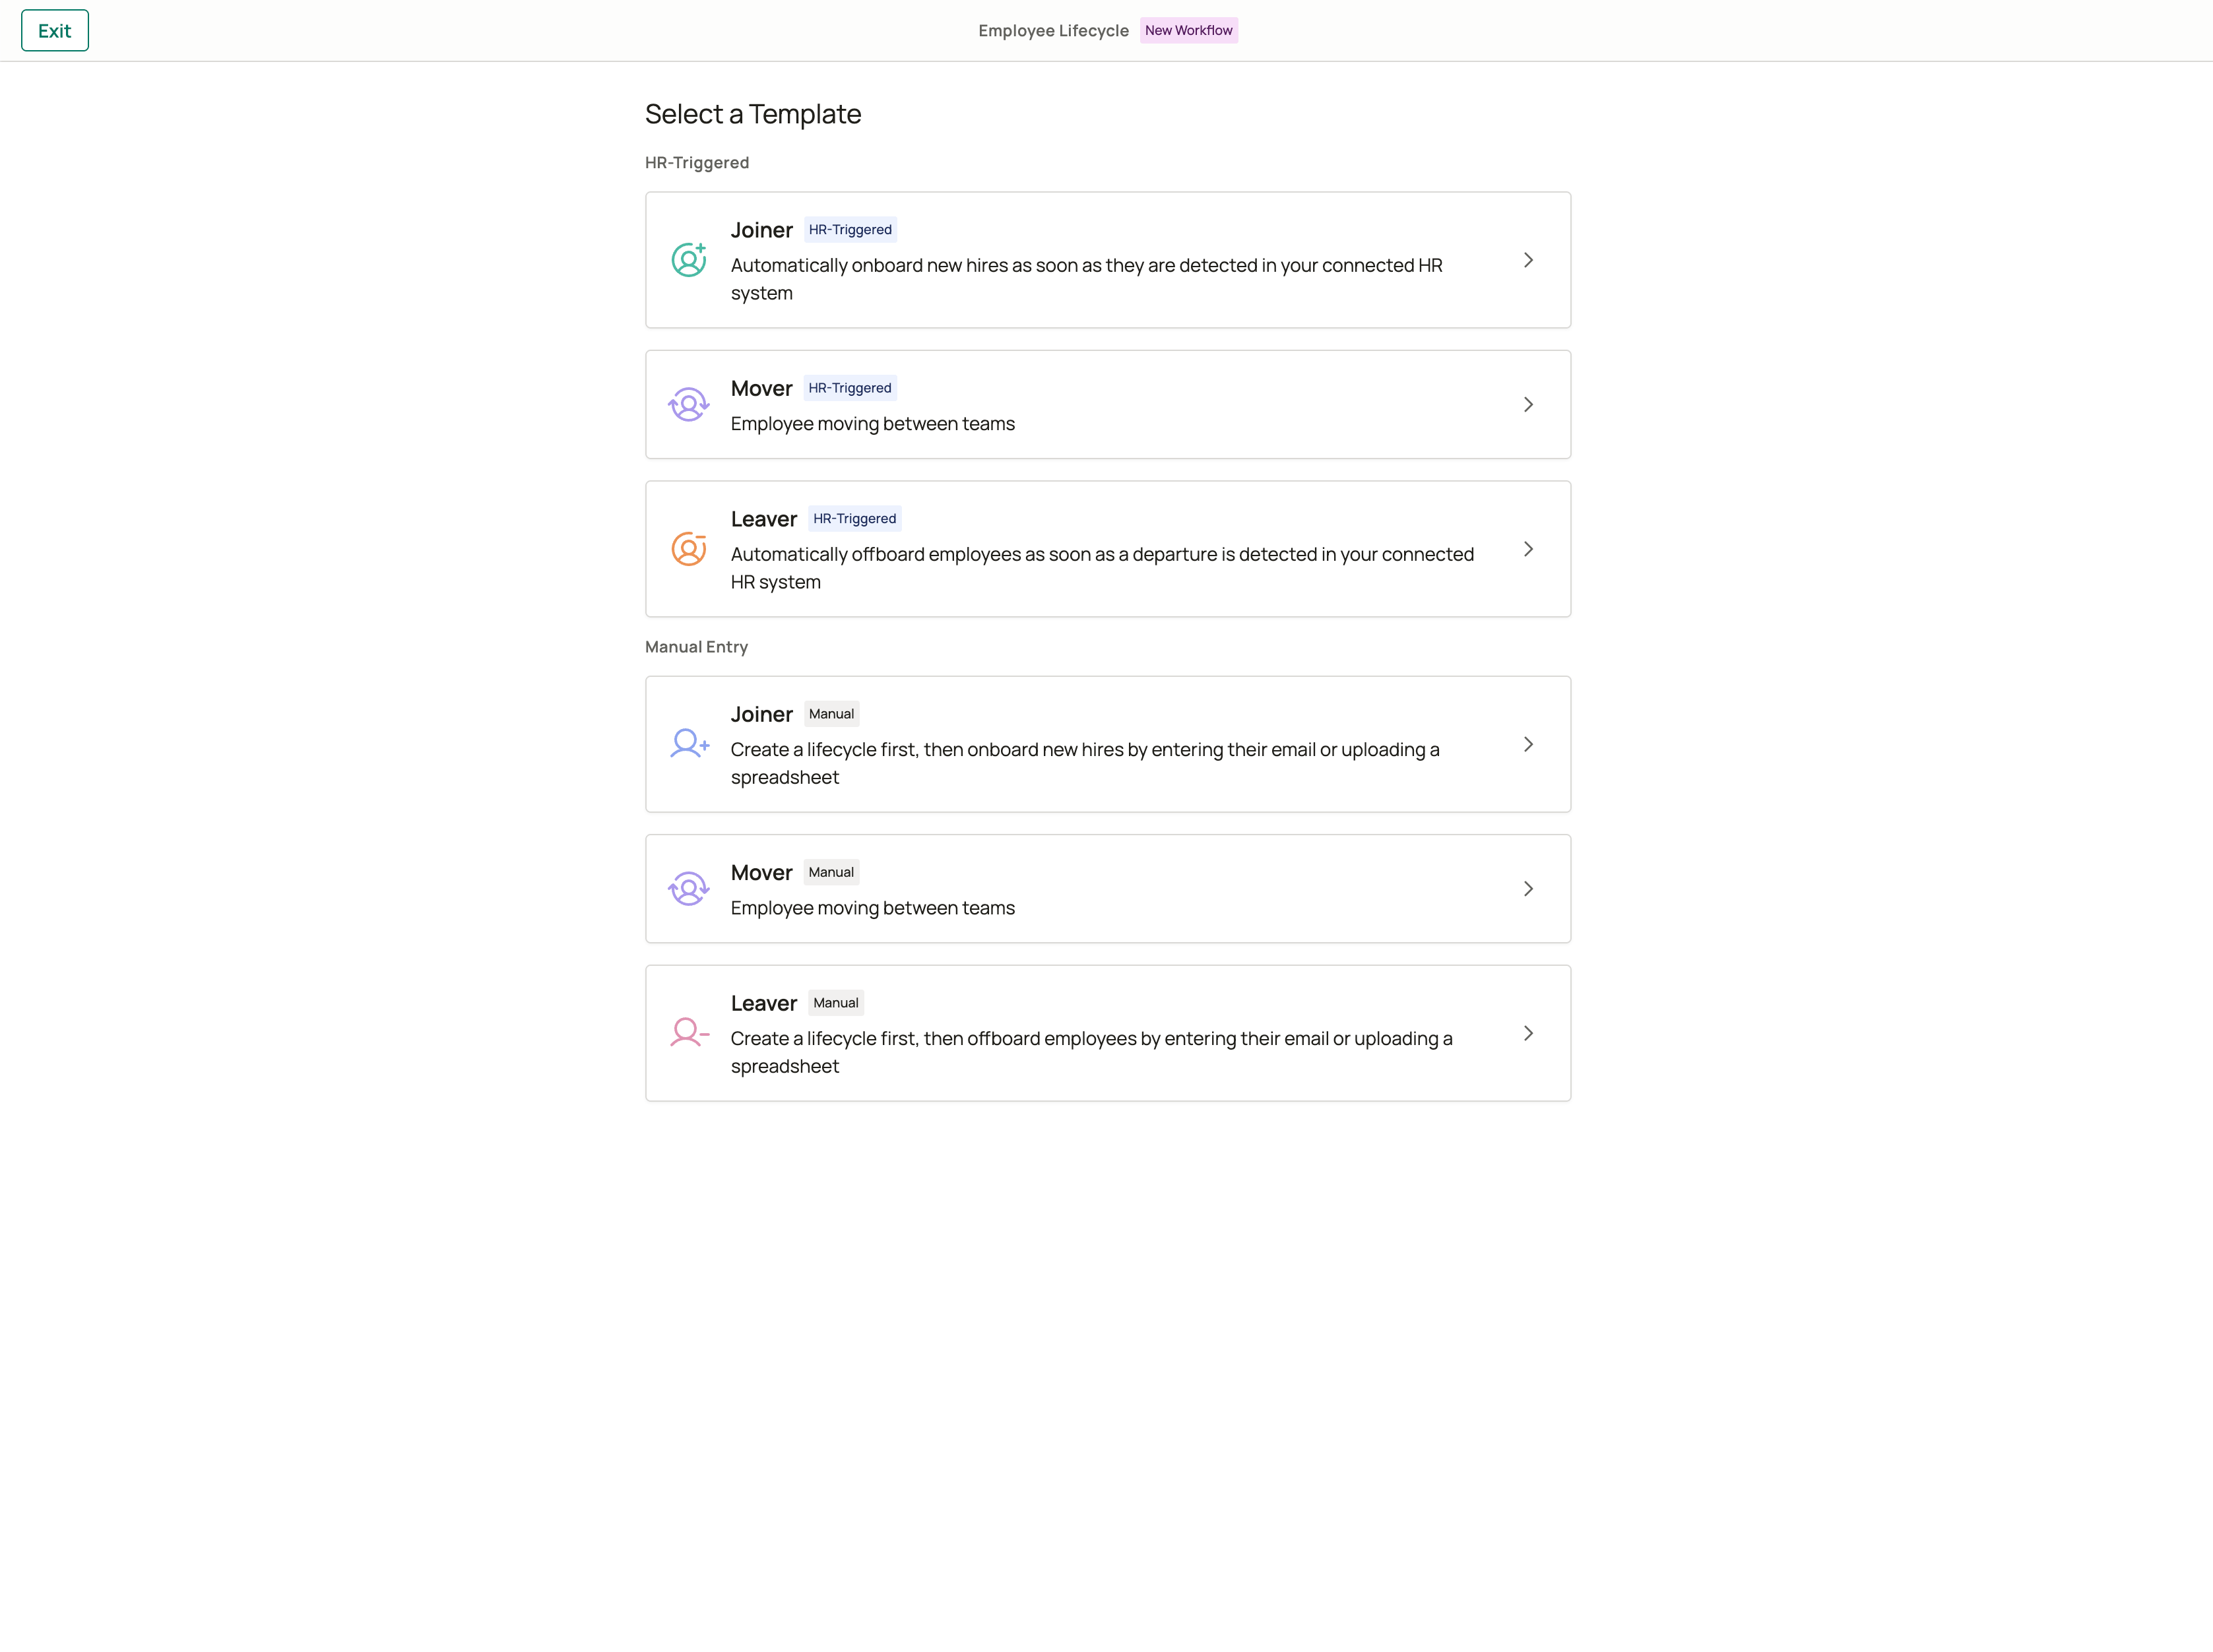
- HR-Triggered
- Manual Entry
The HR-Triggered lifecycle monitors your connected HR system and processes new hires automatically. After you publish the lifecycle, Oleria checks your HR data periodically and enrolls employees whose start date is approaching.
1
Review the schedule trigger
The schedule trigger is pre-configured. Oleria checks your connected HR system periodically to detect employees with upcoming start dates. Provisioning begins at the times you set in the next step.
Configure your HR system connection under Settings before creating an HR-Triggered lifecycle.
2
Configure provisioning settings
This step controls when accounts are created, when access is assigned, and what notifications are sent.Create a ticketCheck Create a ticket to track joiner actions to open a ticket in your connected ticketing system when each new hire is processed. If no ticketing system is connected, this option is disabled. Connect one under Settings.Create identities before start dateOleria creates the new hire’s accounts in your connected identity providers before their first day. Set how many days in advance to run this step (2-30 days before the start date) and the time of day. Building in lead time ensures accounts are fully propagated by the time access is assigned.Assign accessOleria grants application entitlements and group memberships based on Access Bundles after accounts are created. Set how many days before the start date to run this step, and the time of day. Enter 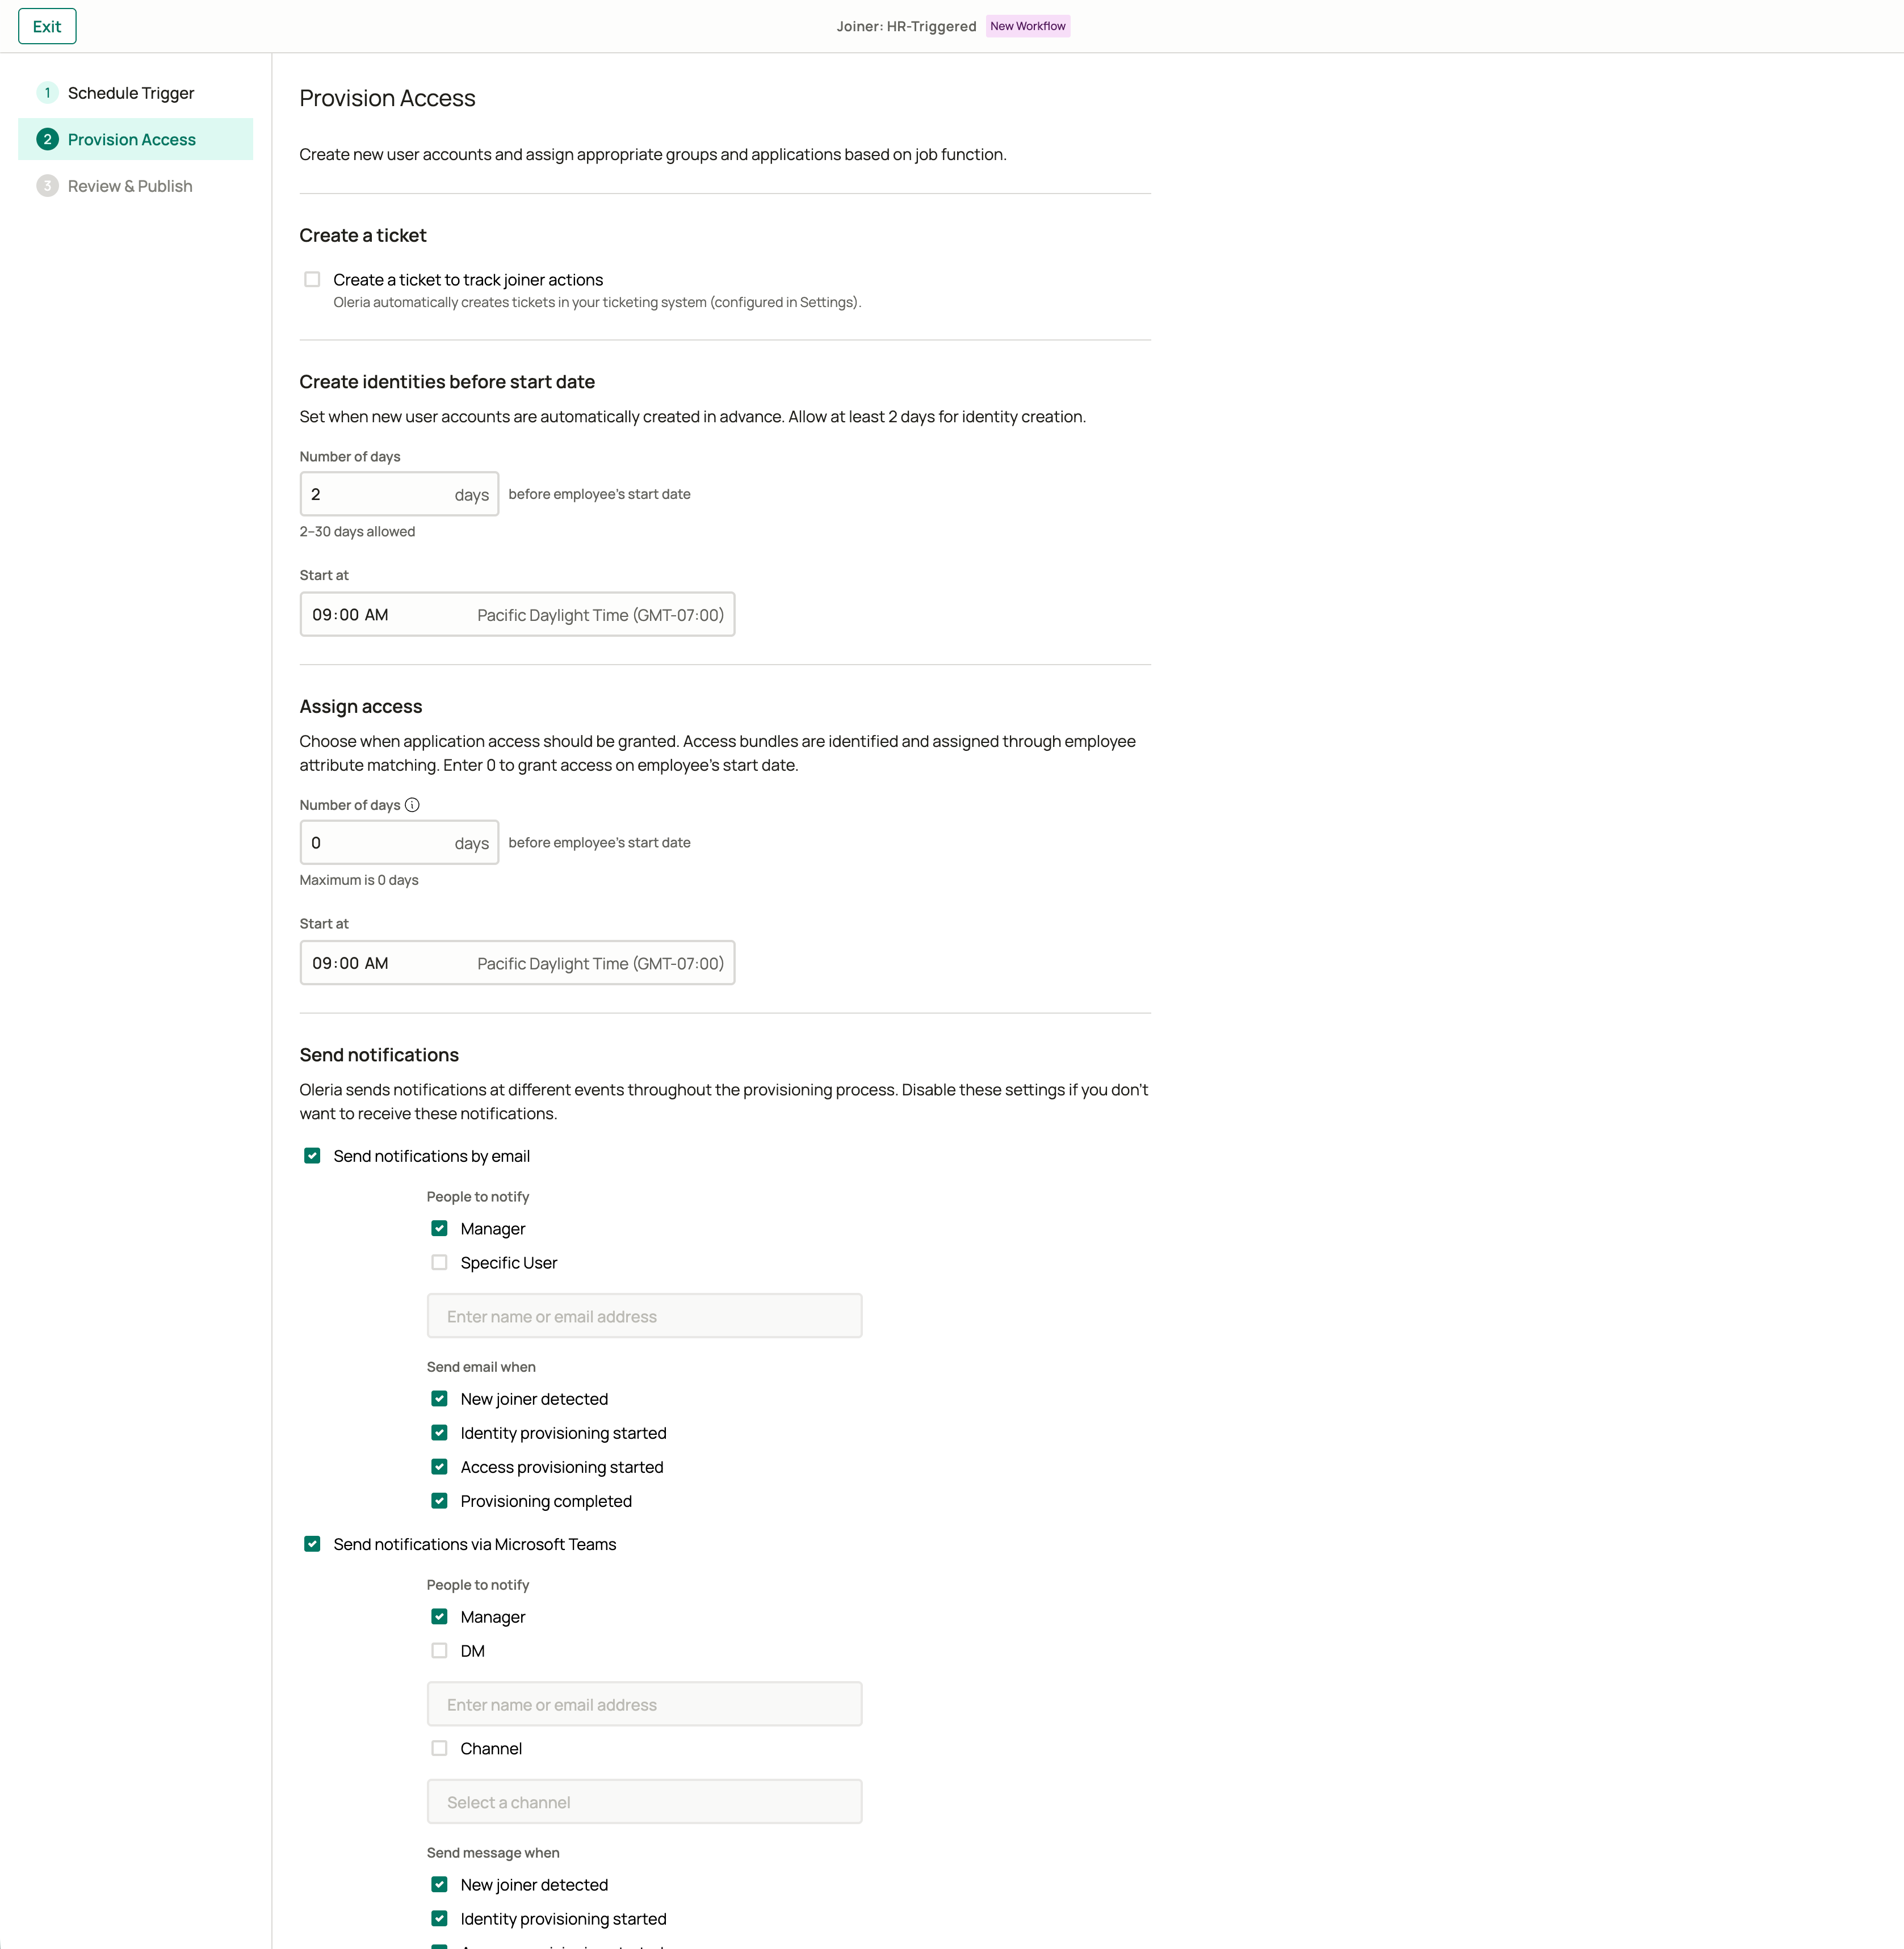
0 to grant access on the first day itself.Because accounts must be fully created before access can be granted, this step must run at least 2 days after account creation. For example: if accounts are created 7 days before the start date, access can be assigned up to 5 days before the start date.Send notificationsConfigure email and messaging notifications (Slack or Teams if connected) for the following events:Choose who receives each notification - the employee’s manager, a specific user, or a messaging channel.
3
Review and publish
On the summary page, review your full configuration. Enter a lifecycle name (required) and an optional description.Enable Dry-run mode to preview what access changes Oleria would make without applying them. Disable dry-run when you are ready for the lifecycle to take effect on future runs. Previous simulated runs are not retroactively applied.Select Publish to activate the lifecycle. Once published, Oleria runs on schedule and enrolls employees automatically.
Only one lifecycle of each type can be active at a time. Lifecycles cannot be deleted - if you need to stop a lifecycle, disable it from the lifecycle details page.
Running a Manual Entry lifecycle
After publishing a Manual Entry lifecycle, onboard employees by navigating to the lifecycle details page and selecting Add employees.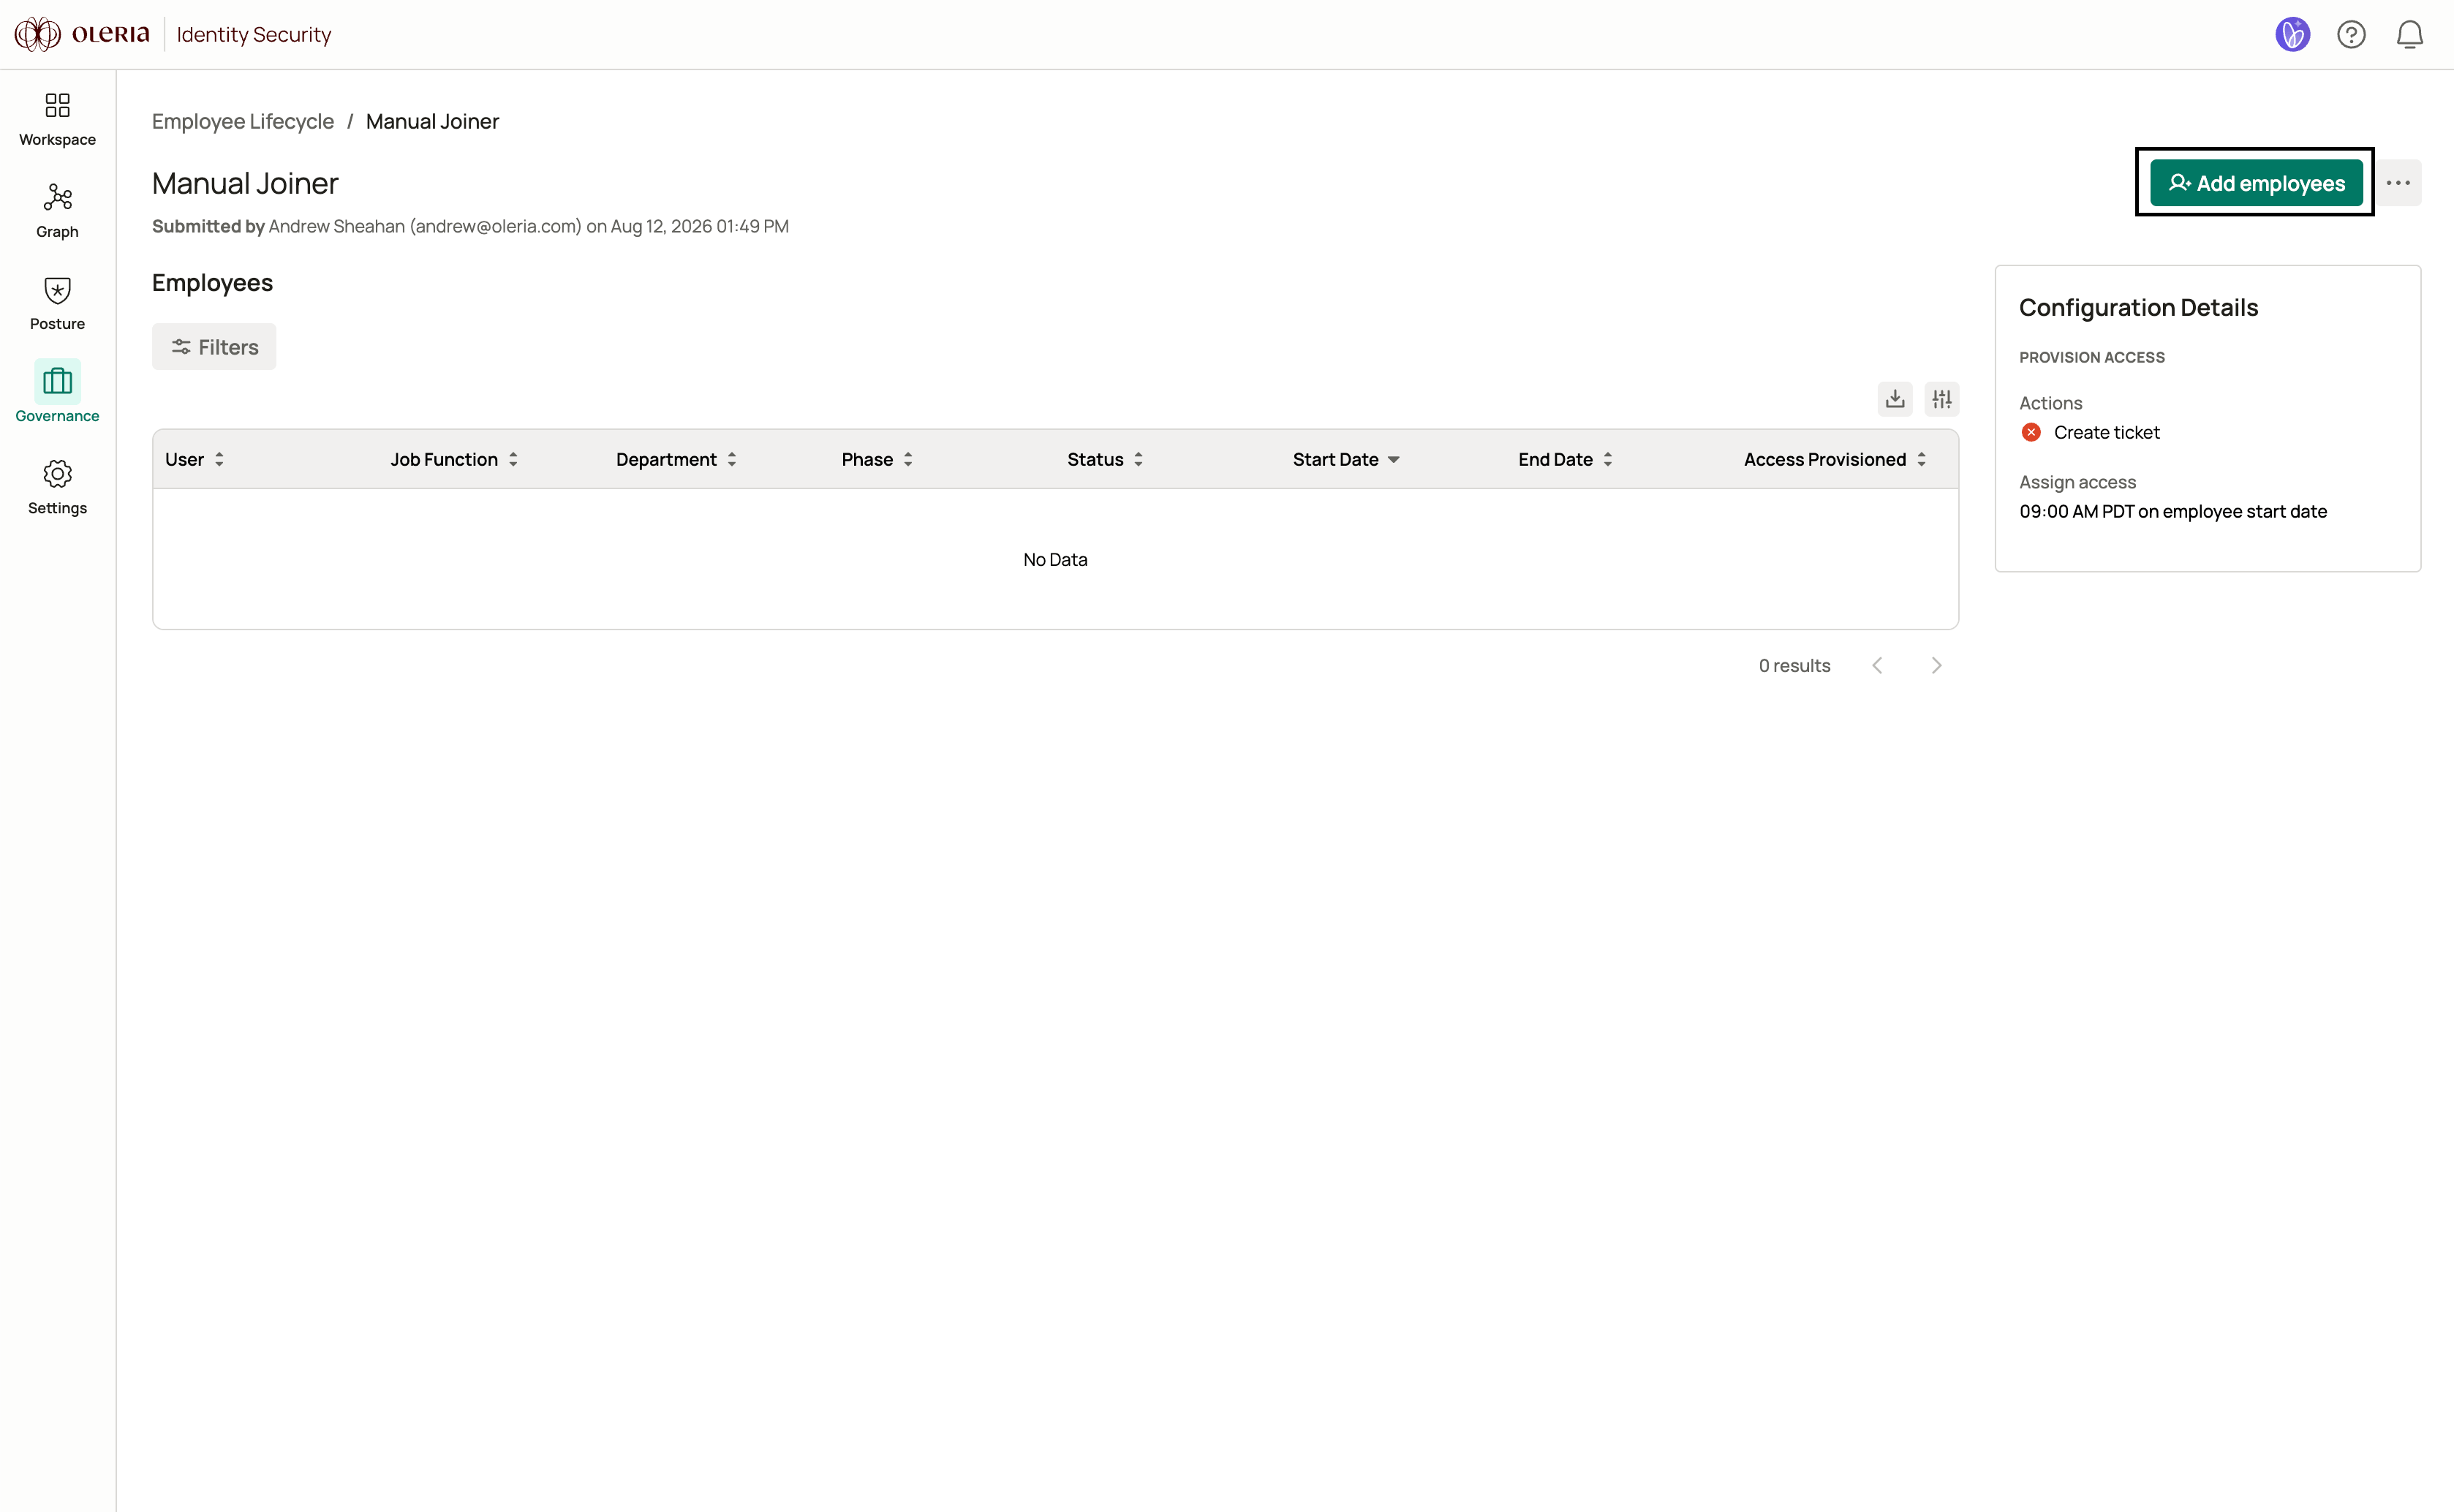
1
Choose how to add employees
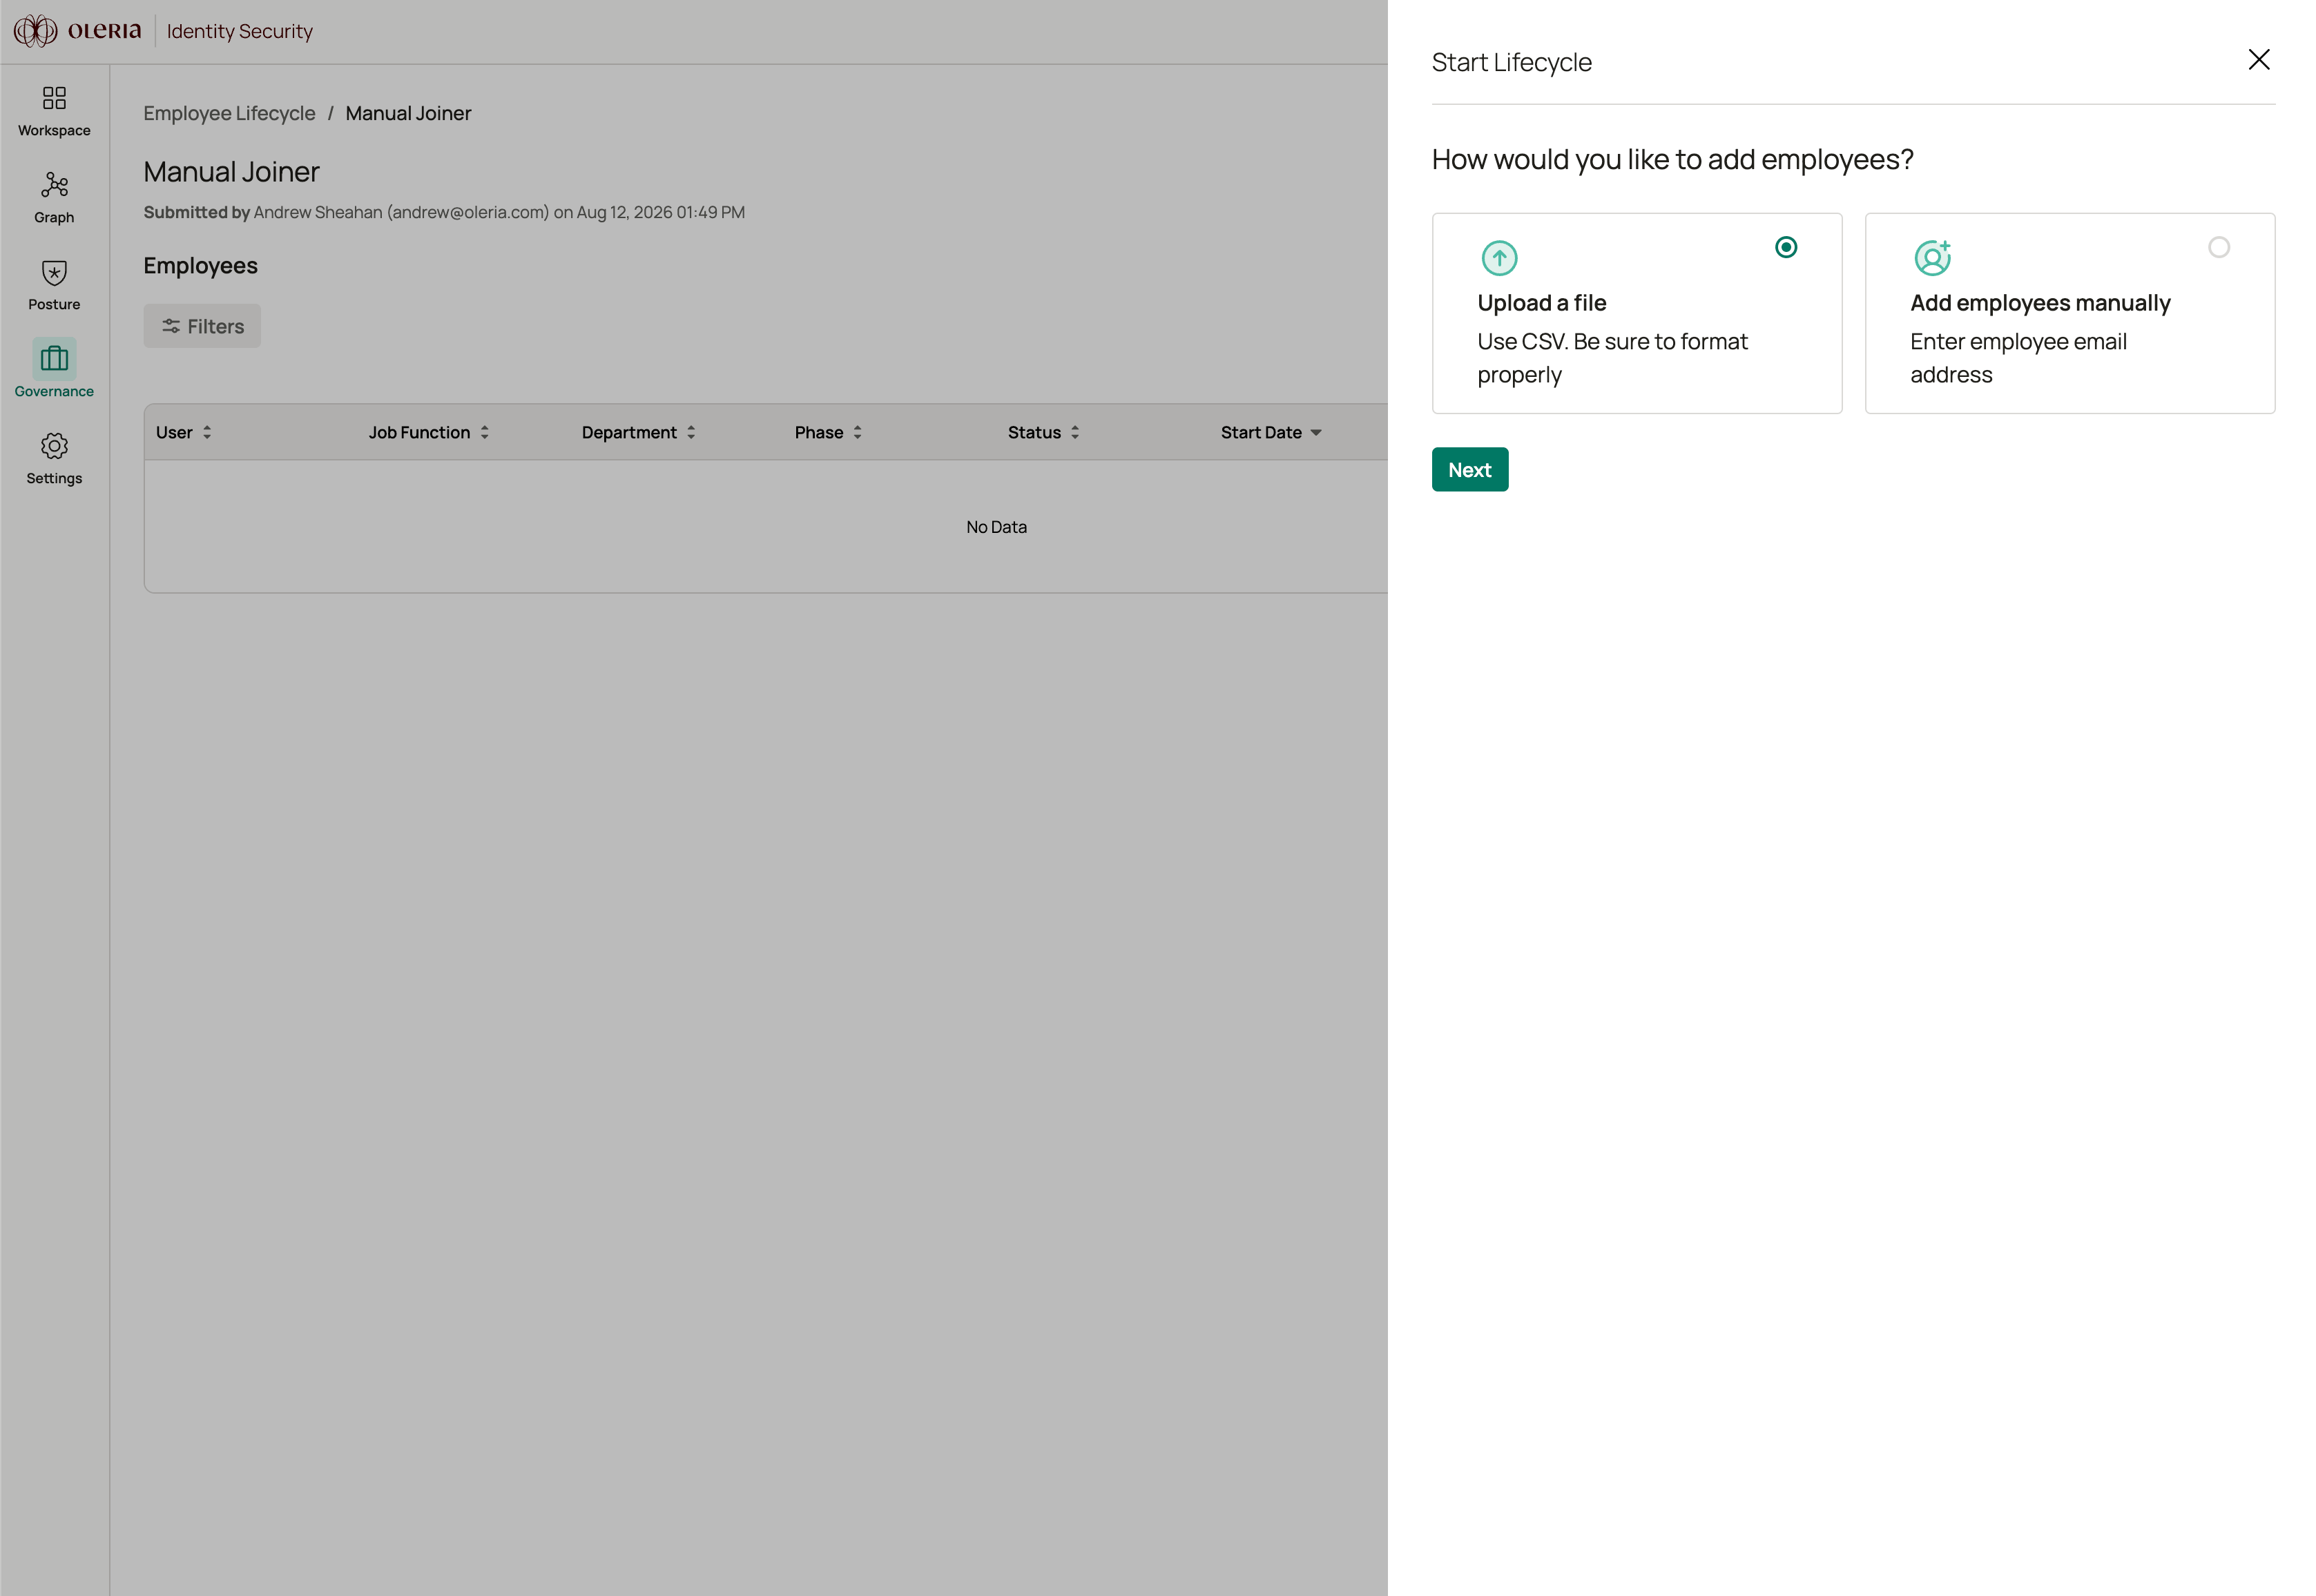
Select one of two methods:
- Add employees manually - enter up to 10 email addresses using the employee search field
-
Upload a file - upload a CSV file with up to 500 email addresses
2
Add employees
If adding manually: Use the search field to find and select each employee by name or email address. Employees are sourced from your employee source of truth. You can add up to 10 employees per run.If uploading a CSV file: Prepare a spreadsheet with a single column labeled Email containing each employee’s work email address. Export it as a
.csv file (maximum 1 MB and 500 rows). Drag and drop the file onto the upload area or select it using the file picker.Then choose when to start onboarding:- Start now - actions begin as soon as you submit
- Schedule for later - pick a date, time, and timezone up to 90 days in the future
Scheduled onboarding may begin within two hours of the selected time rather than exactly at it.
3
Review and submit
The review step shows how many employees matched records in Oleria and when onboarding is set to begin. Any email addresses with no matching employee record are listed so you can verify them before proceeding.Select Submit to start the lifecycle run. Employees may take up to a minute to appear in the lifecycle details page.
Joiner event details
Each employee processed by a joiner lifecycle appears as an individual event. Select an employee’s name from the lifecycle details page to open their event details page.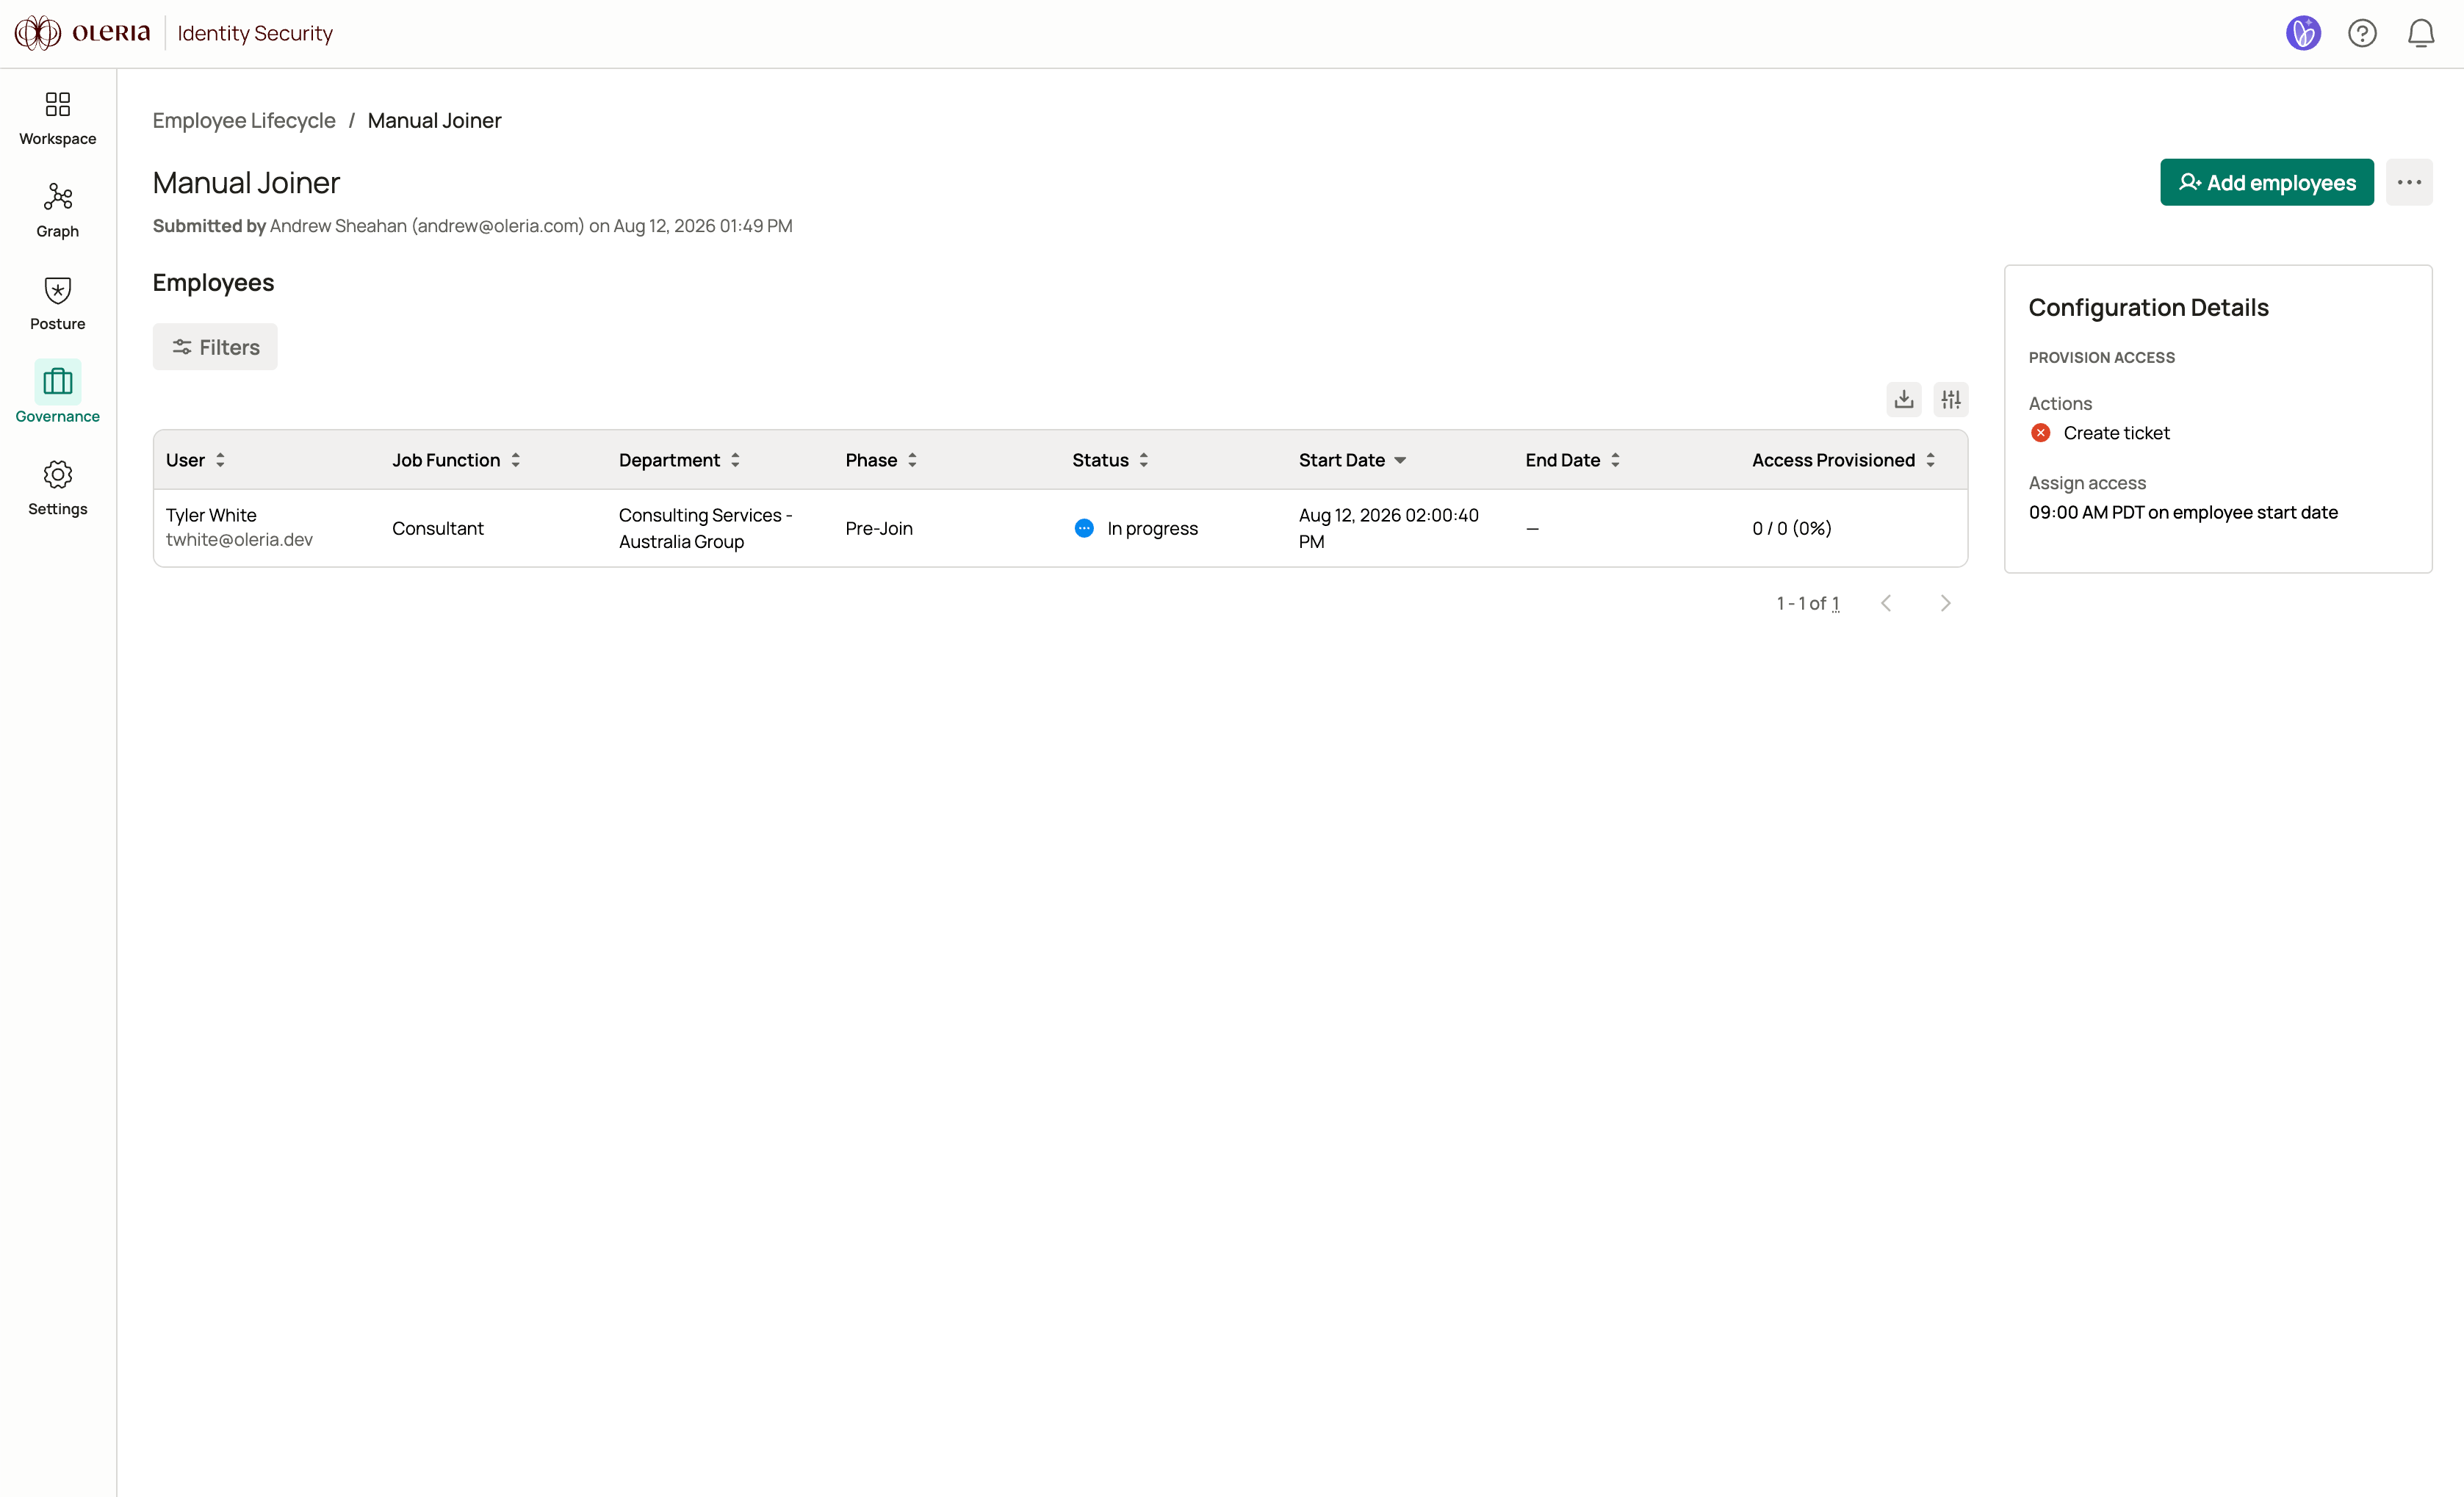
- User details - name, User ID, Employee No., department, manager, job title, and company code
- Employee start date - the start date sourced from your HR system, or for Manual Entry, the onboarding start time chosen when the employee was added
- Current phase - the employee’s position in the lifecycle: Pre-Join, Create Accounts, or Assign Access
- Access provisioned - the count of access entries applied out of the total identified, shown as a percentage
- Access schedule card - when provisioning actions are scheduled to run or have already run, including the Create identities and Assign access times; an edit option is available during the Pre-Join phase
- Ticket - a link to the associated ticket if ticketing is configured
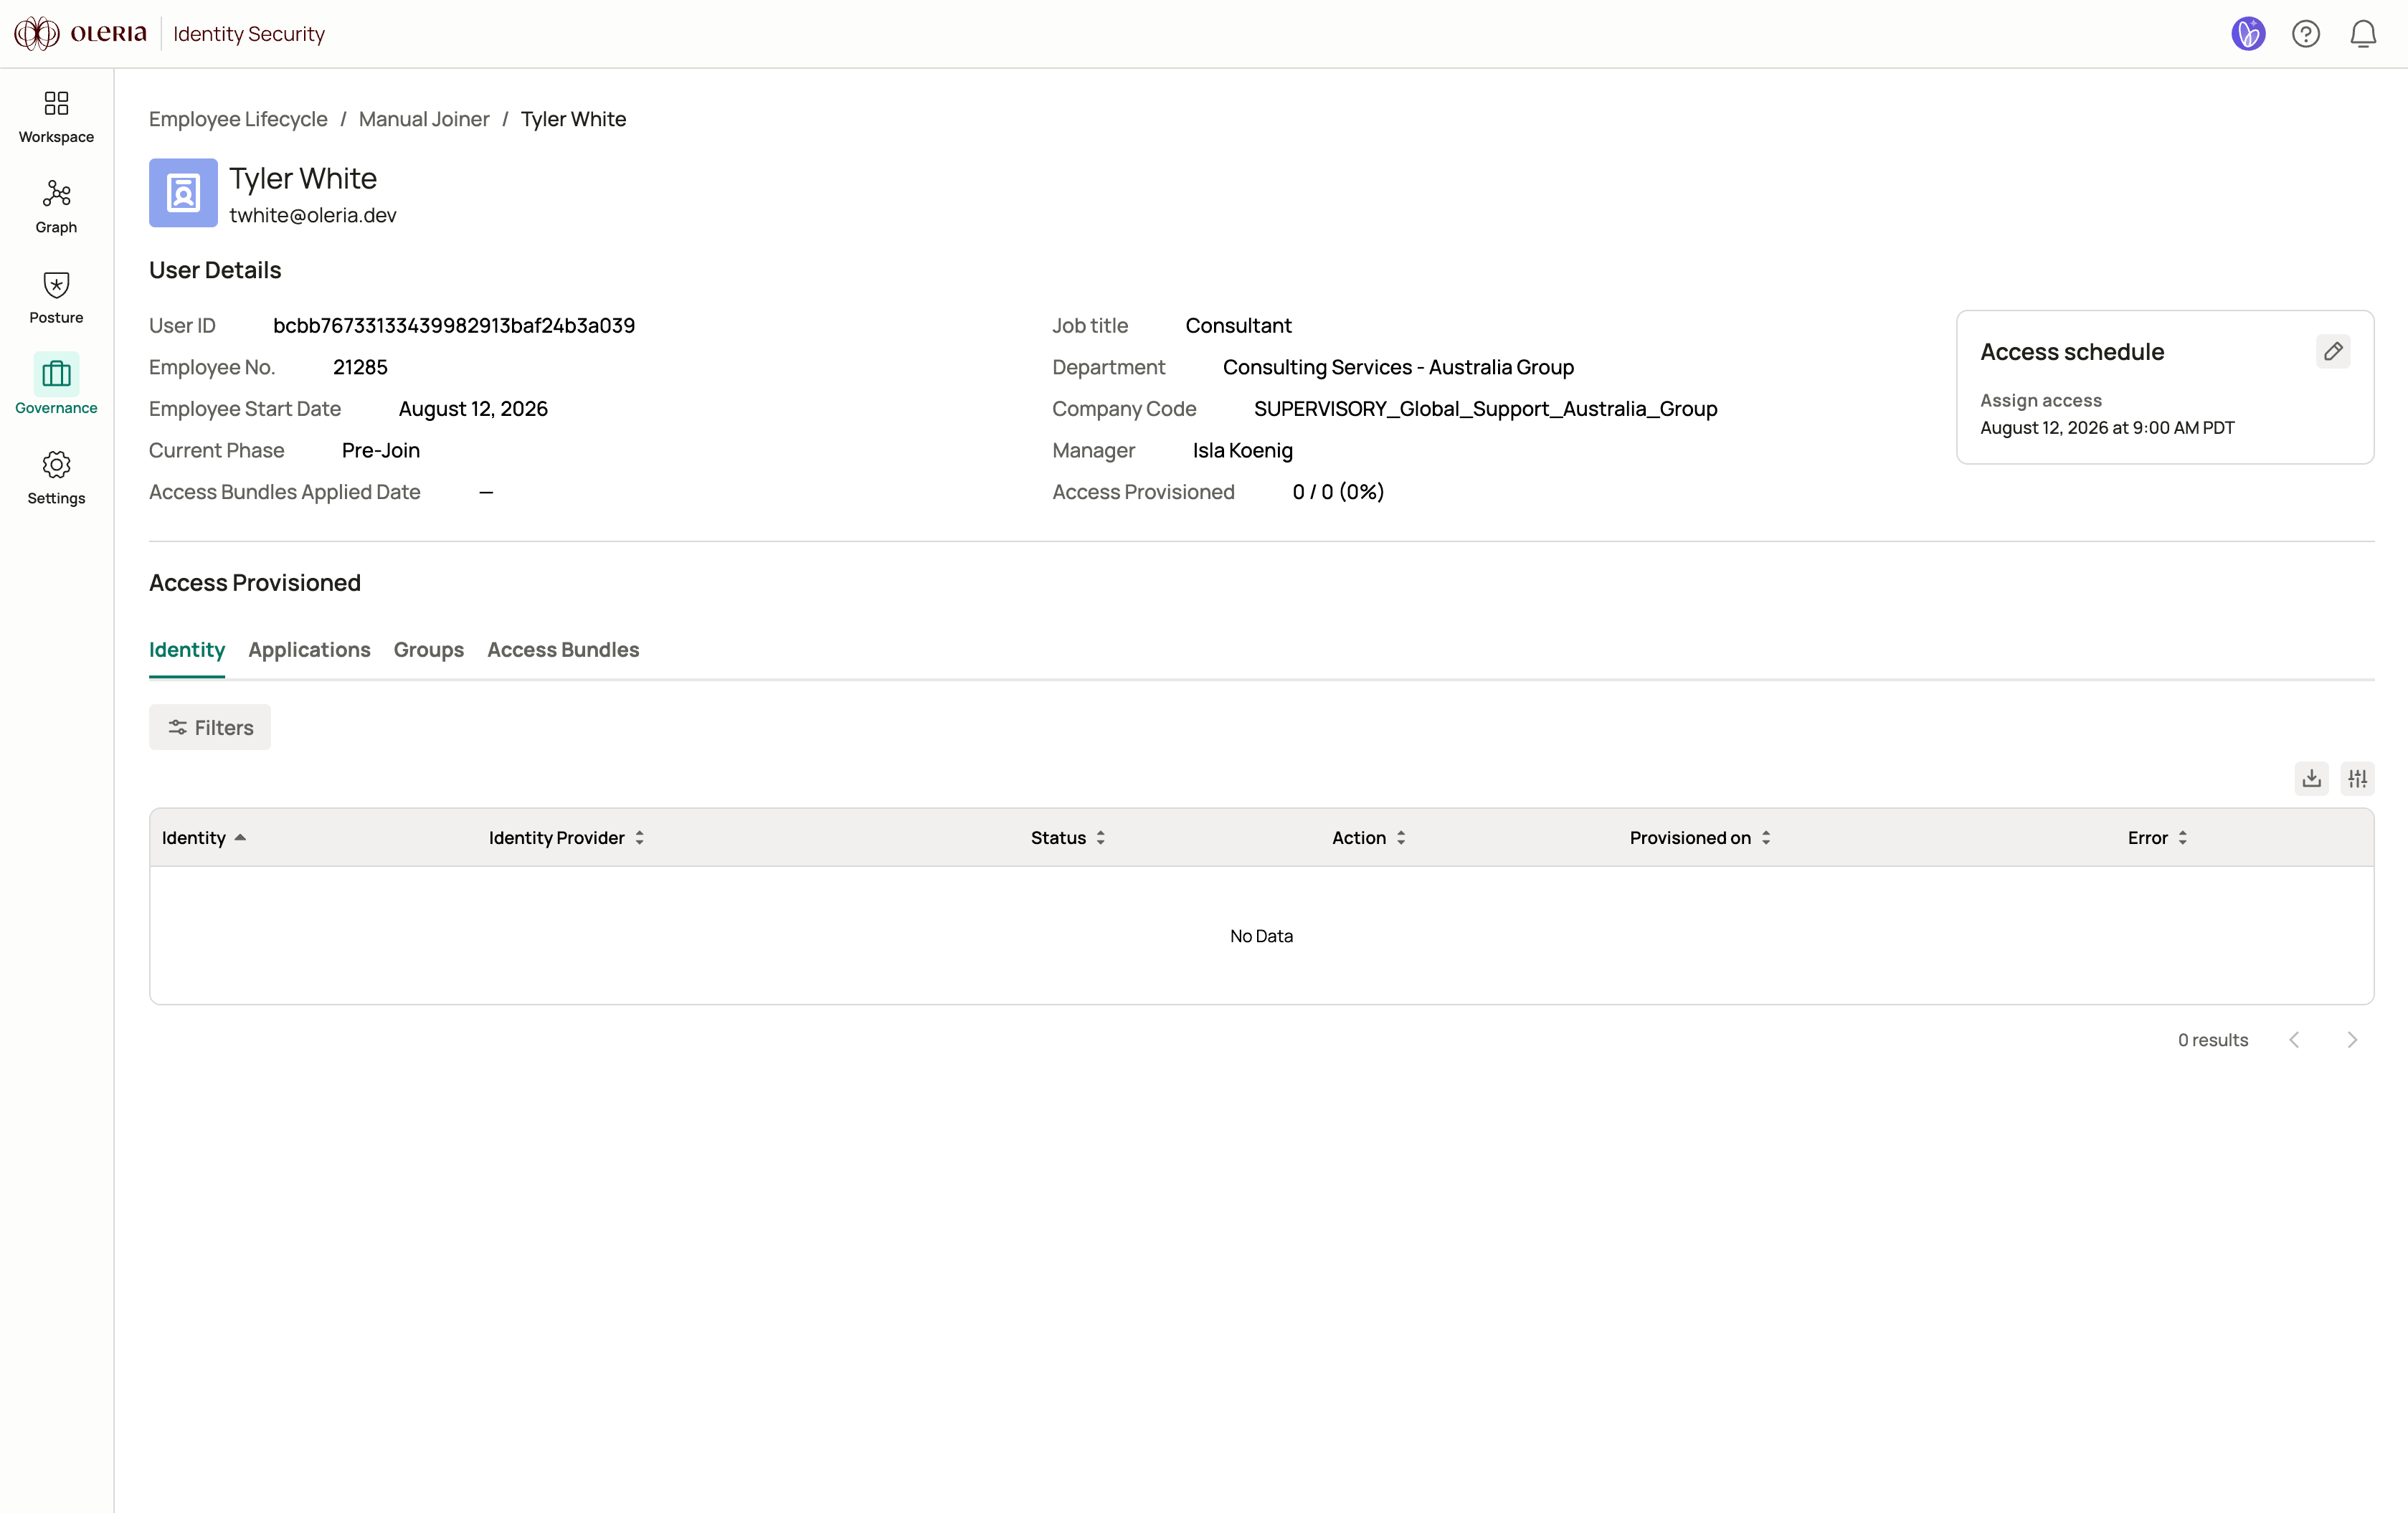
- Identity - accounts across connected identity providers, with status, action type, completion time, and any errors
- Applications - application accounts with the same columns
- Groups - group memberships added with the same columns
- Access Bundles - the access bundles applied, with counts of identity providers, applications, and groups in each bundle
Lifecycle phase
Each joiner event moves through phases that reflect where it is in the onboarding process. The current phase appears on the event details page and in the lifecycle details table.Event status
Each joiner event also has a status that reflects the state of its actions. The status appears alongside the phase in the lifecycle details table and on the event details page.If a lifecycle is running in Dry-run mode, the event details page shows a Dry Run label alongside the access provisioned count. Actions appear to complete normally, but no access changes are applied.
Adjusting the access schedule
While a joiner event is in the Pre-Join phase, you can change when provisioning actions will run. The edit option is available until the end of the day after the employee’s start date; after that point the schedule is locked.1
Open the event details
Navigate to Employee Lifecycle -> select the joiner lifecycle -> select the employee’s name.
2
Edit the access schedule
Select the pencil icon in the Access schedule card to open the schedule editor.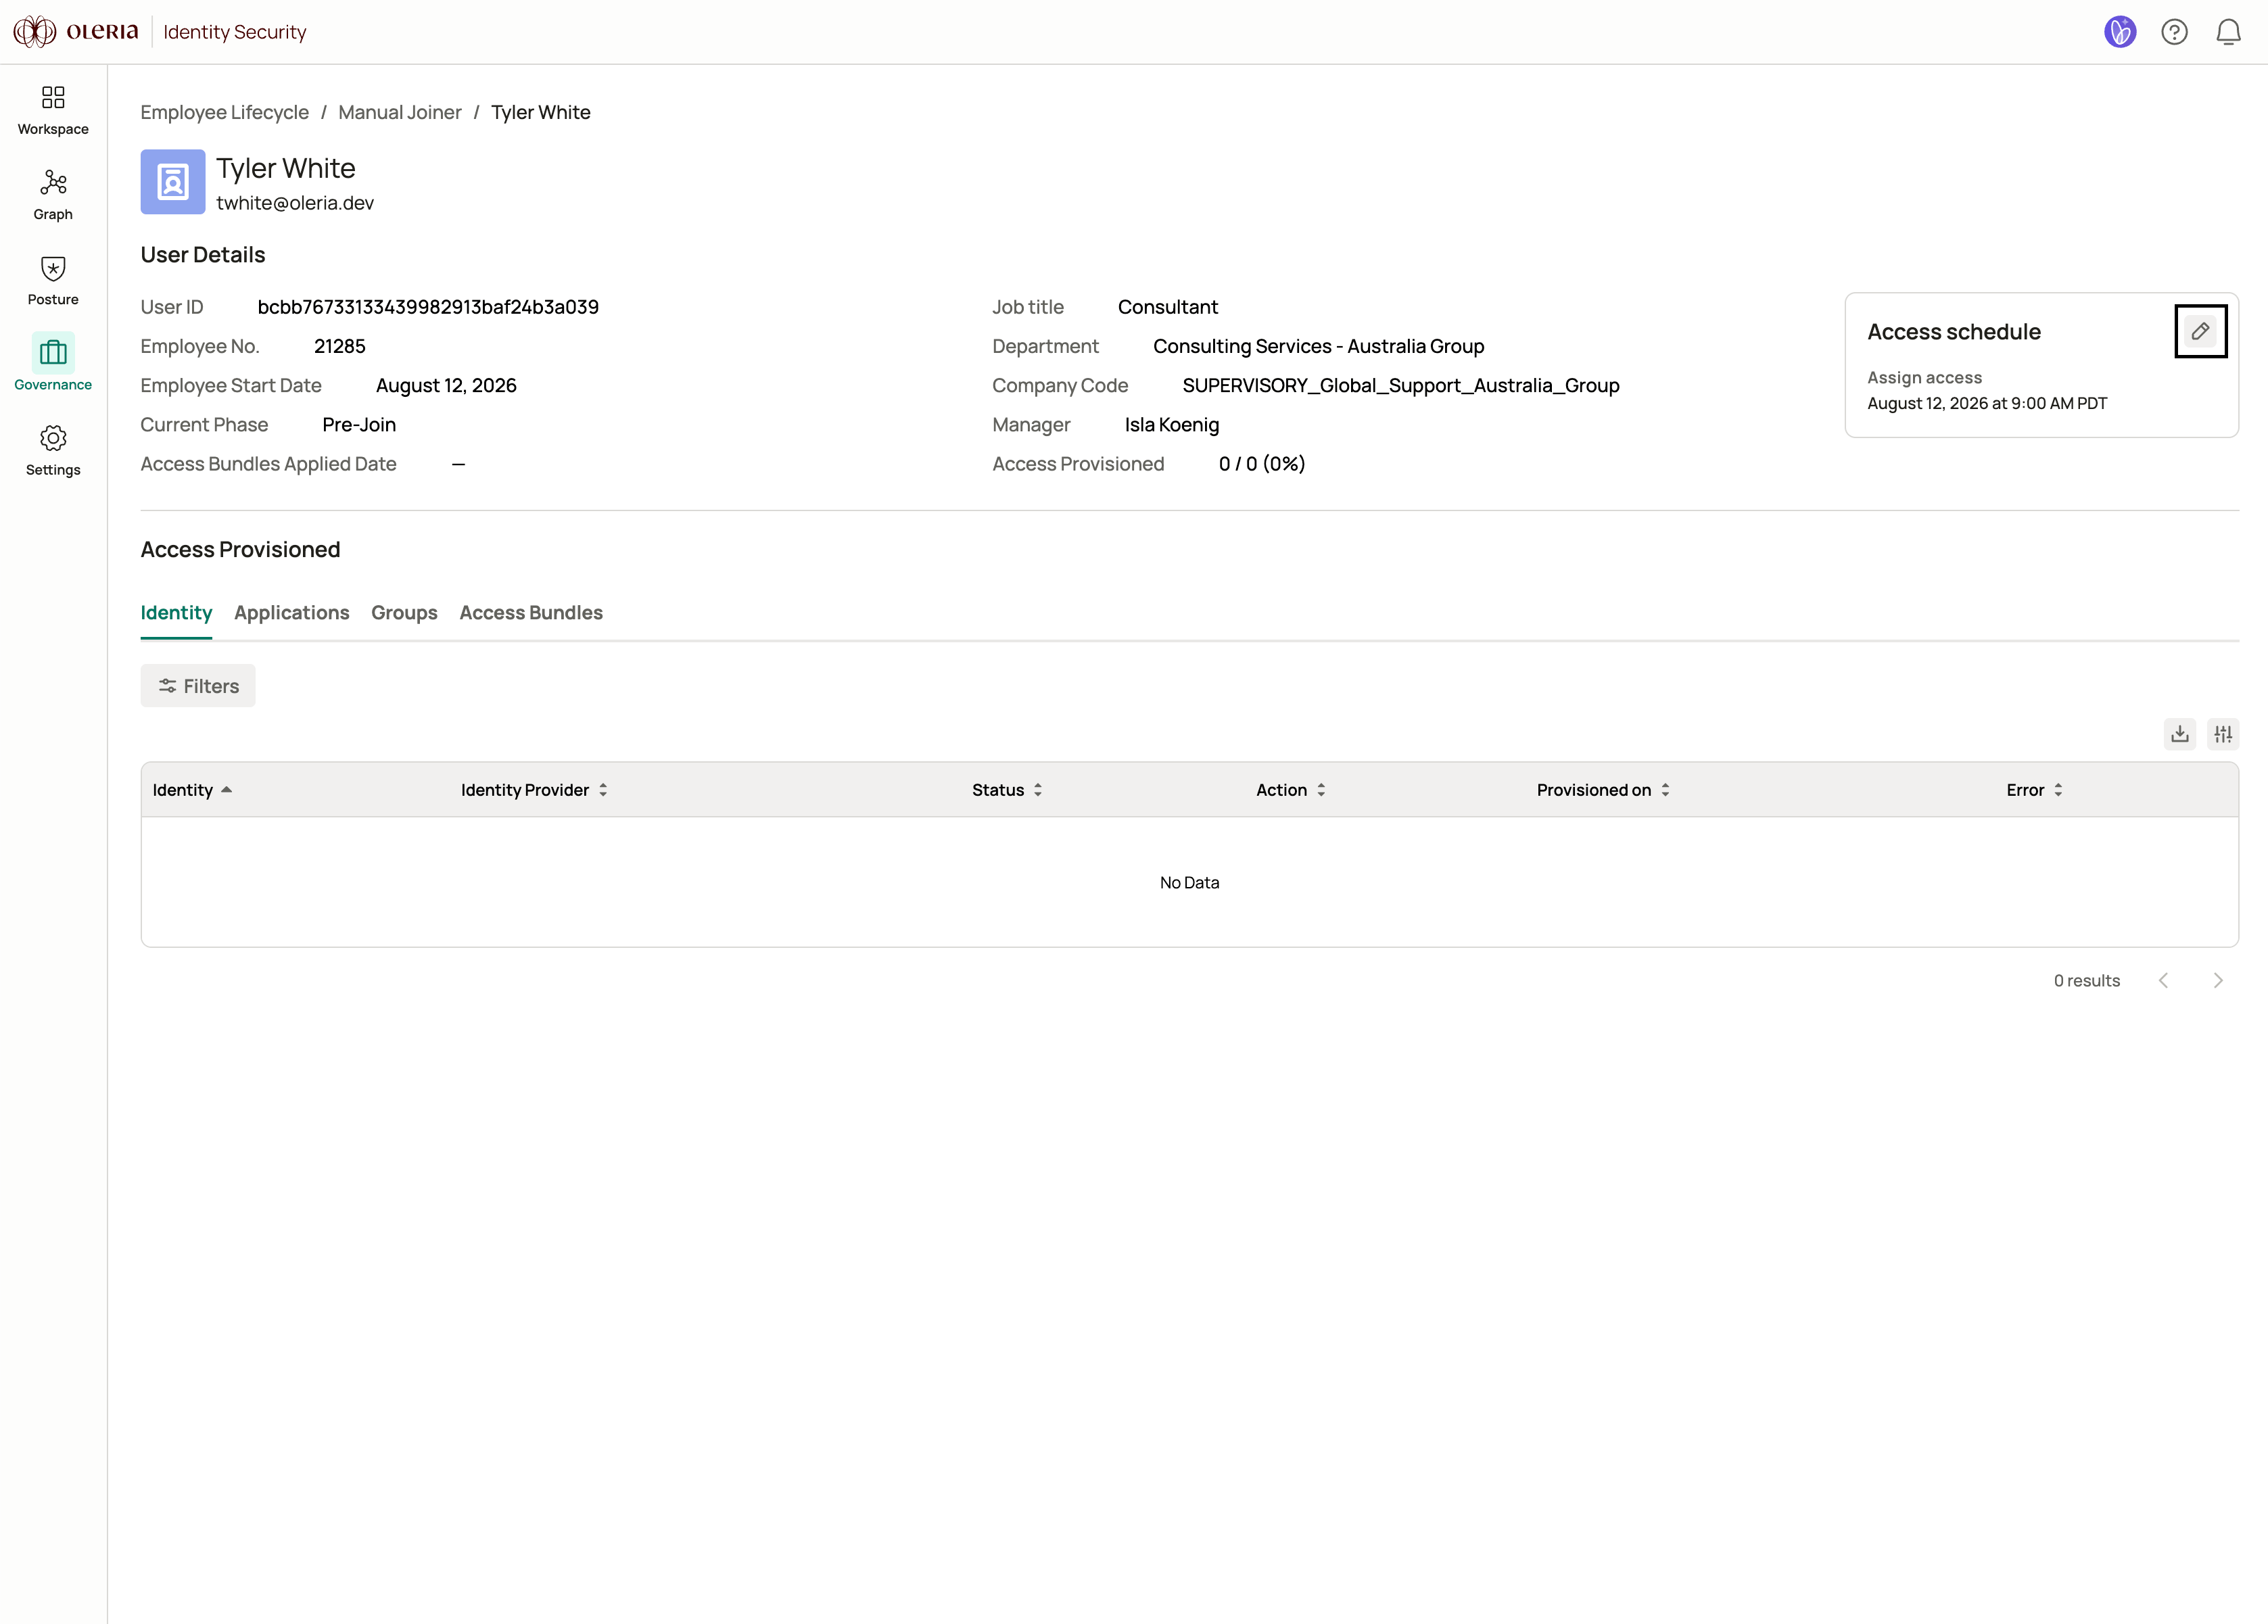
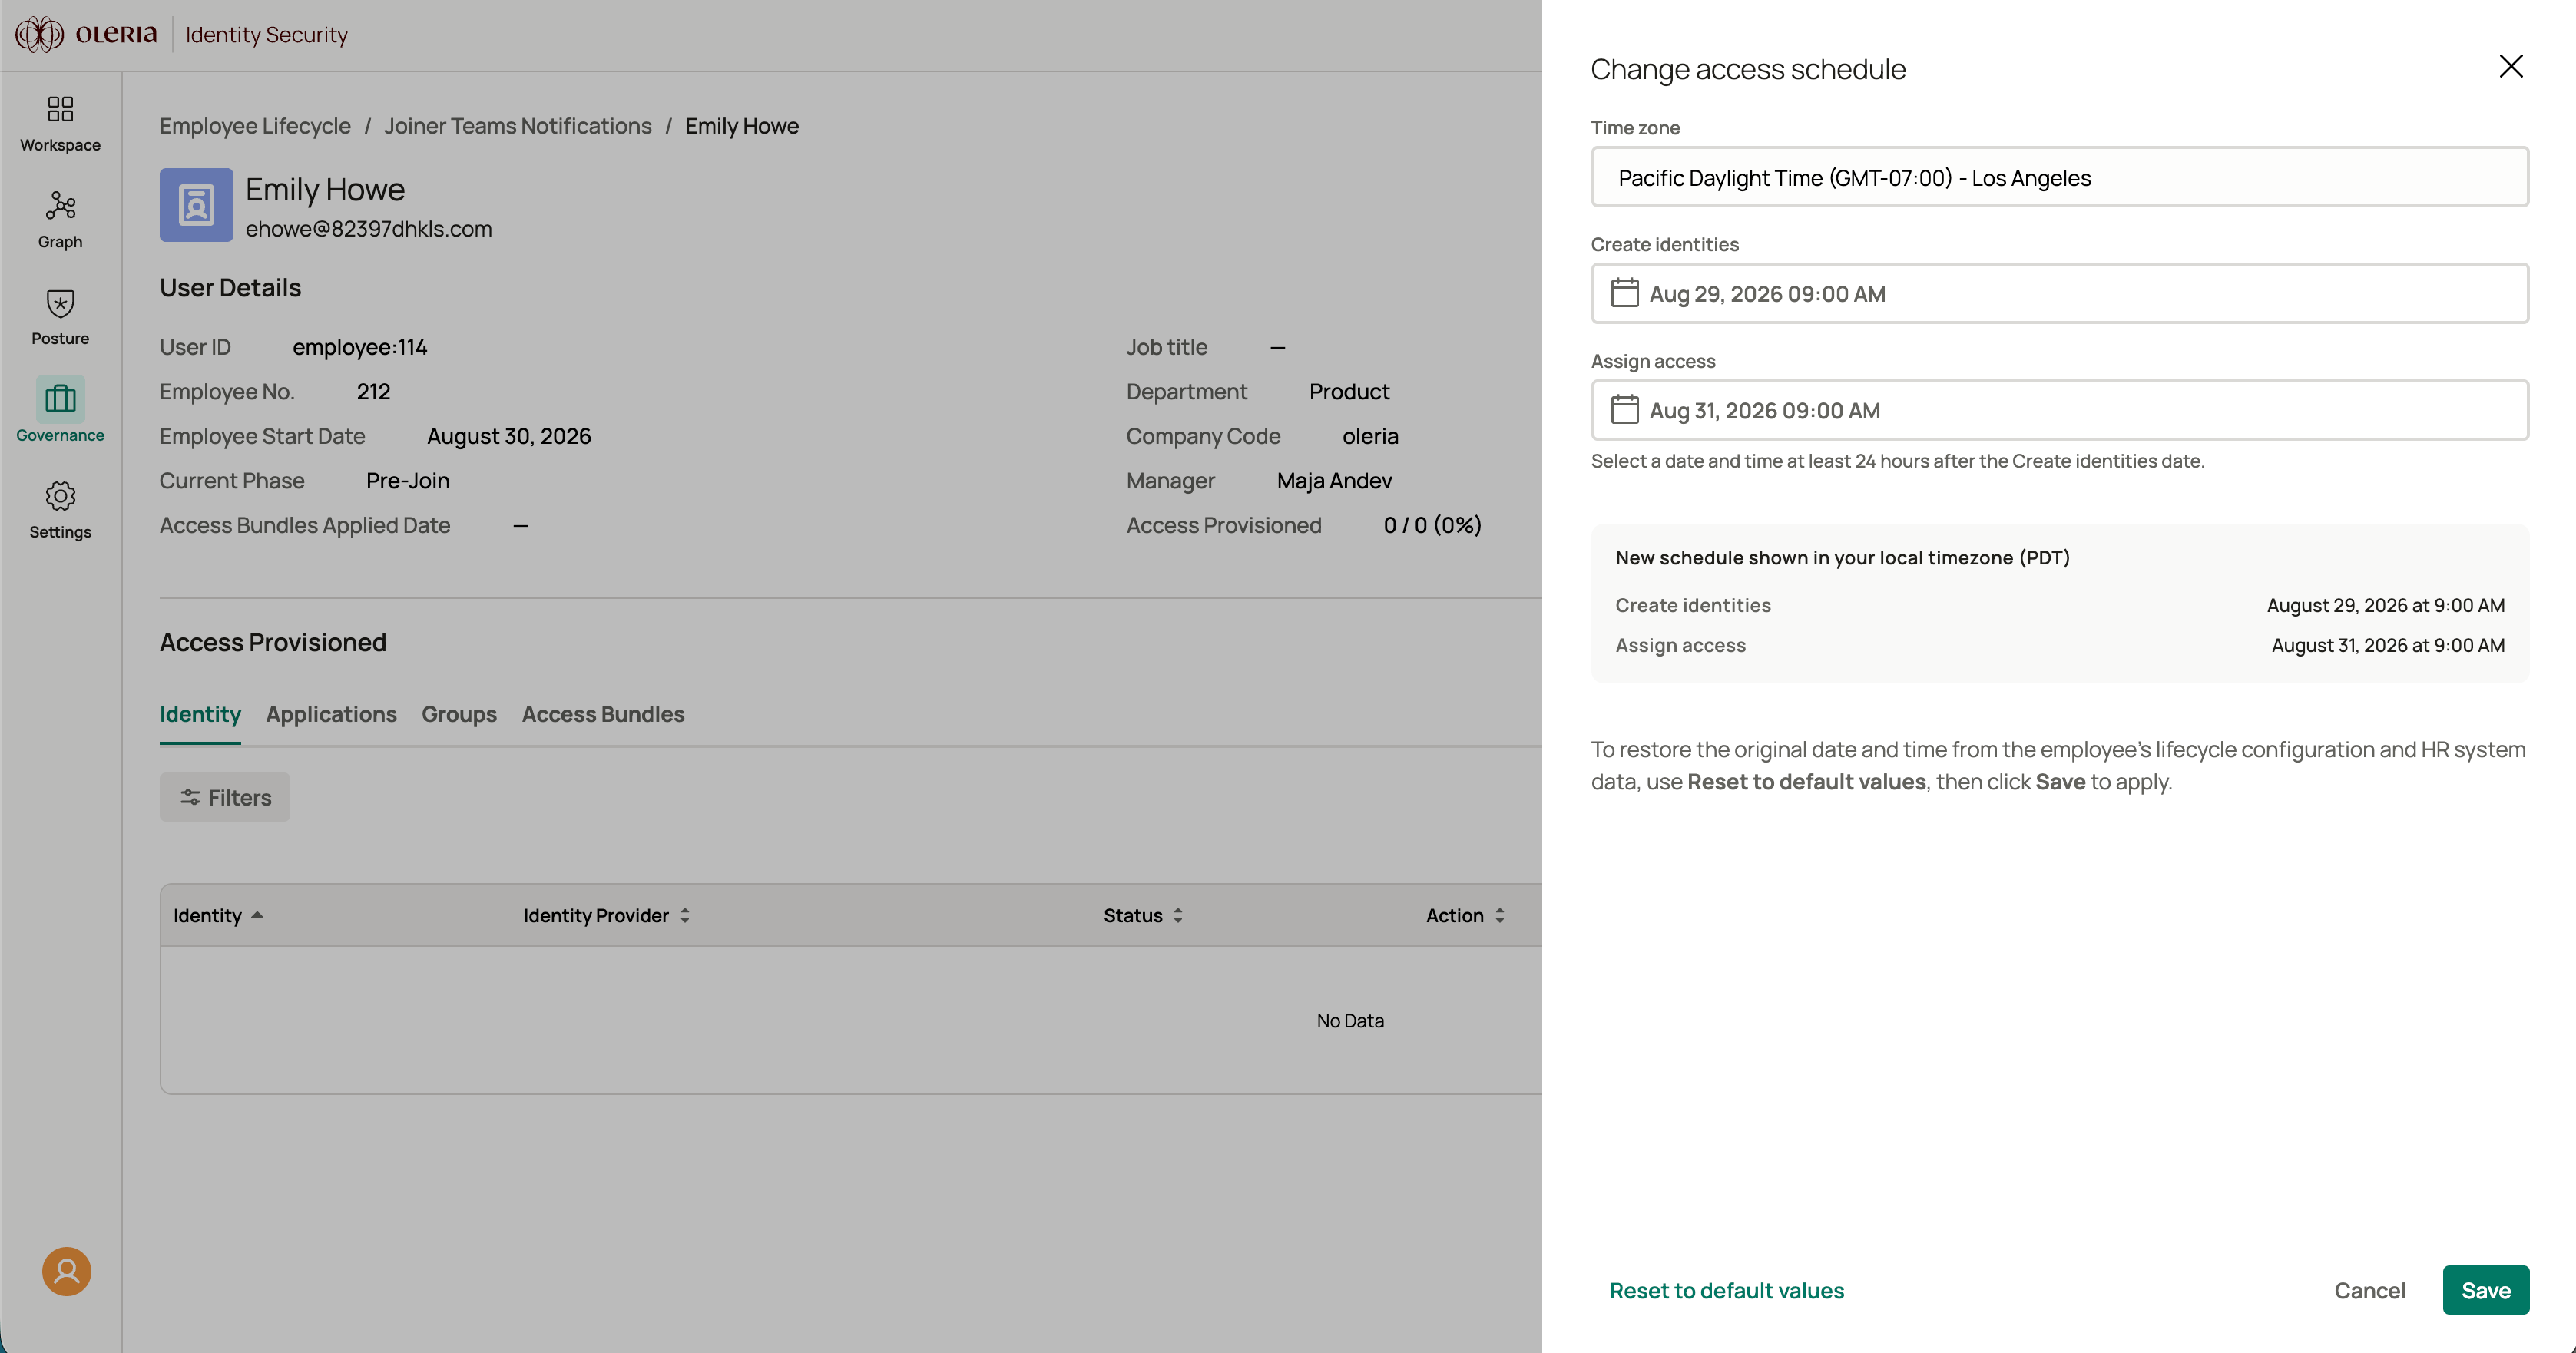
The edit option is only available while the event is in the Pre-Join phase. Once provisioning has started, the schedule can no longer be changed.