> ## Documentation Index
> Fetch the complete documentation index at: https://docs.oleria.com/llms.txt
> Use this file to discover all available pages before exploring further.
# Google Cloud Platform
Oleria provides identity security and access management teams with visibility and intelligence into who has access to what, where they got that access, how they use it, and whether they should even have it. As part of that promise, we deeply integrate your Google Cloud Platform environment into the Oleria platform. This document provides step-by-step guidance for integrating GCP - at either the organization level or project level - with your Oleria workspace.
## Prerequisites
* **GCP Organization Admin** or **Project Owner** role to grant IAM roles to the connector service account
* **Google Workspace Super Admin** role to configure domain-wide delegation
Use a service account (and not an employee account) with the suggested privileges for the integration to ensure continuity.
## Integration Approaches
Oleria supports two integration scopes. Follow the one most appropriate for your organization.
* **[Organization (Recommended)](#integrate-gcp-organization)** - Oleria sees all projects, folders, and resources across your entire GCP org, including org-level IAM policies and cross-project bindings. Recommended for full visibility.
* **[Project](#integrate-gcp-project)** - Oleria is scoped to IAM bindings, resources, and storage within a single project only. Use this if you don't have org-level access or only want to connect a specific project.
***
## Integrate GCP Organization
1. Log in to the [Google Cloud Console](https://console.cloud.google.com) and navigate to **IAM & Admin** → **Service Accounts**.
 2. Select **Create Service Account**. Provide a name such as `oleria-connector` and select **Create and Continue**.
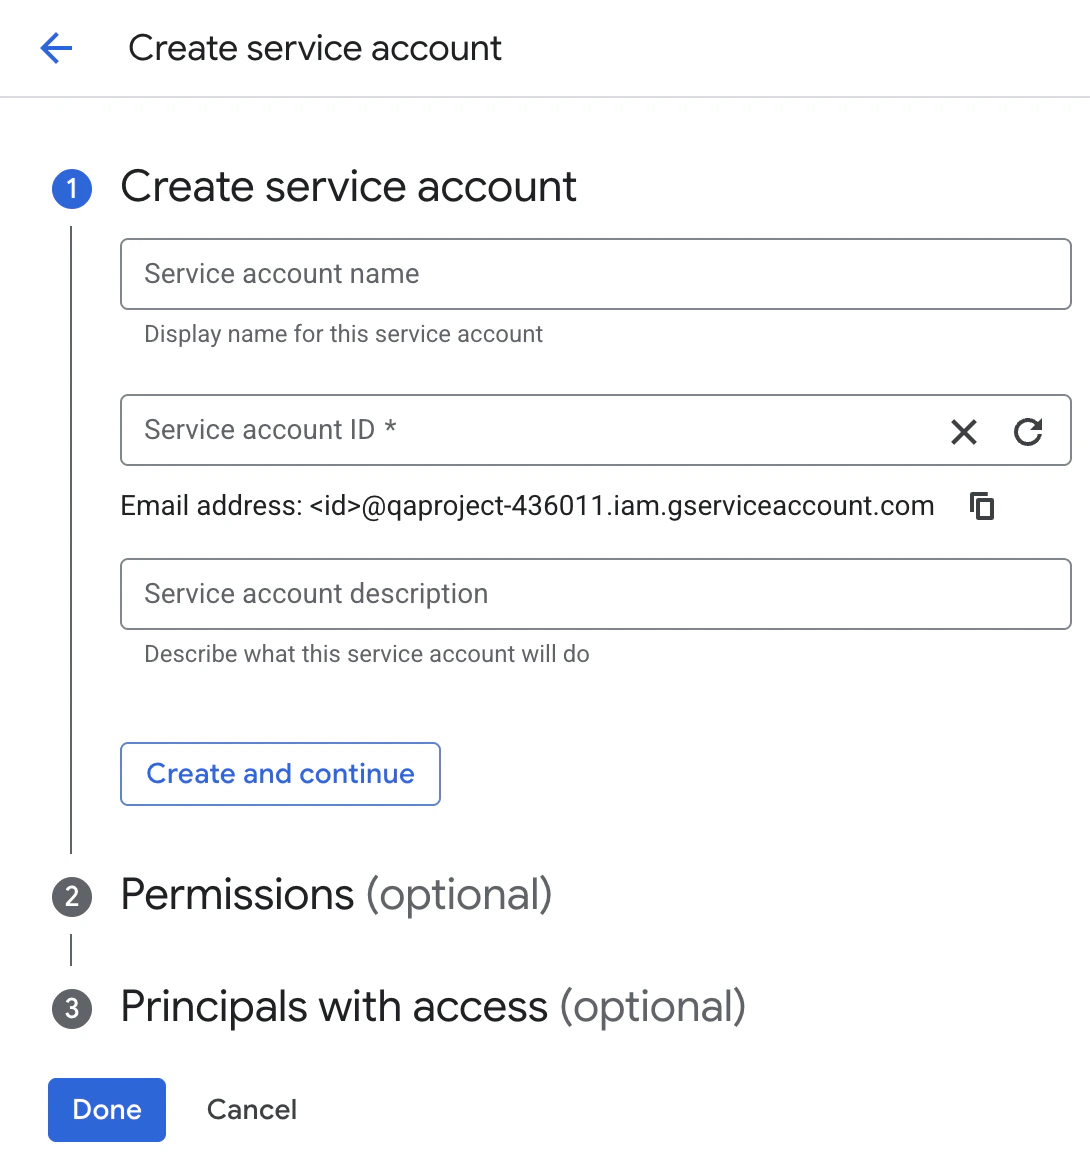 3. Skip the optional role grant and user access steps. Select **Done**.
The connector calls a number of Google Cloud APIs. Each one must be enabled in the **host project** of the connector service account; if any are disabled, authentication or sync will fail.
**Option A: Using the Google Cloud Console**
1. In the Google Cloud Console, select the project that owns the connector service account from the resource picker.
2. Navigate to **APIs & Services** → **Enabled APIs & services** → **Enable APIs and Services**.
3. Search for and enable each of the following:
* Cloud Resource Manager API
* Identity and Access Management (IAM) API
* Cloud Asset API
* Cloud Identity API
* Admin SDK API
* Cloud Storage API
* Cloud Logging API
**Option B: Using the gcloud CLI**
```bash theme={null}
gcloud services enable \
cloudresourcemanager.googleapis.com \
iam.googleapis.com \
cloudasset.googleapis.com \
cloudidentity.googleapis.com \
admin.googleapis.com \
storage.googleapis.com \
logging.googleapis.com \
--project=YOUR_PROJECT_ID
```
`YOUR_PROJECT_ID` is the project that owns the connector service account. API enablement on this single project is sufficient - the connector calls these APIs on behalf of resources across the whole organization.
1. In the Google Cloud Console, click the project selector at the top of the page and select your **Organization** from the resource picker.
3. Skip the optional role grant and user access steps. Select **Done**.
The connector calls a number of Google Cloud APIs. Each one must be enabled in the **host project** of the connector service account; if any are disabled, authentication or sync will fail.
**Option A: Using the Google Cloud Console**
1. In the Google Cloud Console, select the project that owns the connector service account from the resource picker.
2. Navigate to **APIs & Services** → **Enabled APIs & services** → **Enable APIs and Services**.
3. Search for and enable each of the following:
* Cloud Resource Manager API
* Identity and Access Management (IAM) API
* Cloud Asset API
* Cloud Identity API
* Admin SDK API
* Cloud Storage API
* Cloud Logging API
**Option B: Using the gcloud CLI**
```bash theme={null}
gcloud services enable \
cloudresourcemanager.googleapis.com \
iam.googleapis.com \
cloudasset.googleapis.com \
cloudidentity.googleapis.com \
admin.googleapis.com \
storage.googleapis.com \
logging.googleapis.com \
--project=YOUR_PROJECT_ID
```
`YOUR_PROJECT_ID` is the project that owns the connector service account. API enablement on this single project is sufficient - the connector calls these APIs on behalf of resources across the whole organization.
1. In the Google Cloud Console, click the project selector at the top of the page and select your **Organization** from the resource picker.
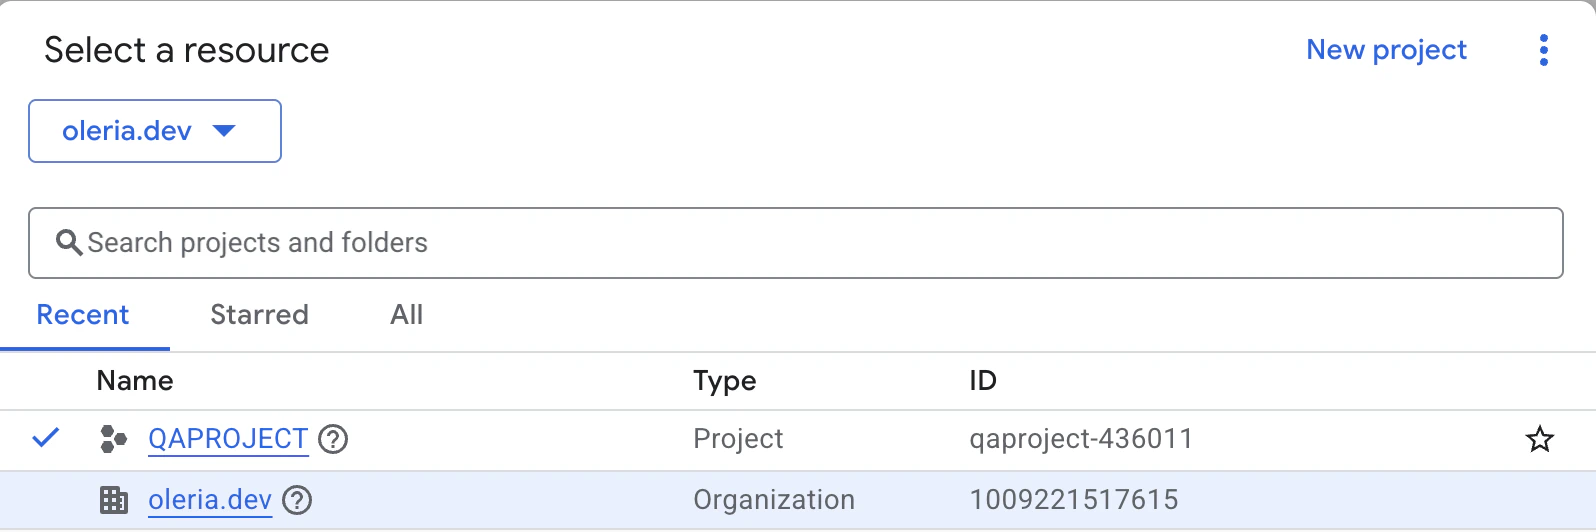 2. Navigate to **IAM & Admin** → **IAM** and select **Grant Access**.
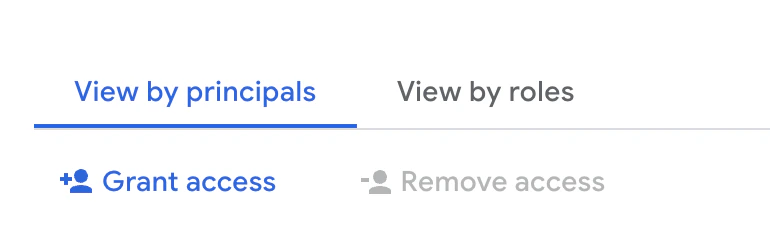 3. Enter the connector service account email and assign the following roles:
```
roles/iam.securityReviewer
roles/resourcemanager.organizationViewer
roles/resourcemanager.folderViewer
roles/storage.objectViewer
roles/logging.viewer
```
`roles/logging.viewer` is required for activity sync via Cloud Audit Logs.
1. In **IAM & Admin** → **Service Accounts**, select the service account you created in the first step.
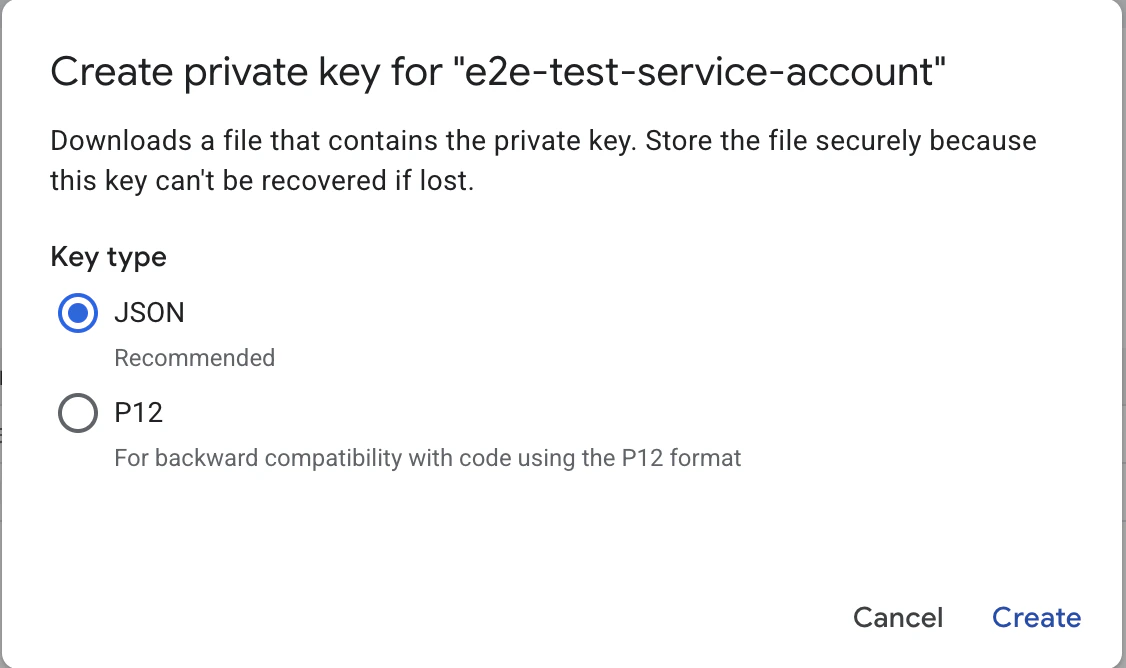
2. Navigate to the **Keys** tab and select **Add Key** → **Create new key**.
3. Enter the connector service account email and assign the following roles:
```
roles/iam.securityReviewer
roles/resourcemanager.organizationViewer
roles/resourcemanager.folderViewer
roles/storage.objectViewer
roles/logging.viewer
```
`roles/logging.viewer` is required for activity sync via Cloud Audit Logs.
1. In **IAM & Admin** → **Service Accounts**, select the service account you created in the first step.
2. Navigate to the **Keys** tab and select **Add Key** → **Create new key**.
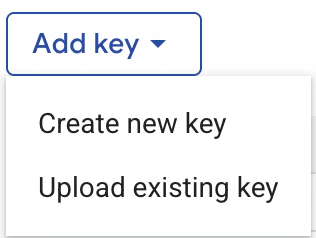 3. Select **JSON** format and select **Create**. The key file will be downloaded to your machine. Keep this file secure - you will provide it to Oleria in the final step.
 Domain-wide delegation allows the connector service account to enumerate Google Workspace users and groups on behalf of a delegated admin.
1. Log in to the [Google Workspace Admin Console](https://admin.google.com) and navigate to **Security** → **Access and data control** → **API controls**. Under **Domain-wide delegation**, select **Manage Domain Wide Delegation**.
Domain-wide delegation allows the connector service account to enumerate Google Workspace users and groups on behalf of a delegated admin.
1. Log in to the [Google Workspace Admin Console](https://admin.google.com) and navigate to **Security** → **Access and data control** → **API controls**. Under **Domain-wide delegation**, select **Manage Domain Wide Delegation**.
 2. Select **Add new**.
3. Provide the **Client ID** of the service account (found under **IAM & Admin** → **Service Accounts** → select the SA → **Details** tab → **Unique ID**) and add the following OAuth scopes:
```
https://www.googleapis.com/auth/admin.directory.user.readonly
https://www.googleapis.com/auth/cloud-identity.groups.readonly
```
2. Select **Add new**.
3. Provide the **Client ID** of the service account (found under **IAM & Admin** → **Service Accounts** → select the SA → **Details** tab → **Unique ID**) and add the following OAuth scopes:
```
https://www.googleapis.com/auth/admin.directory.user.readonly
https://www.googleapis.com/auth/cloud-identity.groups.readonly
```
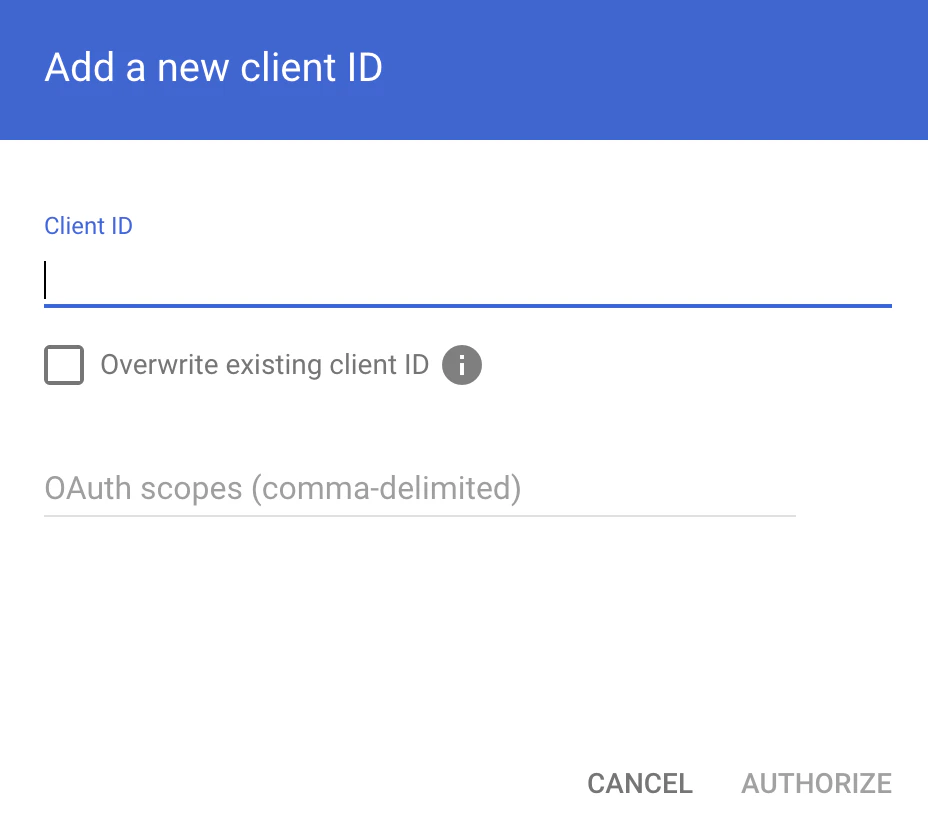 4. Select **Authorize**.
The Google Workspace admin email provided as the Workspace Delegate Email in the final step must have at least read access to user and group directories.
This step enables Oleria to ingest Cloud Audit Logs for user activity insights.
Choose a globally unique name for your audit log bucket - you'll use it as `YOUR_AUDIT_BUCKET` throughout this step.
**Option A: Using the Google Cloud Console**
1. In the Google Cloud Console, ensure your **Organization** is selected in the resource picker, then navigate to **Cloud Storage** → **Buckets** and select **Create**.
2. Provide a globally unique bucket name (this will be your `YOUR_AUDIT_BUCKET`).
3. Choose a location and accept the defaults for the remaining options.
4. Select **Create**.
5. Navigate to **Logging** → **Log Router** and confirm the resource scope is set to your **Organization**. Select **Create Sink**.
6. On the **Sink details** step, enter `audit-log-sink` as the sink name and select **Next**.
7. On the **Sink destination** step, select **Cloud Storage bucket**, then choose the bucket created above. Select **Next**.
8. On the **Choose logs to include in sink** step, enter the following inclusion filter and select **Next**:
```
logName=~"cloudaudit.googleapis.com"
```
9. Skip the exclusion filters step and select **Create Sink**. Ensure **include logs from children** (sub-folders and projects) is enabled so that audit logs from the entire organization are exported.
10. After the sink is created, open it from the Log Router page and copy the **Writer Identity** service account email (e.g. `serviceAccount:p123456789-xxxxxx@gcp-sa-logging.iam.gserviceaccount.com`).
11. Navigate to **Cloud Storage** → **Buckets**, select the audit log bucket, open the **Permissions** tab, and select **Grant Access**. Add two principals:
* The sink **Writer Identity** with the role **Storage Object Creator** (`roles/storage.objectCreator`)
* The connector service account (`oleria-connector@YOUR_PROJECT_ID.iam.gserviceaccount.com`) with the role **Storage Object Viewer** (`roles/storage.objectViewer`)
Select **Save**.
**Option B: Using the gcloud CLI**
1. Create a GCS bucket to receive audit logs:
```bash theme={null}
gsutil mb -p YOUR_PROJECT_ID gs://YOUR_AUDIT_BUCKET
```
2. Create a Log Sink that exports organization-wide audit logs to the bucket:
```bash theme={null}
gcloud logging sinks create audit-log-sink \
storage.googleapis.com/YOUR_AUDIT_BUCKET \
--log-filter='logName=~"cloudaudit.googleapis.com"' \
--include-children \
--organization=YOUR_ORG_ID
```
3. Grant the sink's writer service account write access to the bucket:
```bash theme={null}
SINK_SA=$(gcloud logging sinks describe audit-log-sink \
--organization=YOUR_ORG_ID --format='value(writerIdentity)')
gsutil iam ch ${SINK_SA}:objectCreator gs://YOUR_AUDIT_BUCKET
```
4. Grant the connector service account read access to the bucket:
```bash theme={null}
gsutil iam ch serviceAccount:oleria-connector@YOUR_PROJECT_ID.iam.gserviceaccount.com:objectViewer \
gs://YOUR_AUDIT_BUCKET
```
Oleria automatically discovers the audit log bucket by inspecting Log Sinks - no additional configuration is needed in the Oleria workspace.
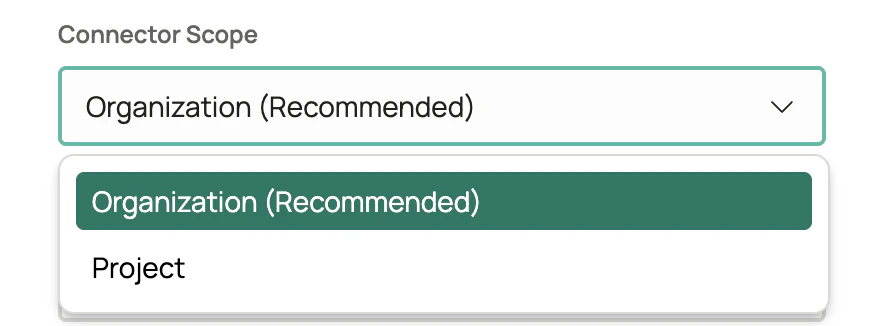
1. Log in to your Oleria workspace, select **Integrations** → select **Google Cloud Platform**. A side panel opens. Select **Organization (Recommended)** from the **Connector Scope** dropdown.
4. Select **Authorize**.
The Google Workspace admin email provided as the Workspace Delegate Email in the final step must have at least read access to user and group directories.
This step enables Oleria to ingest Cloud Audit Logs for user activity insights.
Choose a globally unique name for your audit log bucket - you'll use it as `YOUR_AUDIT_BUCKET` throughout this step.
**Option A: Using the Google Cloud Console**
1. In the Google Cloud Console, ensure your **Organization** is selected in the resource picker, then navigate to **Cloud Storage** → **Buckets** and select **Create**.
2. Provide a globally unique bucket name (this will be your `YOUR_AUDIT_BUCKET`).
3. Choose a location and accept the defaults for the remaining options.
4. Select **Create**.
5. Navigate to **Logging** → **Log Router** and confirm the resource scope is set to your **Organization**. Select **Create Sink**.
6. On the **Sink details** step, enter `audit-log-sink` as the sink name and select **Next**.
7. On the **Sink destination** step, select **Cloud Storage bucket**, then choose the bucket created above. Select **Next**.
8. On the **Choose logs to include in sink** step, enter the following inclusion filter and select **Next**:
```
logName=~"cloudaudit.googleapis.com"
```
9. Skip the exclusion filters step and select **Create Sink**. Ensure **include logs from children** (sub-folders and projects) is enabled so that audit logs from the entire organization are exported.
10. After the sink is created, open it from the Log Router page and copy the **Writer Identity** service account email (e.g. `serviceAccount:p123456789-xxxxxx@gcp-sa-logging.iam.gserviceaccount.com`).
11. Navigate to **Cloud Storage** → **Buckets**, select the audit log bucket, open the **Permissions** tab, and select **Grant Access**. Add two principals:
* The sink **Writer Identity** with the role **Storage Object Creator** (`roles/storage.objectCreator`)
* The connector service account (`oleria-connector@YOUR_PROJECT_ID.iam.gserviceaccount.com`) with the role **Storage Object Viewer** (`roles/storage.objectViewer`)
Select **Save**.
**Option B: Using the gcloud CLI**
1. Create a GCS bucket to receive audit logs:
```bash theme={null}
gsutil mb -p YOUR_PROJECT_ID gs://YOUR_AUDIT_BUCKET
```
2. Create a Log Sink that exports organization-wide audit logs to the bucket:
```bash theme={null}
gcloud logging sinks create audit-log-sink \
storage.googleapis.com/YOUR_AUDIT_BUCKET \
--log-filter='logName=~"cloudaudit.googleapis.com"' \
--include-children \
--organization=YOUR_ORG_ID
```
3. Grant the sink's writer service account write access to the bucket:
```bash theme={null}
SINK_SA=$(gcloud logging sinks describe audit-log-sink \
--organization=YOUR_ORG_ID --format='value(writerIdentity)')
gsutil iam ch ${SINK_SA}:objectCreator gs://YOUR_AUDIT_BUCKET
```
4. Grant the connector service account read access to the bucket:
```bash theme={null}
gsutil iam ch serviceAccount:oleria-connector@YOUR_PROJECT_ID.iam.gserviceaccount.com:objectViewer \
gs://YOUR_AUDIT_BUCKET
```
Oleria automatically discovers the audit log bucket by inspecting Log Sinks - no additional configuration is needed in the Oleria workspace.
1. Log in to your Oleria workspace, select **Integrations** → select **Google Cloud Platform**. A side panel opens. Select **Organization (Recommended)** from the **Connector Scope** dropdown.
 2. Provide the following and select **Authenticate**:
* **Organization ID** - your numeric GCP Organization ID (e.g. `123456789012`). Found under **IAM & Admin** → **Settings** in the Cloud Console.
* **Workspace Delegate Email** - email address of the Google Workspace admin whose permissions will be used to enumerate users and groups
* **Service Account Credentials** - paste the full contents of the JSON key file downloaded above
3. Find the newly integrated GCP Organization in your Oleria workspace connected integrations.
***
## Integrate GCP Project
1. Log in to the [Google Cloud Console](https://console.cloud.google.com), select the target project, and navigate to **IAM & Admin** → **Service Accounts**.
2. Select **Create Service Account**. Provide a name such as `oleria-connector` and select **Create and Continue**.
3. Skip the optional role grant and user access steps. Select **Done**.
The connector calls a number of Google Cloud APIs. Each one must be enabled in the **host project** of the connector service account; if any are disabled, authentication or sync will fail.
**Option A: Using the Google Cloud Console**
1. In the Google Cloud Console, select the project that owns the connector service account from the resource picker.
2. Navigate to **APIs & Services** → **Enabled APIs & services** → **Enable APIs and Services**.
3. Search for and enable each of the following:
* Cloud Resource Manager API
* Identity and Access Management (IAM) API
* Cloud Identity API
* Admin SDK API
* Cloud Storage API
* Cloud Logging API
**Option B: Using the gcloud CLI**
```bash theme={null}
gcloud services enable \
cloudresourcemanager.googleapis.com \
iam.googleapis.com \
cloudidentity.googleapis.com \
admin.googleapis.com \
storage.googleapis.com \
logging.googleapis.com \
--project=YOUR_PROJECT_ID
```
`YOUR_PROJECT_ID` is the project that owns the connector service account, which is also the target project for this integration.
1. In the Google Cloud Console, navigate to **IAM & Admin** → **IAM** for the target project and select **Grant Access**.
2. Enter the connector service account email and assign the following roles:
```
roles/iam.securityReviewer
roles/storage.objectViewer
roles/logging.viewer
```
`roles/logging.viewer` is required for activity sync via Cloud Audit Logs.
1. In **IAM & Admin** → **Service Accounts**, select the service account you created in the first step.
2. Navigate to the **Keys** tab and select **Add Key** → **Create new key**.
3. Select **JSON** format and select **Create**. The key file will be downloaded to your machine. Keep this file secure - you will provide it to Oleria in the final step.
Domain-wide delegation allows the connector service account to enumerate Google Workspace users and groups on behalf of a delegated admin.
1. Log in to the [Google Workspace Admin Console](https://admin.google.com) and navigate to **Security** → **Access and data control** → **API controls**. Under **Domain-wide delegation**, select **Manage Domain Wide Delegation**.
2. Select **Add new**.
3. Provide the **Client ID** of the service account (found under **IAM & Admin** → **Service Accounts** → select the SA → **Details** tab → **Unique ID**) and add the following OAuth scopes:
```
https://www.googleapis.com/auth/admin.directory.user.readonly
https://www.googleapis.com/auth/cloud-identity.groups.readonly
```
4. Select **Authorize**.
The Google Workspace admin email provided as the Workspace Delegate Email in the final step must have at least read access to user and group directories.
This step enables Oleria to ingest Cloud Audit Logs for user activity insights.
Choose a globally unique name for your audit log bucket - you'll use it as `YOUR_AUDIT_BUCKET` throughout this step.
**Option A: Using the Google Cloud Console**
1. In the Google Cloud Console, ensure the target **Project** is selected in the resource picker, then navigate to **Cloud Storage** → **Buckets** and select **Create**.
2. Provide a globally unique bucket name (this will be your `YOUR_AUDIT_BUCKET`).
3. Choose a location and accept the defaults for the remaining options.
4. Select **Create**.
5. Navigate to **Logging** → **Log Router** and confirm the resource scope is set to your target **Project**. Select **Create Sink**.
6. On the **Sink details** step, enter `audit-log-sink` as the sink name and select **Next**.
7. On the **Sink destination** step, select **Cloud Storage bucket**, then choose the bucket created above. Select **Next**.
8. On the **Choose logs to include in sink** step, enter the following inclusion filter and select **Next**:
```
logName=~"cloudaudit.googleapis.com"
```
9. Skip the exclusion filters step and select **Create Sink**.
10. After the sink is created, open it from the Log Router page and copy the **Writer Identity** service account email (e.g. `serviceAccount:p123456789-xxxxxx@gcp-sa-logging.iam.gserviceaccount.com`).
11. Navigate to **Cloud Storage** → **Buckets**, select the audit log bucket, open the **Permissions** tab, and select **Grant Access**. Add two principals:
* The sink **Writer Identity** with the role **Storage Object Creator** (`roles/storage.objectCreator`)
* The connector service account (`oleria-connector@YOUR_PROJECT_ID.iam.gserviceaccount.com`) with the role **Storage Object Viewer** (`roles/storage.objectViewer`)
Select **Save**.
**Option B: Using the gcloud CLI**
1. Create a GCS bucket to receive audit logs:
```bash theme={null}
gsutil mb -p YOUR_PROJECT_ID gs://YOUR_AUDIT_BUCKET
```
2. Create a Log Sink that exports project-level audit logs to the bucket:
```bash theme={null}
gcloud logging sinks create audit-log-sink \
storage.googleapis.com/YOUR_AUDIT_BUCKET \
--log-filter='logName=~"cloudaudit.googleapis.com"' \
--project=YOUR_PROJECT_ID
```
3. Grant the sink's writer service account write access to the bucket:
```bash theme={null}
SINK_SA=$(gcloud logging sinks describe audit-log-sink \
--project=YOUR_PROJECT_ID --format='value(writerIdentity)')
gsutil iam ch ${SINK_SA}:objectCreator gs://YOUR_AUDIT_BUCKET
```
4. Grant the connector service account read access to the bucket:
```bash theme={null}
gsutil iam ch serviceAccount:oleria-connector@YOUR_PROJECT_ID.iam.gserviceaccount.com:objectViewer \
gs://YOUR_AUDIT_BUCKET
```
Oleria automatically discovers the audit log bucket by inspecting Log Sinks - no additional configuration is needed in the Oleria workspace.
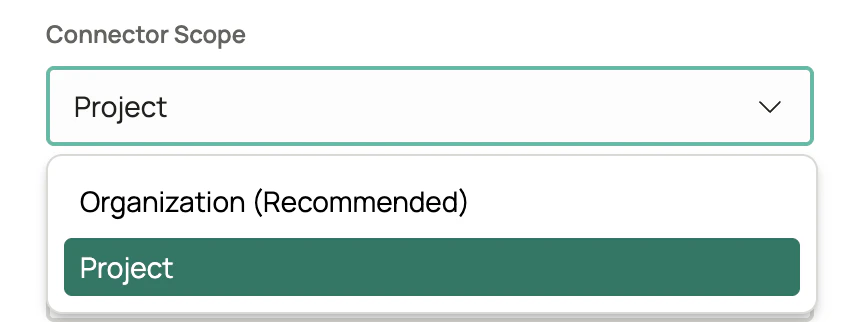
1. Log in to your Oleria workspace, select **Integrations** → select **Google Cloud Platform**. A side panel opens. Select **Project** from the **Connector Scope** dropdown.
2. Provide the following and select **Authenticate**:
* **Organization ID** - your numeric GCP Organization ID (e.g. `123456789012`). Found under **IAM & Admin** → **Settings** in the Cloud Console.
* **Workspace Delegate Email** - email address of the Google Workspace admin whose permissions will be used to enumerate users and groups
* **Service Account Credentials** - paste the full contents of the JSON key file downloaded above
3. Find the newly integrated GCP Organization in your Oleria workspace connected integrations.
***
## Integrate GCP Project
1. Log in to the [Google Cloud Console](https://console.cloud.google.com), select the target project, and navigate to **IAM & Admin** → **Service Accounts**.
2. Select **Create Service Account**. Provide a name such as `oleria-connector` and select **Create and Continue**.
3. Skip the optional role grant and user access steps. Select **Done**.
The connector calls a number of Google Cloud APIs. Each one must be enabled in the **host project** of the connector service account; if any are disabled, authentication or sync will fail.
**Option A: Using the Google Cloud Console**
1. In the Google Cloud Console, select the project that owns the connector service account from the resource picker.
2. Navigate to **APIs & Services** → **Enabled APIs & services** → **Enable APIs and Services**.
3. Search for and enable each of the following:
* Cloud Resource Manager API
* Identity and Access Management (IAM) API
* Cloud Identity API
* Admin SDK API
* Cloud Storage API
* Cloud Logging API
**Option B: Using the gcloud CLI**
```bash theme={null}
gcloud services enable \
cloudresourcemanager.googleapis.com \
iam.googleapis.com \
cloudidentity.googleapis.com \
admin.googleapis.com \
storage.googleapis.com \
logging.googleapis.com \
--project=YOUR_PROJECT_ID
```
`YOUR_PROJECT_ID` is the project that owns the connector service account, which is also the target project for this integration.
1. In the Google Cloud Console, navigate to **IAM & Admin** → **IAM** for the target project and select **Grant Access**.
2. Enter the connector service account email and assign the following roles:
```
roles/iam.securityReviewer
roles/storage.objectViewer
roles/logging.viewer
```
`roles/logging.viewer` is required for activity sync via Cloud Audit Logs.
1. In **IAM & Admin** → **Service Accounts**, select the service account you created in the first step.
2. Navigate to the **Keys** tab and select **Add Key** → **Create new key**.
3. Select **JSON** format and select **Create**. The key file will be downloaded to your machine. Keep this file secure - you will provide it to Oleria in the final step.
Domain-wide delegation allows the connector service account to enumerate Google Workspace users and groups on behalf of a delegated admin.
1. Log in to the [Google Workspace Admin Console](https://admin.google.com) and navigate to **Security** → **Access and data control** → **API controls**. Under **Domain-wide delegation**, select **Manage Domain Wide Delegation**.
2. Select **Add new**.
3. Provide the **Client ID** of the service account (found under **IAM & Admin** → **Service Accounts** → select the SA → **Details** tab → **Unique ID**) and add the following OAuth scopes:
```
https://www.googleapis.com/auth/admin.directory.user.readonly
https://www.googleapis.com/auth/cloud-identity.groups.readonly
```
4. Select **Authorize**.
The Google Workspace admin email provided as the Workspace Delegate Email in the final step must have at least read access to user and group directories.
This step enables Oleria to ingest Cloud Audit Logs for user activity insights.
Choose a globally unique name for your audit log bucket - you'll use it as `YOUR_AUDIT_BUCKET` throughout this step.
**Option A: Using the Google Cloud Console**
1. In the Google Cloud Console, ensure the target **Project** is selected in the resource picker, then navigate to **Cloud Storage** → **Buckets** and select **Create**.
2. Provide a globally unique bucket name (this will be your `YOUR_AUDIT_BUCKET`).
3. Choose a location and accept the defaults for the remaining options.
4. Select **Create**.
5. Navigate to **Logging** → **Log Router** and confirm the resource scope is set to your target **Project**. Select **Create Sink**.
6. On the **Sink details** step, enter `audit-log-sink` as the sink name and select **Next**.
7. On the **Sink destination** step, select **Cloud Storage bucket**, then choose the bucket created above. Select **Next**.
8. On the **Choose logs to include in sink** step, enter the following inclusion filter and select **Next**:
```
logName=~"cloudaudit.googleapis.com"
```
9. Skip the exclusion filters step and select **Create Sink**.
10. After the sink is created, open it from the Log Router page and copy the **Writer Identity** service account email (e.g. `serviceAccount:p123456789-xxxxxx@gcp-sa-logging.iam.gserviceaccount.com`).
11. Navigate to **Cloud Storage** → **Buckets**, select the audit log bucket, open the **Permissions** tab, and select **Grant Access**. Add two principals:
* The sink **Writer Identity** with the role **Storage Object Creator** (`roles/storage.objectCreator`)
* The connector service account (`oleria-connector@YOUR_PROJECT_ID.iam.gserviceaccount.com`) with the role **Storage Object Viewer** (`roles/storage.objectViewer`)
Select **Save**.
**Option B: Using the gcloud CLI**
1. Create a GCS bucket to receive audit logs:
```bash theme={null}
gsutil mb -p YOUR_PROJECT_ID gs://YOUR_AUDIT_BUCKET
```
2. Create a Log Sink that exports project-level audit logs to the bucket:
```bash theme={null}
gcloud logging sinks create audit-log-sink \
storage.googleapis.com/YOUR_AUDIT_BUCKET \
--log-filter='logName=~"cloudaudit.googleapis.com"' \
--project=YOUR_PROJECT_ID
```
3. Grant the sink's writer service account write access to the bucket:
```bash theme={null}
SINK_SA=$(gcloud logging sinks describe audit-log-sink \
--project=YOUR_PROJECT_ID --format='value(writerIdentity)')
gsutil iam ch ${SINK_SA}:objectCreator gs://YOUR_AUDIT_BUCKET
```
4. Grant the connector service account read access to the bucket:
```bash theme={null}
gsutil iam ch serviceAccount:oleria-connector@YOUR_PROJECT_ID.iam.gserviceaccount.com:objectViewer \
gs://YOUR_AUDIT_BUCKET
```
Oleria automatically discovers the audit log bucket by inspecting Log Sinks - no additional configuration is needed in the Oleria workspace.
1. Log in to your Oleria workspace, select **Integrations** → select **Google Cloud Platform**. A side panel opens. Select **Project** from the **Connector Scope** dropdown.
 2. Provide the following and select **Authenticate**:
* **Project ID** - your GCP Project ID (e.g. `my-project`). Found in the Cloud Console project selector at the top of the page.
* **Workspace Delegate Email** - email address of the Google Workspace admin whose permissions will be used to enumerate users and groups
* **Service Account Credentials** - paste the full contents of the JSON key file downloaded above
3. Find the newly integrated GCP Project in your Oleria workspace connected integrations.
***
## Enable Remediations (Optional)
Remediations allow Oleria to take automated or one-click corrective actions - such as revoking an IAM binding, removing a group member, or disabling a service account - directly from the Oleria workspace.
To allow Oleria to take remediation actions in your GCP environment, grant the connector service account the following additional roles:
* To **revoke an IAM binding at the project level**, grant `roles/resourcemanager.projectIamAdmin` on the project.
* To **revoke an IAM binding at the organization level**, grant `roles/resourcemanager.organizationIamAdmin` on the organization.
* To **remove a member from a Cloud Identity group**, grant `roles/cloudidentity.groups.editor`.
* To **disable a service account**, grant `roles/iam.serviceAccountAdmin` on the project that owns the service account.
## Contact us
For questions about this integration, contact us at [support@oleria.com](mailto:support@oleria.com).
2. Provide the following and select **Authenticate**:
* **Project ID** - your GCP Project ID (e.g. `my-project`). Found in the Cloud Console project selector at the top of the page.
* **Workspace Delegate Email** - email address of the Google Workspace admin whose permissions will be used to enumerate users and groups
* **Service Account Credentials** - paste the full contents of the JSON key file downloaded above
3. Find the newly integrated GCP Project in your Oleria workspace connected integrations.
***
## Enable Remediations (Optional)
Remediations allow Oleria to take automated or one-click corrective actions - such as revoking an IAM binding, removing a group member, or disabling a service account - directly from the Oleria workspace.
To allow Oleria to take remediation actions in your GCP environment, grant the connector service account the following additional roles:
* To **revoke an IAM binding at the project level**, grant `roles/resourcemanager.projectIamAdmin` on the project.
* To **revoke an IAM binding at the organization level**, grant `roles/resourcemanager.organizationIamAdmin` on the organization.
* To **remove a member from a Cloud Identity group**, grant `roles/cloudidentity.groups.editor`.
* To **disable a service account**, grant `roles/iam.serviceAccountAdmin` on the project that owns the service account.
## Contact us
For questions about this integration, contact us at [support@oleria.com](mailto:support@oleria.com).