> ## Documentation Index
> Fetch the complete documentation index at: https://docs.oleria.com/llms.txt
> Use this file to discover all available pages before exploring further.
# Active Directory
Oleria's identity security provides critical visibility into AD resources, enabling organizations to quickly identify, assess, and mitigate identity and access-related risks. As a result, it offers better support for large enterprises that rely on Active Directory (AD) for various aspects of identity and access management. Oleria's identity security solution significantly improves Active Directory management by providing complete visibility and control over your organization's identity and access landscape.
This document provides step-by-step guidance for integrating Active Directory with your Oleria workspace.
## Prerequisites
* Administrator permission on the Oleria workspace
* An Active Directory Domain Joined (ADDJ) machine to install the Oleria AD Agent
* Administrator permissions on the ADDJ machine
## Create a Service Account in Active Directory
Create an Active Directory Service Account and grant **read-only** permissions.
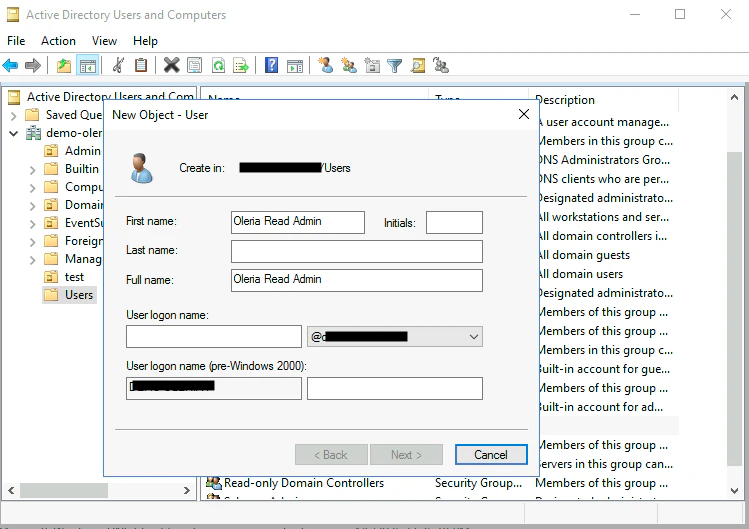
Log in to Active Directory and create a new user, for example, **Oleria Read Admin**.
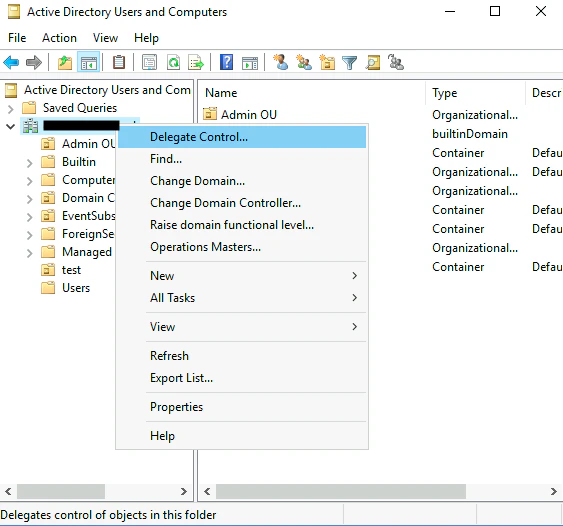
 Open your AD Domain and select **Delegate Control**.
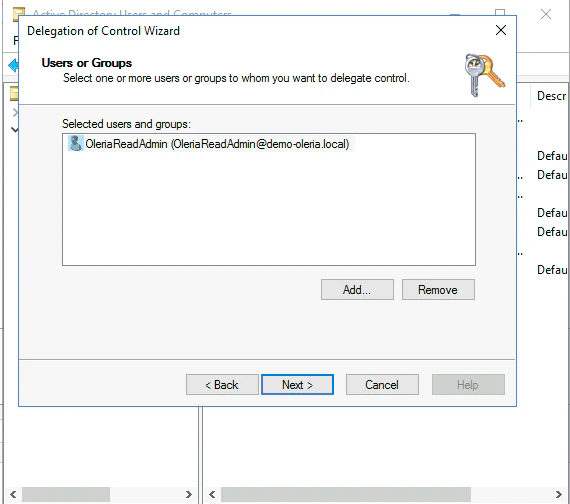
 Select the user as shown below.
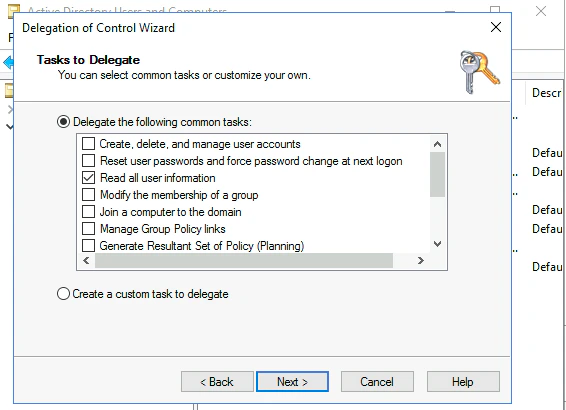
 Grant the following read permissions:
* Read all user information
* Read all inetOrgPerson information
Grant the following read permissions:
* Read all user information
* Read all inetOrgPerson information
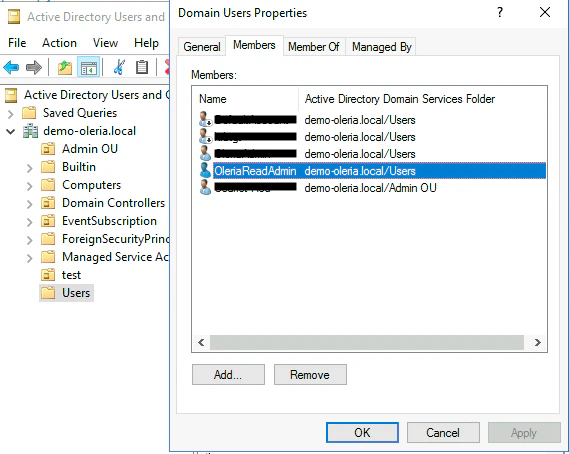
 The account will be automatically added to the Domain Users group. Open the Domain Users group to verify the service account.
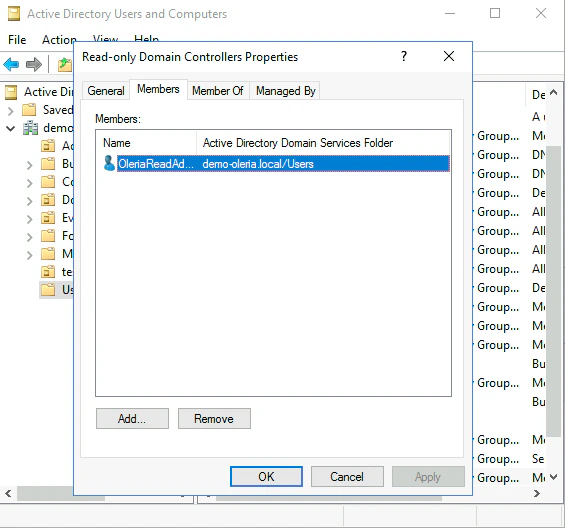
 Add the user to the **Read-only Domain Controller** group.
 ## Configure Event Forwarding
Follow [Microsoft Documentation](https://learn.microsoft.com/en-us/defender-for-identity/deploy/configure-event-forwarding) to configure Windows event forwarding.
## Integrate Active Directory with Oleria
Log in to your Oleria workspace and select **Workspace** → **Integrations** → **Active Directory**.
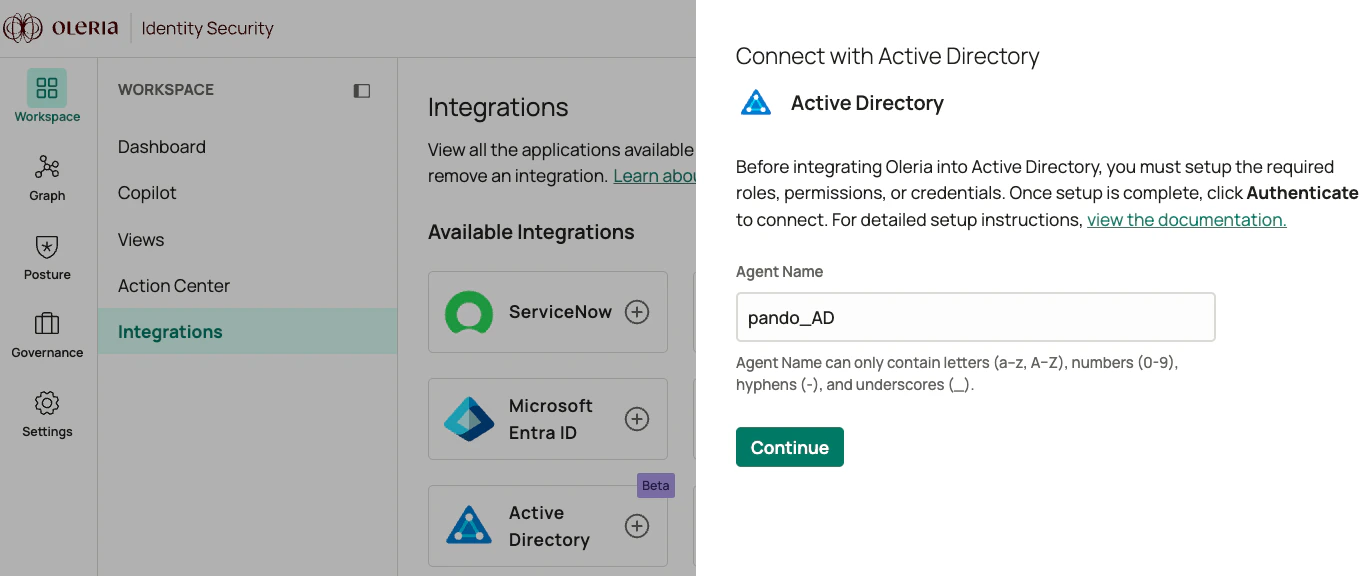
Provide a name for your agent and select **Continue**.
## Configure Event Forwarding
Follow [Microsoft Documentation](https://learn.microsoft.com/en-us/defender-for-identity/deploy/configure-event-forwarding) to configure Windows event forwarding.
## Integrate Active Directory with Oleria
Log in to your Oleria workspace and select **Workspace** → **Integrations** → **Active Directory**.
Provide a name for your agent and select **Continue**.
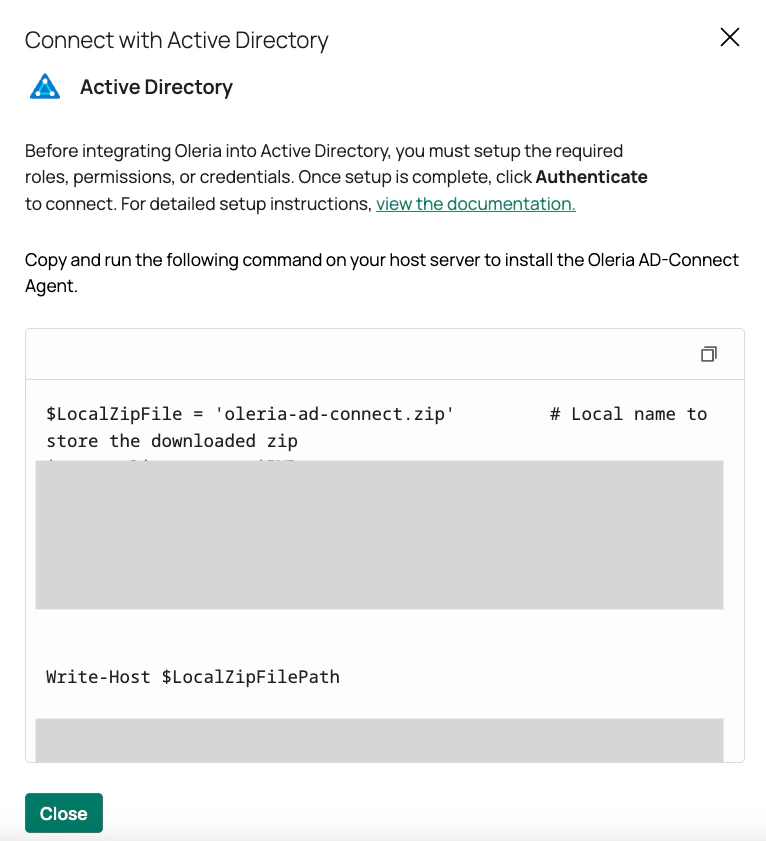
 You will see a PowerShell script with a copy option. Copy and execute this script on a member (domain-joined) server where you want to install the Oleria AD Agent.
 ## Install the Oleria AD Agent
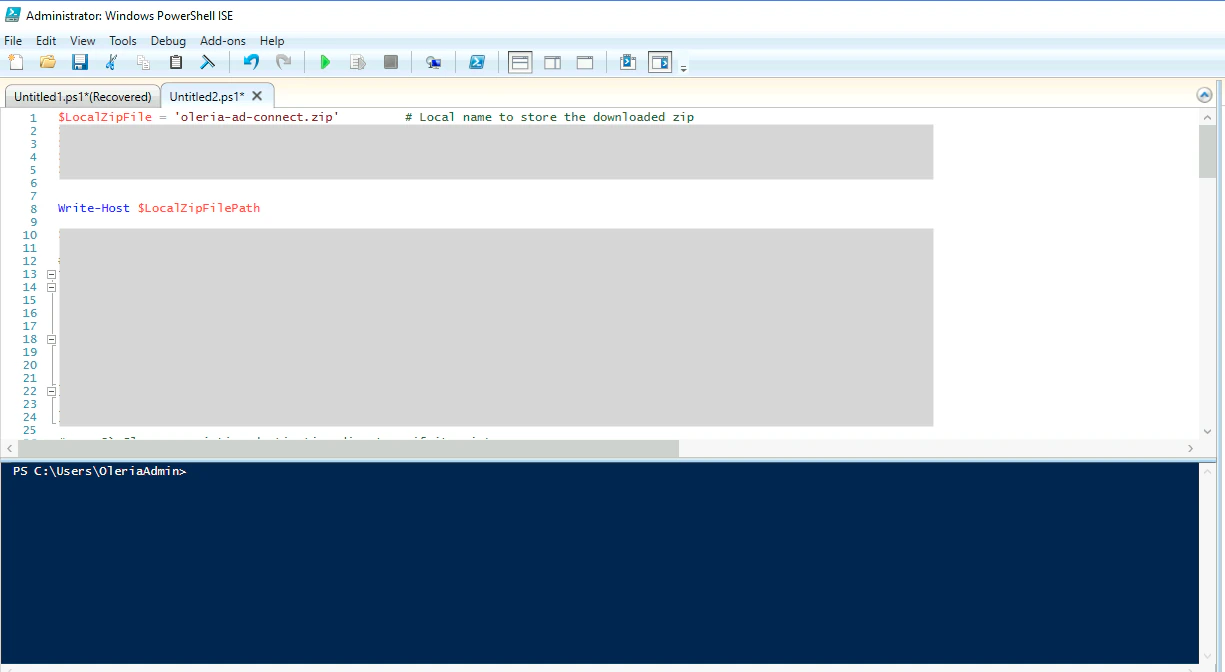
Log in to the ADDJ machine, open PowerShell with administrator privileges, and run the script copied from the previous section.
## Install the Oleria AD Agent
Log in to the ADDJ machine, open PowerShell with administrator privileges, and run the script copied from the previous section.
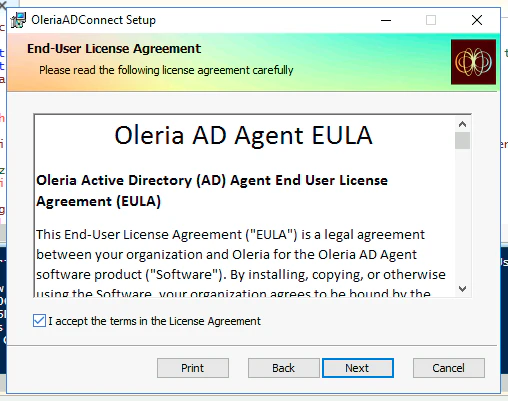
 You will see the Oleria AD Agent installation process. Accept the license terms and select **Next**.
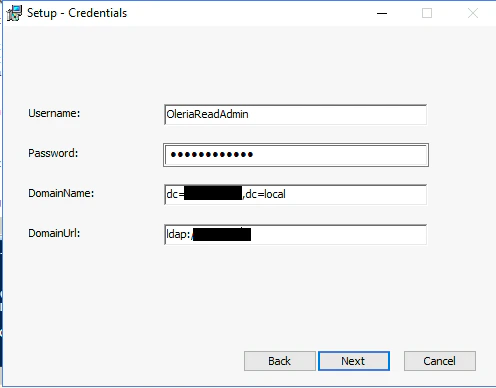
 On the next page, provide the following:
* **Username** - the service account name created above
* **Password** - the service account password
* **DomainName** - your domain name (for example, if your domain is `example.local`, provide `dc=example,dc=local`)
* **DomainUrl** - your domain controller IP address
Select **Next** and follow the prompts to complete the installation.
On the next page, provide the following:
* **Username** - the service account name created above
* **Password** - the service account password
* **DomainName** - your domain name (for example, if your domain is `example.local`, provide `dc=example,dc=local`)
* **DomainUrl** - your domain controller IP address
Select **Next** and follow the prompts to complete the installation.
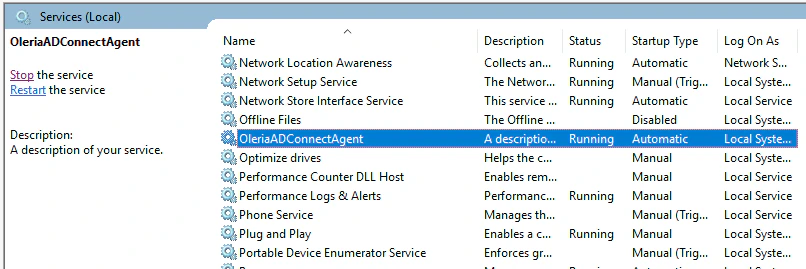
 Once the installation is completed, you will see an **OleriaADConnectAgent** service in the services list.
 ## Verify the Integration
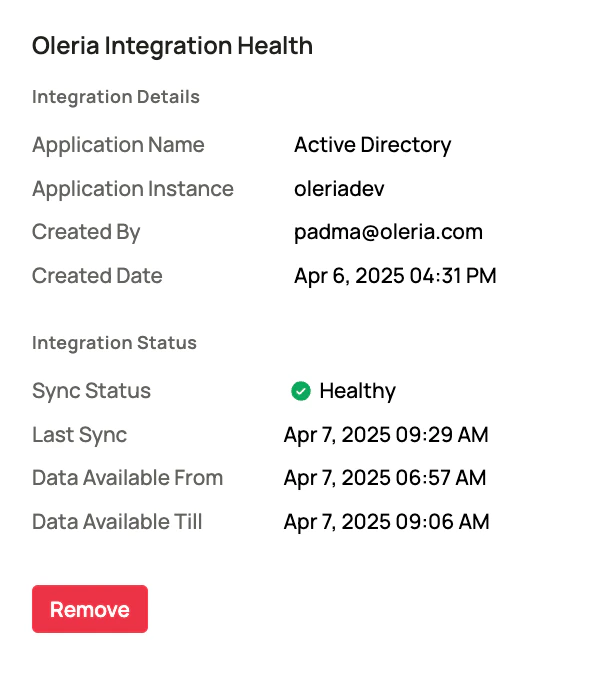
Log in to your workspace → **Connected Integrations** → **Active Directory** → select **View Details** to open the side pane and view the agent health status.
## Verify the Integration
Log in to your workspace → **Connected Integrations** → **Active Directory** → select **View Details** to open the side pane and view the agent health status.
 ## Contact us
For questions about this integration, contact us at [support@oleria.com](mailto:support@oleria.com).
## Contact us
For questions about this integration, contact us at [support@oleria.com](mailto:support@oleria.com).